
Your first day, from installing the app to finding a provider you can trust, saving a deal and leaving a review. About fifteen minutes. Each step says what you will see; the how-to guide has the details and the less common cases.
Stuck on a screen? If it has a (?) at the top, tap it: it opens the how-to for that screen.
What TryMyPro is for. Finding a provider for any job — a plumber, a mechanic, a dentist, an accountant — that the people you trust have used and vouch for, with their deals and reviews in one place. It is free for customers.
Two apps, and this is the one for you. TryMyPro is the customer app. The other one, TryMyPro for Pros, is for providers and the people who work at them; you only need it if you run a business or work at one.
Step 1: Install TryMyPro
When: you have not got the app yet.
- On an iPhone, open the App Store; on an Android phone, Google Play. Search for TryMyPro and install it. (Or open trymy.pro on your phone, tap I’m a customer, and use the store button it shows.)
- Open it. It starts on the start screen, where Step 2 begins.
If a friend or a provider sent you a link, open the link instead: it opens TryMyPro (or the store, if you do not have it yet) and keeps your place, so whatever they sent you is waiting once you have signed in.
Step 2: Make your account
When: the first time you open TryMyPro. There is no password, now or ever: you sign in with a six-digit code, and the first time you do, that makes your account.
-
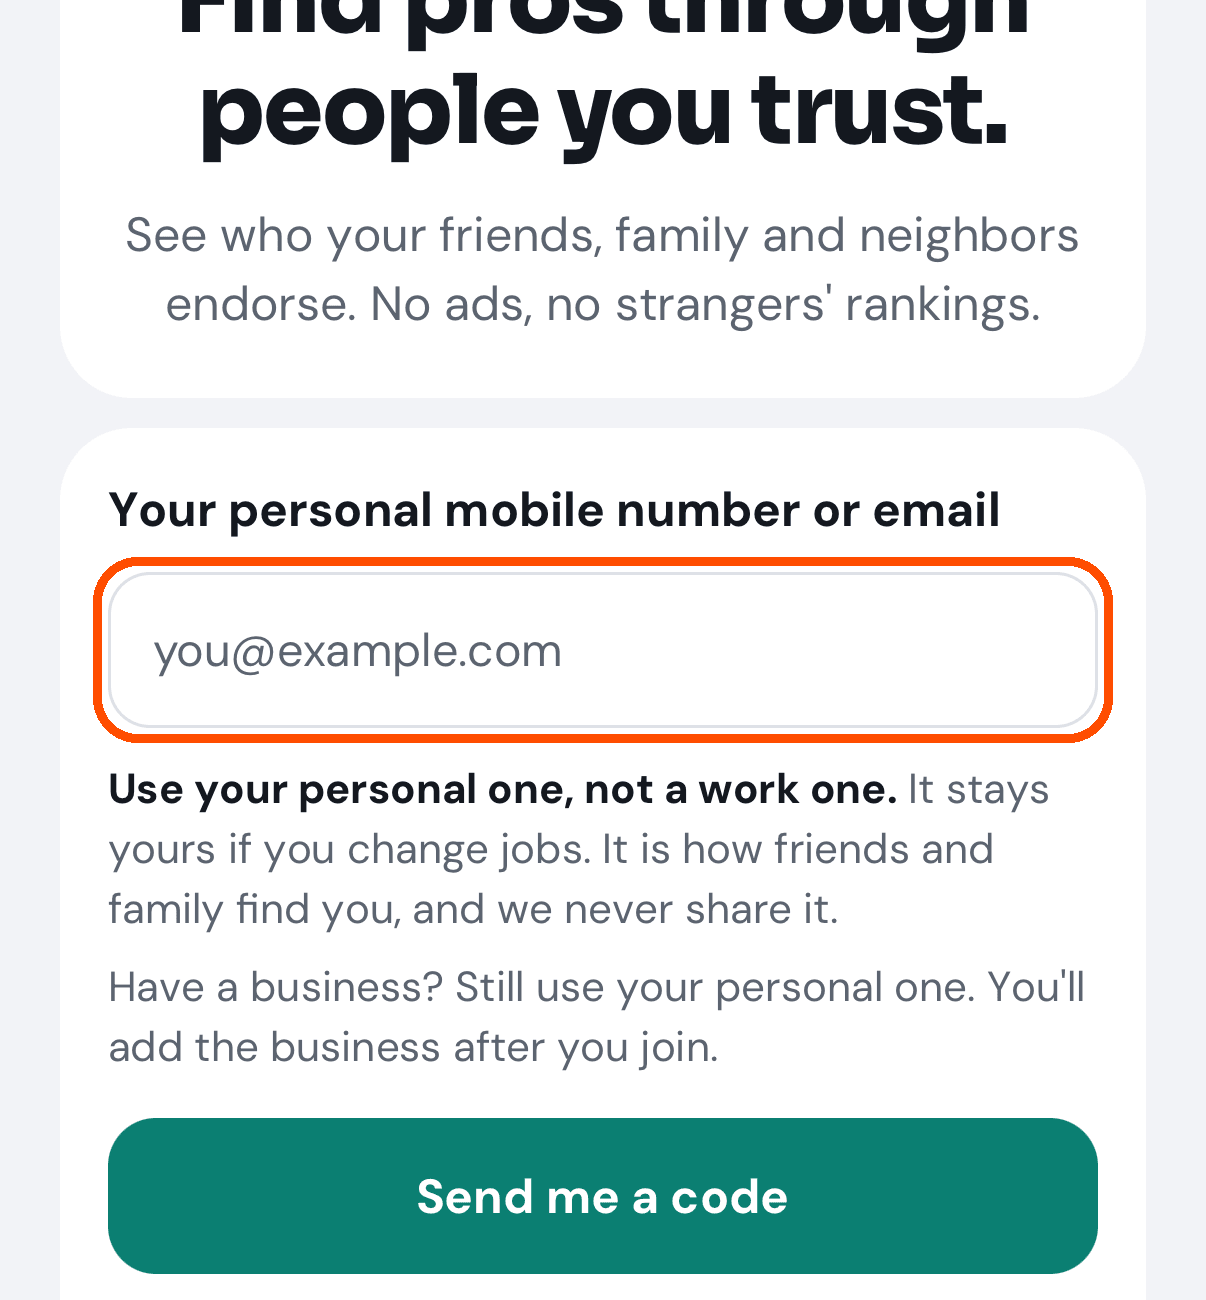
Tap the box under Your personal mobile number or email and type your own mobile number or email — not a work one. It is how friends and family find you, and TryMyPro never shares it.
-
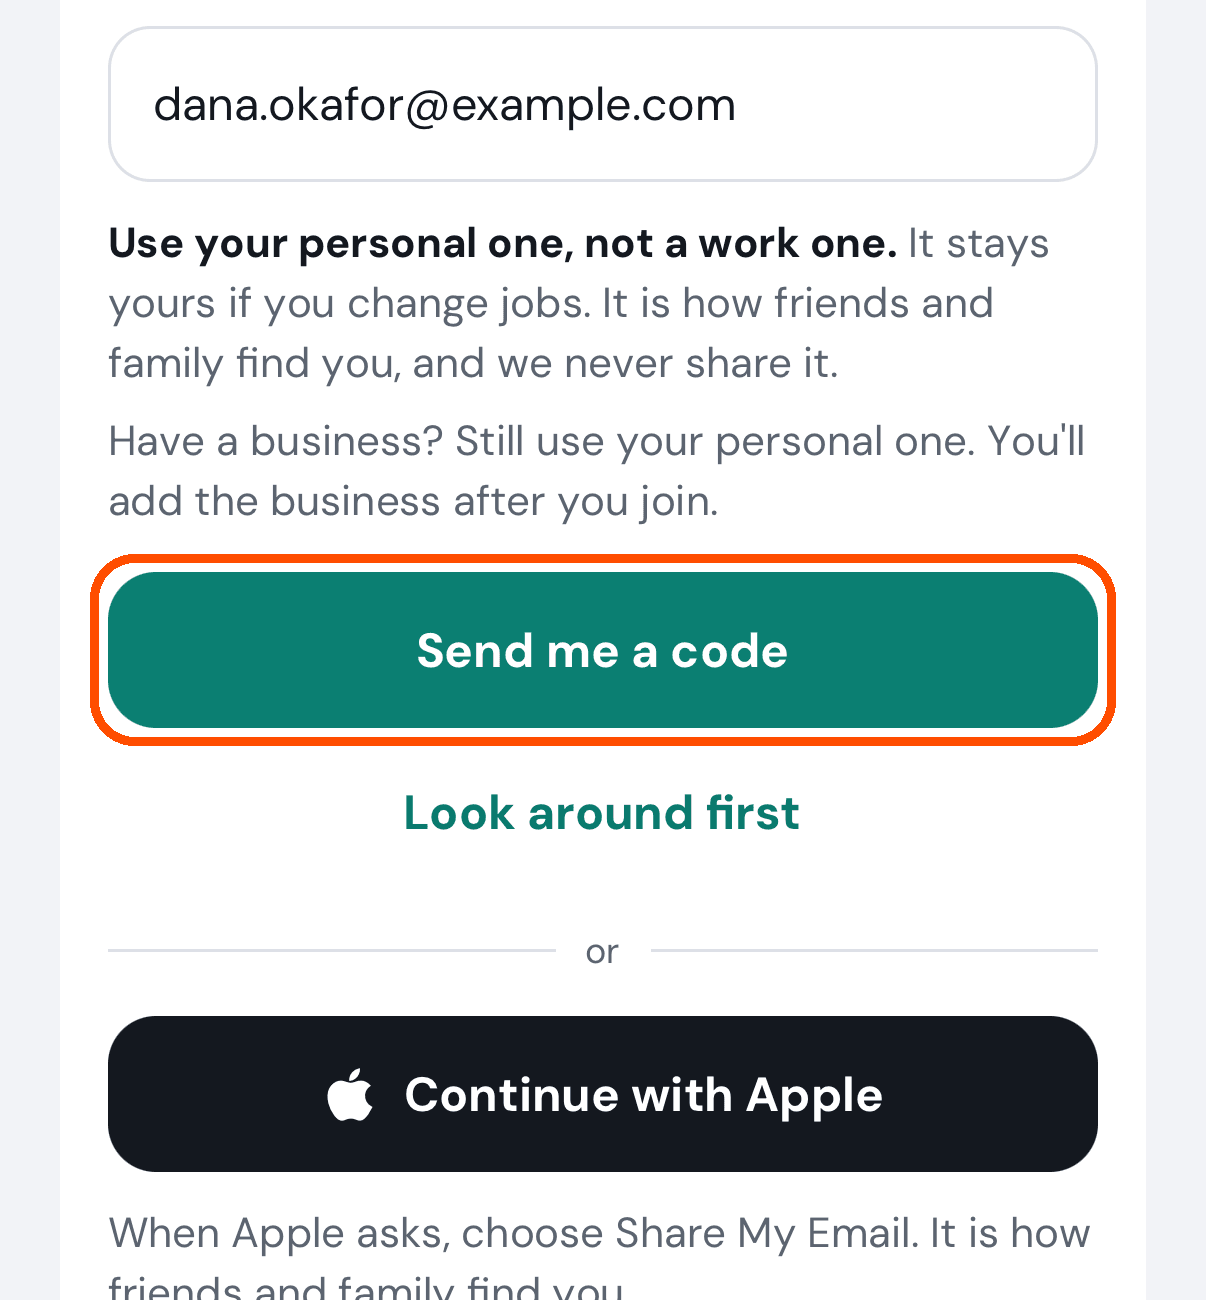
Tap Send me a code.
-
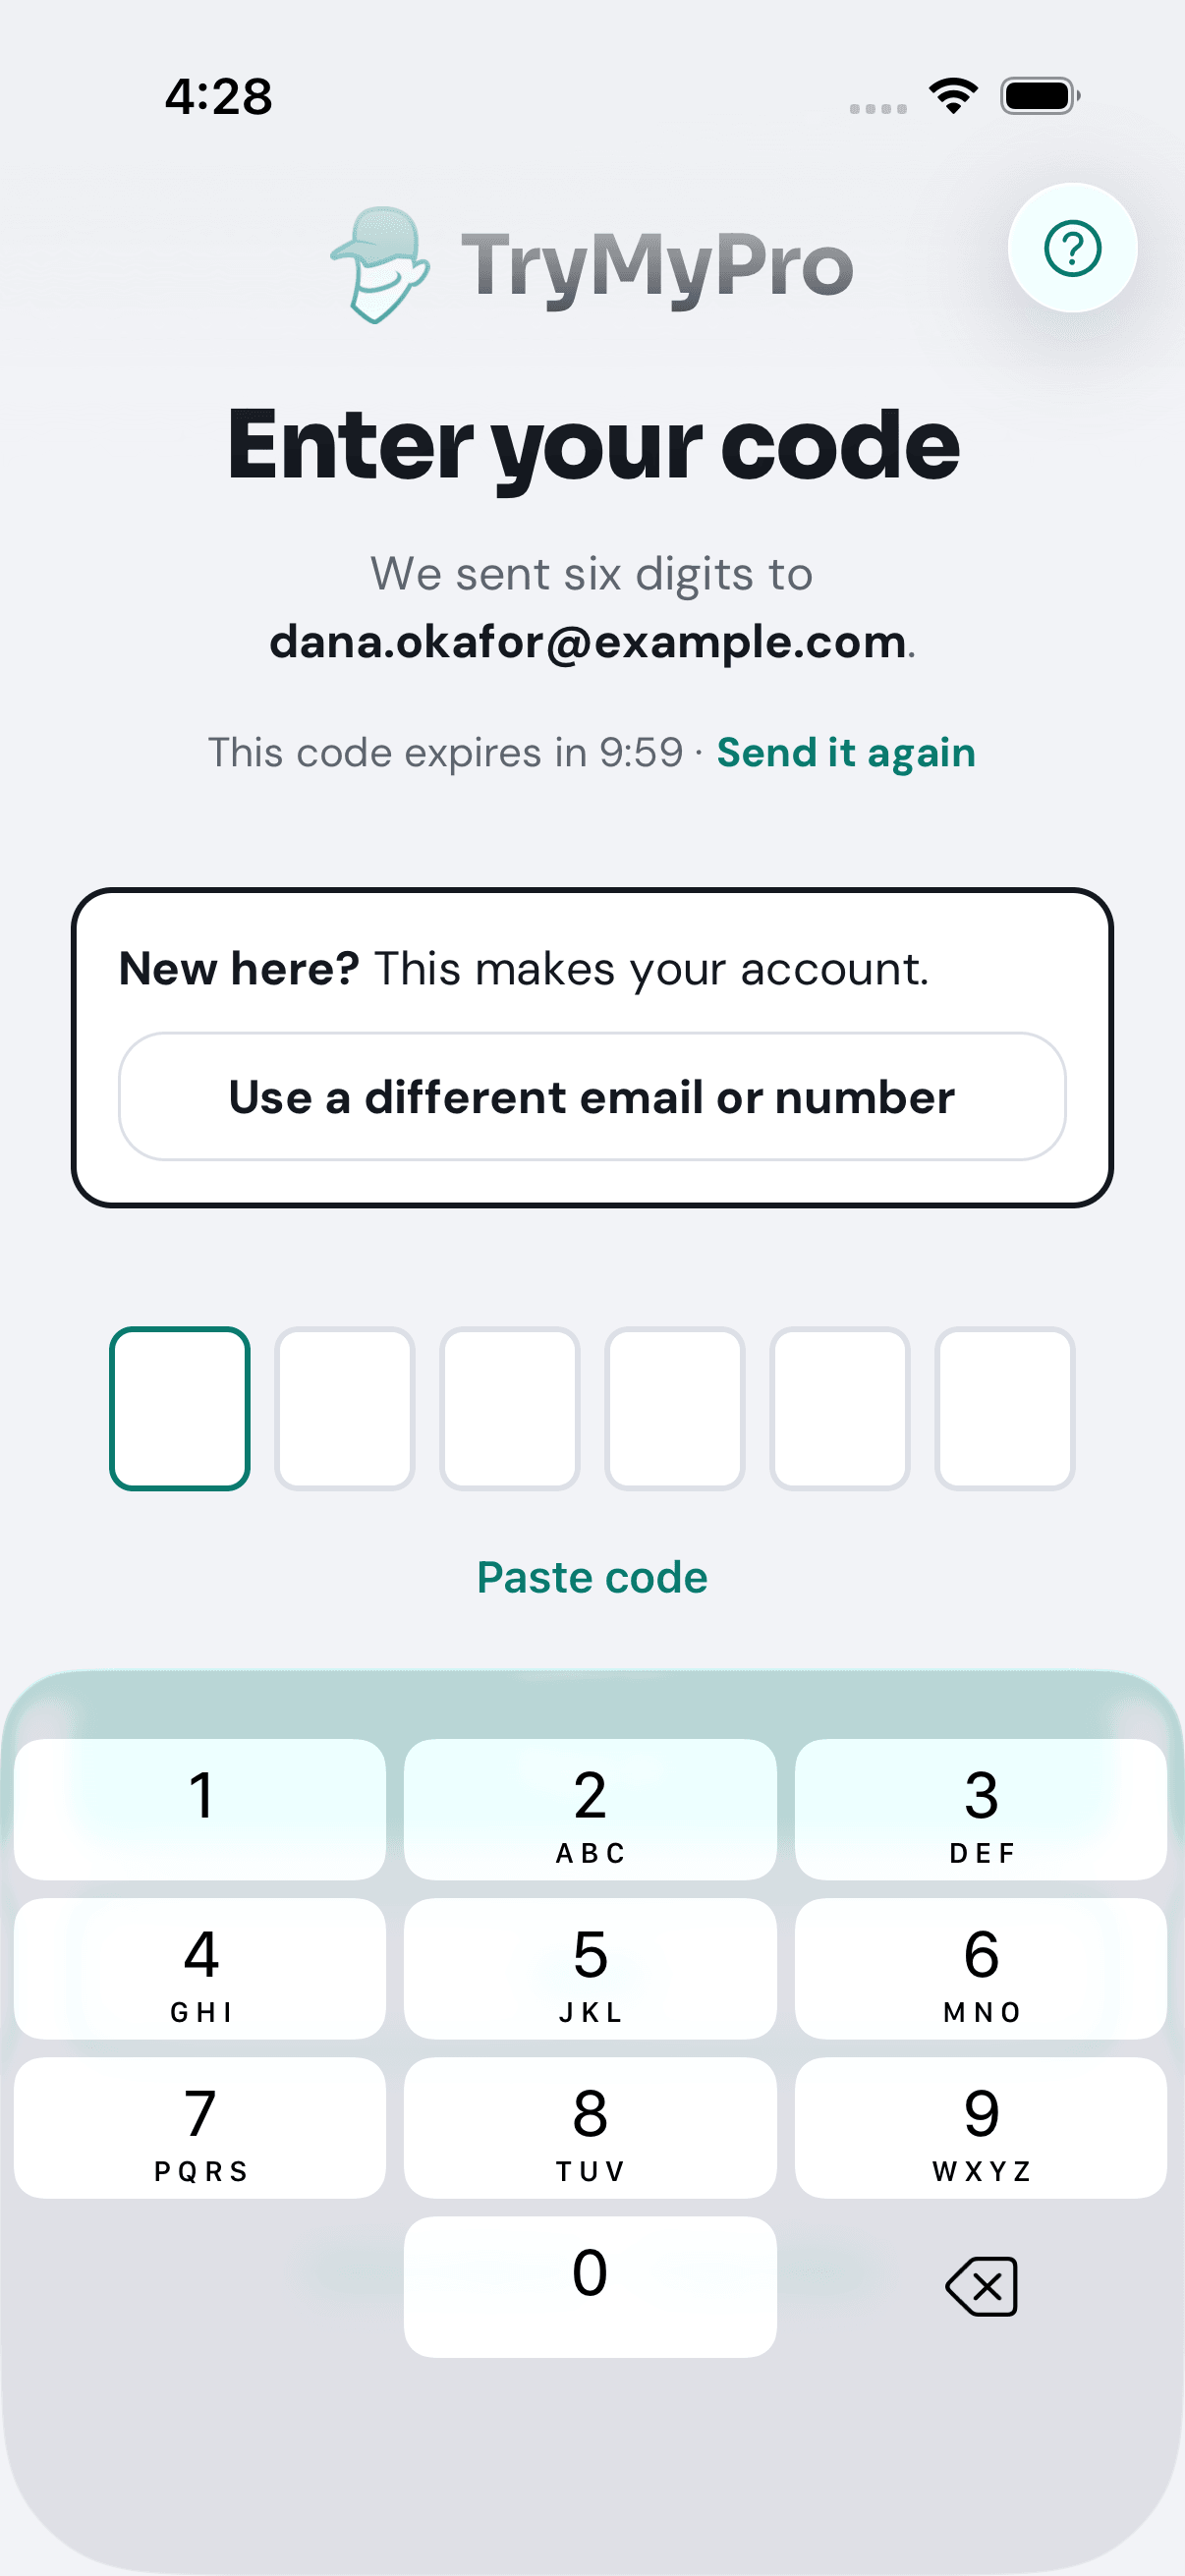
A six-digit code arrives by text or email. The screen says New here? This makes your account. Type the code into the six boxes, or long-press them to paste a copied code; the app signs you in as soon as the sixth digit is in.
Another way in. Newer versions of the app also show Continue with Apple (iPhone) and Continue with Google under Send me a code, so you can sign in without waiting for a code, and you land in the same place a code would take you. When Apple asks, choose Share My Email: it is how friends and family find you. If you choose Hide My Email instead, a note says your email is hidden once, and Finish your account asks for your real email and then your mobile number (or tap Later). Under Google the screen says Choose your personal Google account, not a work one.
The code lasts ten minutes. If it has not arrived, check your spam folder, then tap Send it again (it sends the same code, so either message works). More in the how-to guide, My code has not arrived. What now?
Just looking? Look around first on the start screen lets you search and read without giving a number or an email. You will be asked to join before you can save, endorse, add people or review.
Step 3: Finish your account
When: straight after your first code. The app asks for “Your name, and a second way to reach you.”
-
Type your name.
-
Add the other of your mobile number or email — the one you did not sign in with — and tap Text me a code (or Email me a code). Type the code it sends: it is checked the moment the sixth digit is in (Confirm code is there if it arrives short). This step is optional, but it means friends can find you either way.
-
Tap Done.
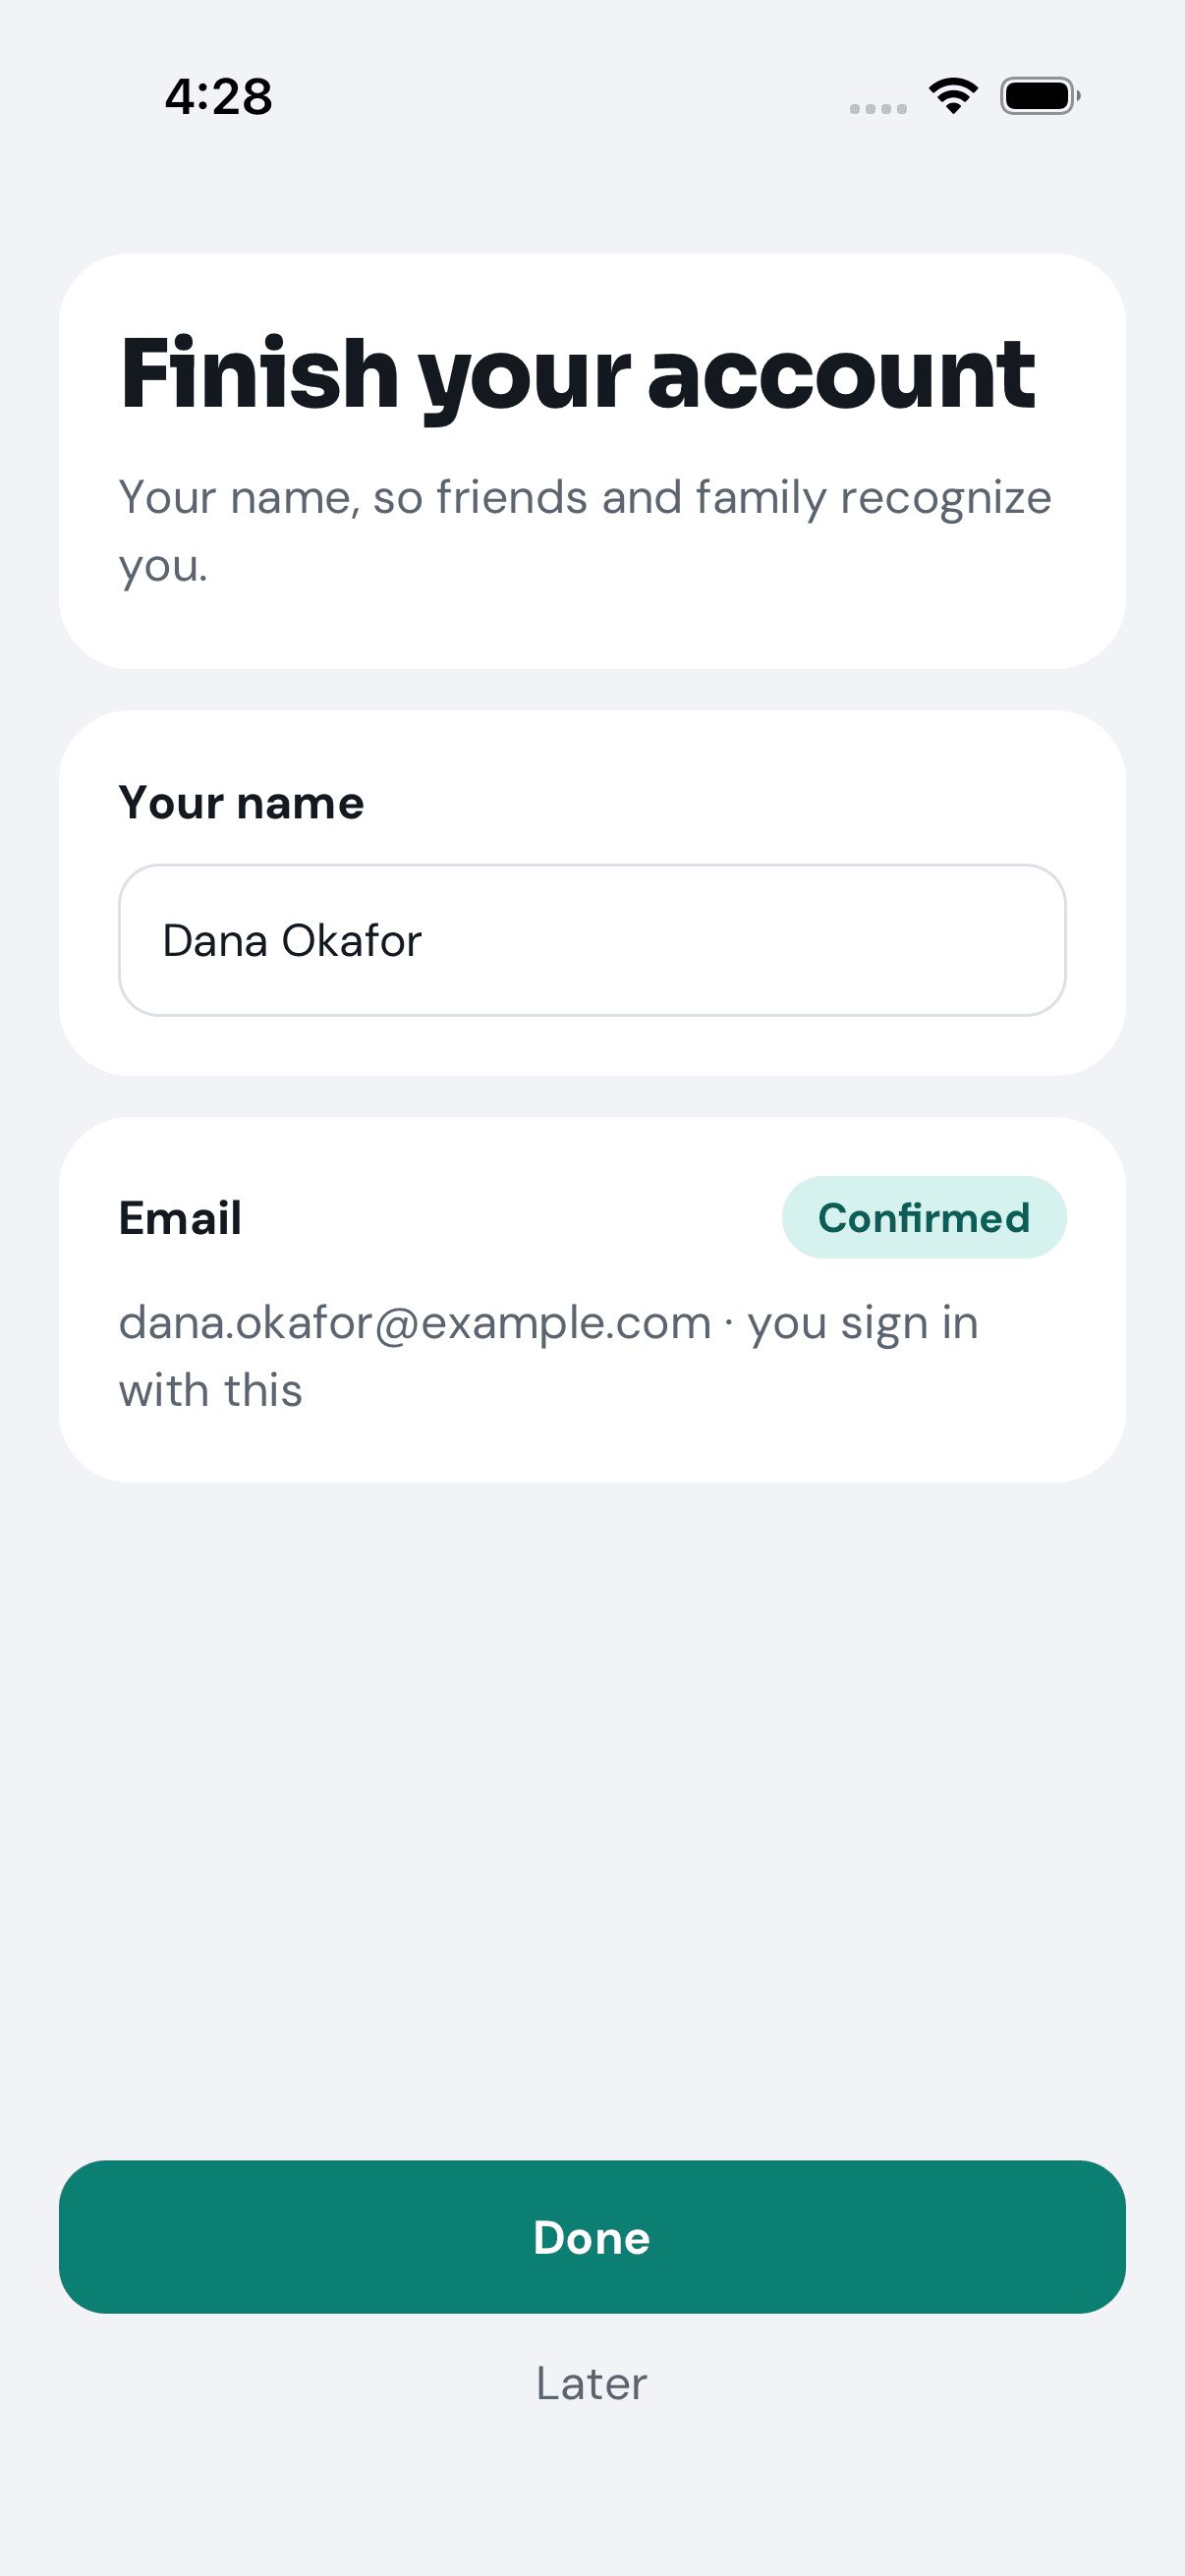
The picture is Dana, who already has an email and a phone, so only her name is asked for. A brand-new account also shows a box for the second way to reach you.
Later skips it. Whatever you skipped waits on Home as a Finish your account panel until you add it.
If you signed in with Apple and chose Hide My Email, the screen says “Your name, and your real email. Friends and family use it to find you. We never share it.” The top card reads Sign in with Apple, “Your email is hidden by Apple”. Add your real email (Email me a code), and once it is confirmed, Add your mobile number follows.
Step 4: Get to know Home
When: you have finished your account and arrive at Home.
Home is short on purpose. From the top:
-
What do you need help with? A search box. Type a job (leaky faucet), a kind of business (dentist) or a name, and tap the search button: it opens Find with your words already searched.
-
Waiting on you. Anything addressed to you: a provider asking for your review, somebody who added you to the people they trust, a team invitation. Each card has its own button. On your first day it most likely says “Nothing is waiting on you.”
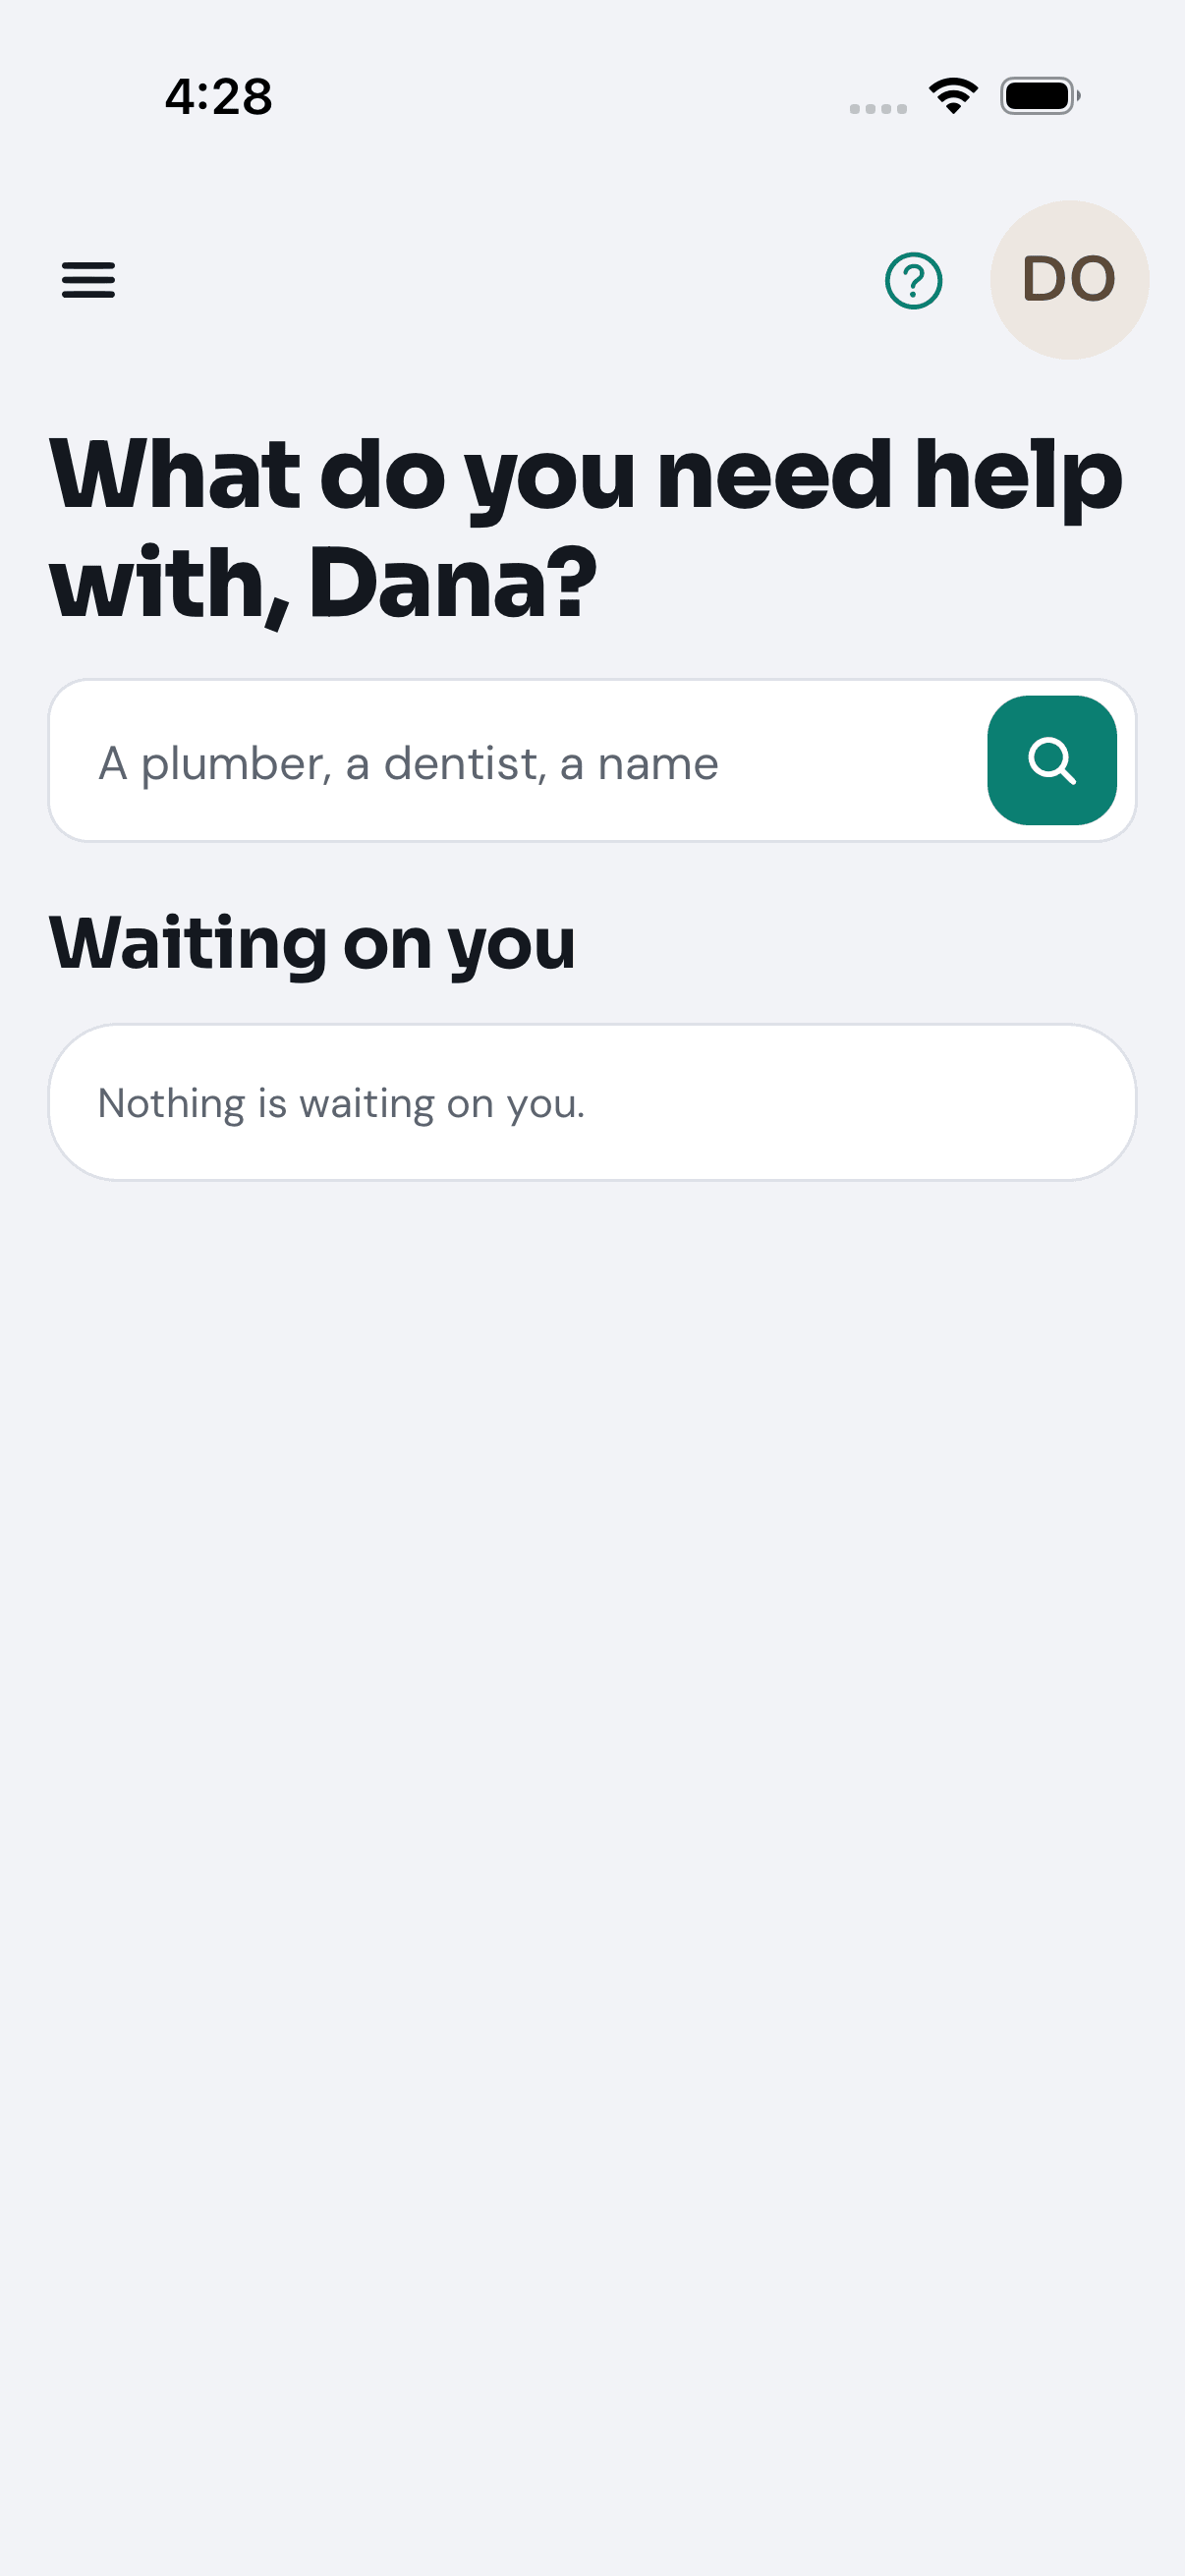
The picture is Dana, whose account is finished, so it has no Finish your account panel.
Two buttons at the top take you everywhere else. The menu button (three lines, top left) opens Home, Find, My Network, History and Saved. Your picture (top right) opens Account and settings, Become a Provider and Log Out.
Step 5: Find a business
When: you need somebody for a job.
-
Type what you need in Home’s search box — or tap the menu button, then Find, which opens on Providers.
-
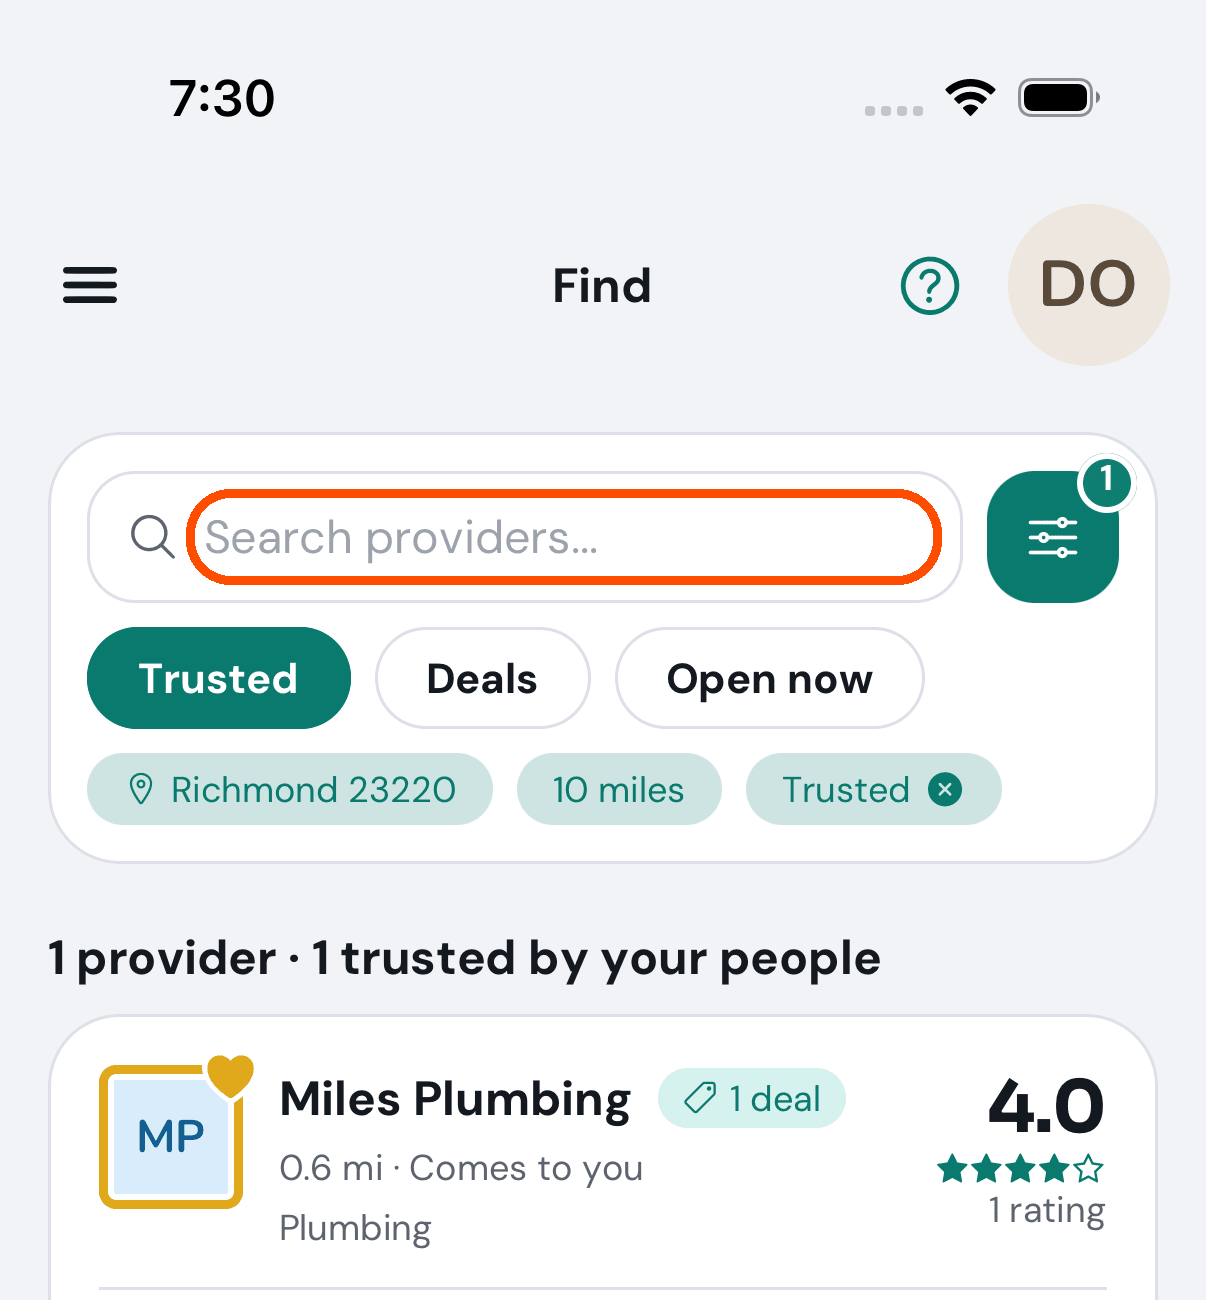
Use your own words: a trade, a problem (leaky faucet in Richmond) or a business’s name. The first time, your phone asks whether TryMyPro may use your location; tap Allow to search near you, or type a city or ZIP code instead.
-
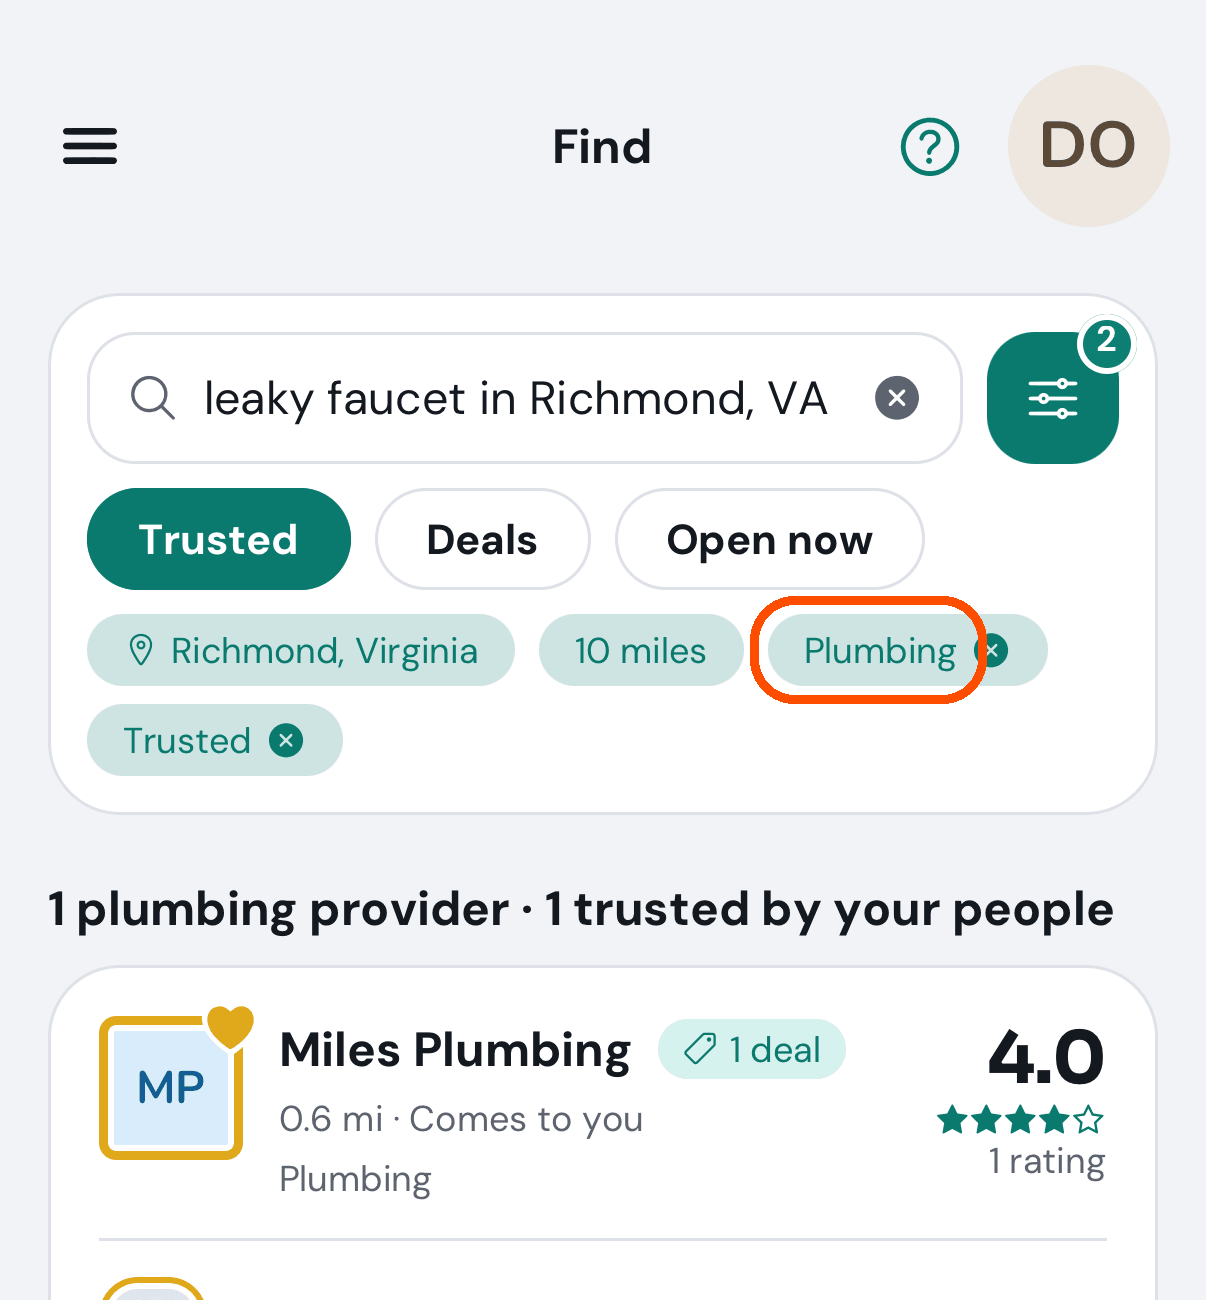
What TryMyPro understood shows as tags under the box — for leaky faucet in Richmond, VA, Plumbing and Richmond, VA. Tap a tag’s ✕ if it guessed wrong. A service or town you set yourself is never replaced by your words.
Each provider in the list ends with a line saying who vouches for it — Mike D. endorses them, Sue L. works here, A member of Powhatan Chamber. On your first day there are few of these lines, because nobody you know is on your list yet; Step 7 fixes that. Trusted is already on, so the list holds only providers your people vouch for; at the bottom a line, See more providers not yet trusted by your network, shows everyone. With nobody in your network yet, that line is all you see until you tap it. The chips Deals and Open now narrow the list.
Step 6: Check a business before you hire it
When: you have a provider in mind. Tap it in the list to open its page.
-
A gold outline round its picture means people you trust vouch for it, and the card Why you can trust them names each reason: a professional you endorsed works there, someone you trust endorses it, or shares a group with it. No card means nobody you know is linked to it yet.
-
The rating, at the top right, counts only customers’ reviews, each customer’s newest. New means nobody’s review counts yet.
-
The tabs — Reviews (the spread of stars, and the words), Pro Offers (its deals), Info, Services, then Team (who would turn up) and Groups; swipe the row of tabs to reach the last two.
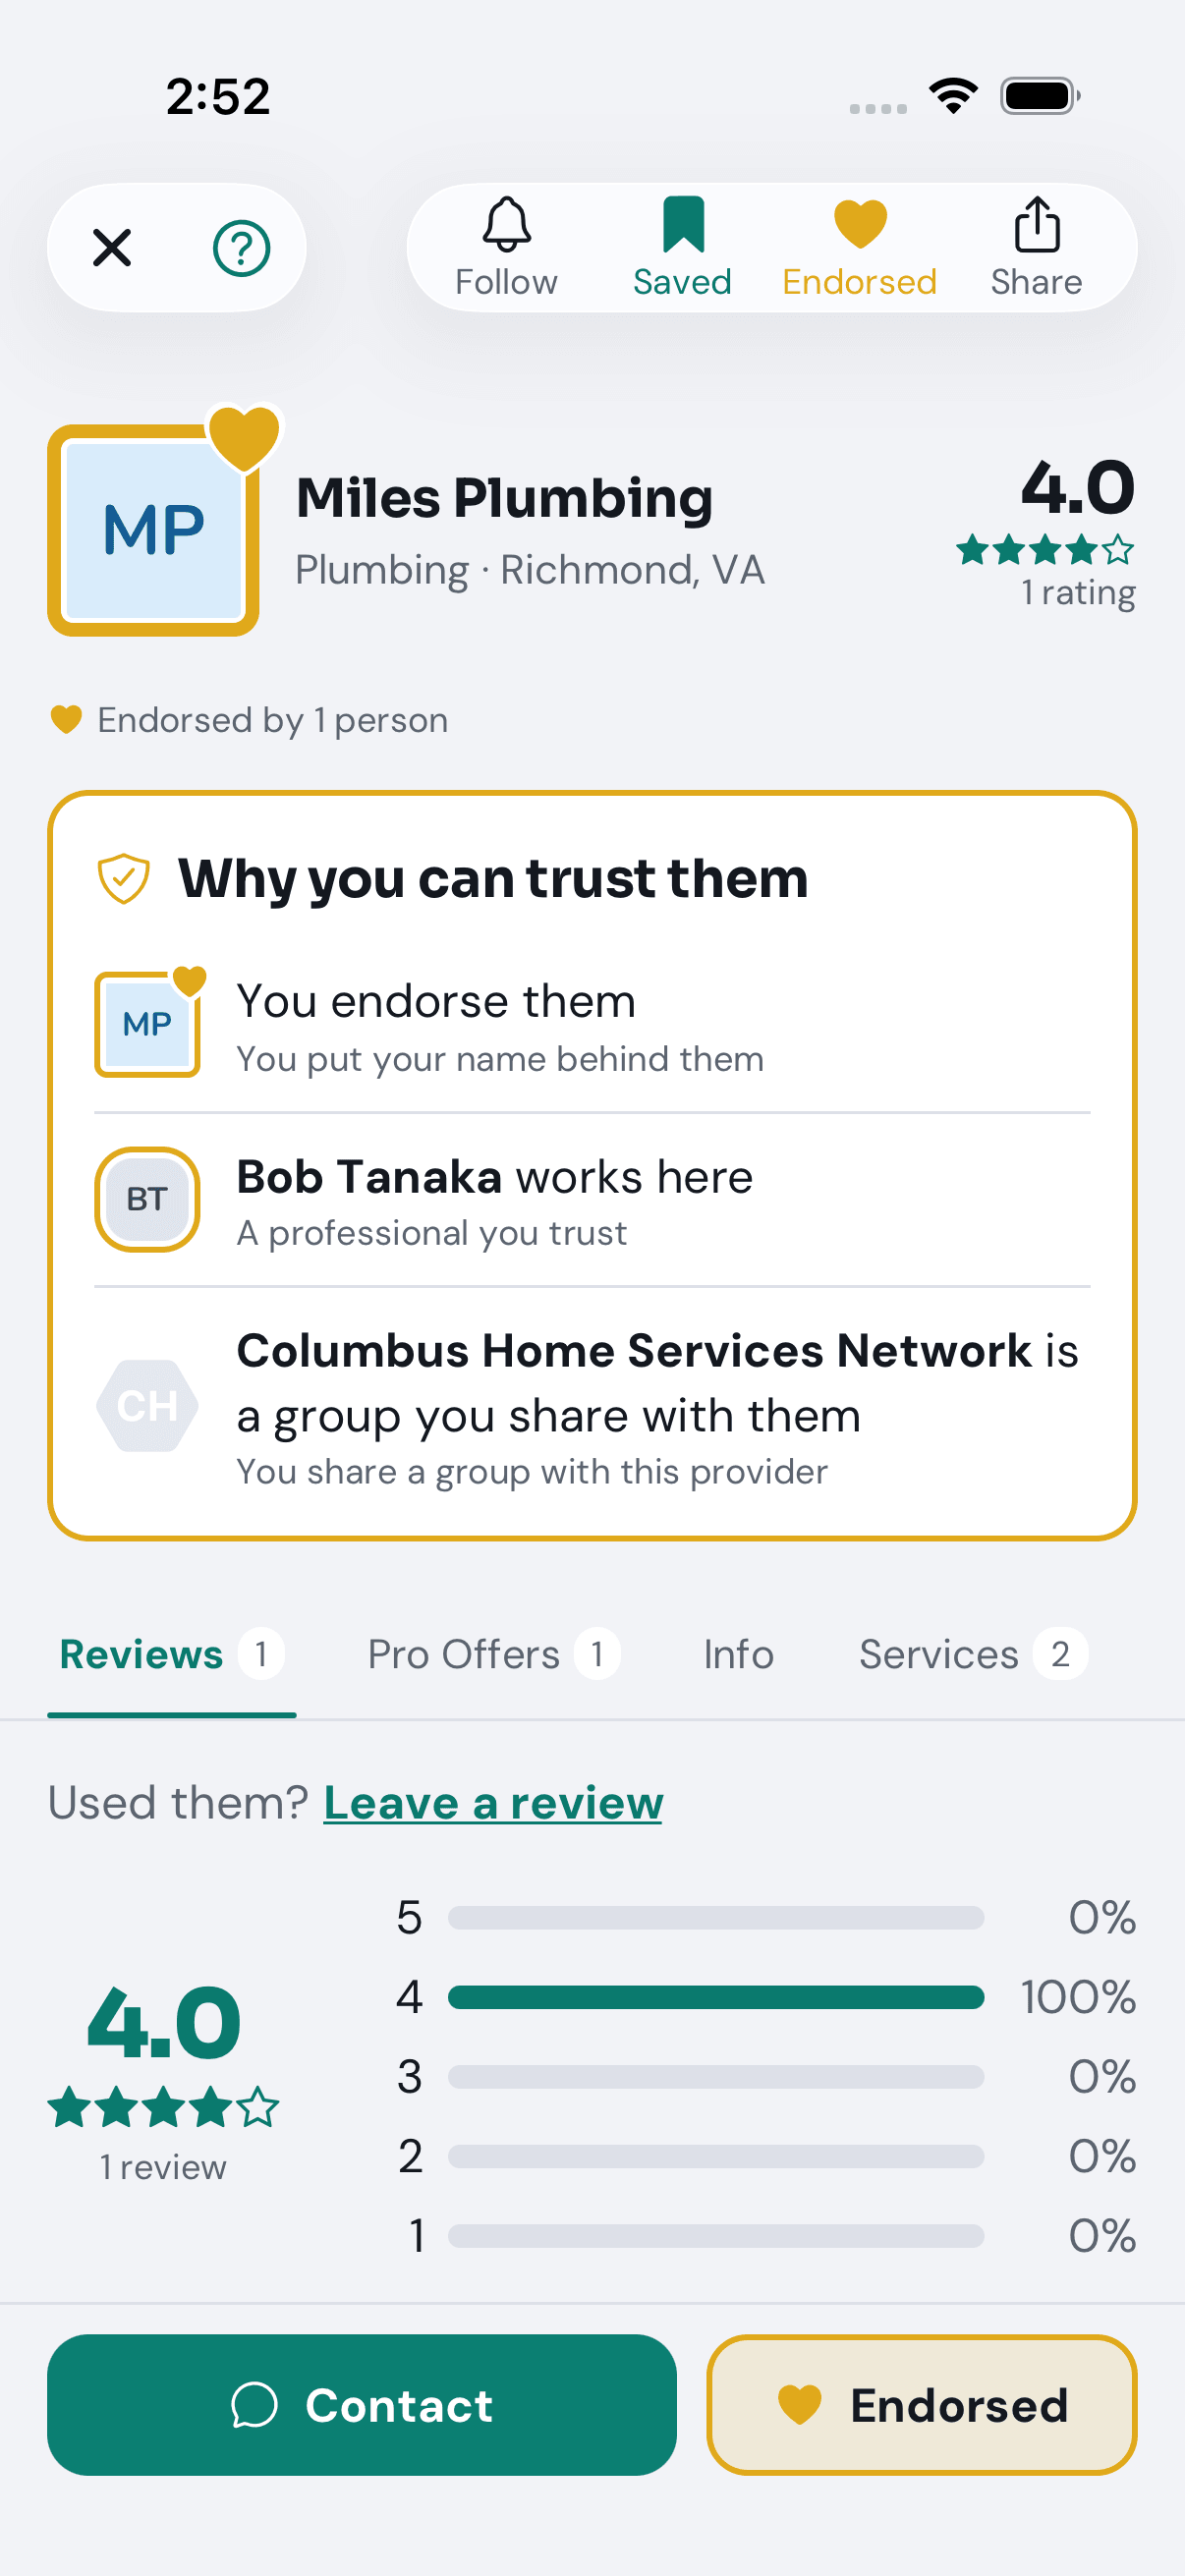
Along the top are four buttons, each for something different:
- Follow (the bell): you are told when they post a new deal. They learn nothing about you.
- Save (the bookmark): keeps them on your own Saved list to find again. Nobody else sees it.
- Endorse (the gold heart, also at the bottom of the page): you vouch for them. They join your network, and the people who trust you see your endorsement when they search. Use it for a provider you have hired and would recommend.
- Share sends a link to the business’s page.
Contact, at the bottom, reaches the business the way it has chosen to be reached.
Step 7: Add the people you trust
When: any time, and the sooner the better. The people in your network are what make Find useful: when they endorse a provider, you see it.
-
Tap the menu button, then My Network. It opens on People.
-
Tap the box Search or invite by email or phone and type a friend’s email or mobile number — or tap the people icon at its right end to pick one from your phone’s contacts. If they have more than one number or email, tap the one to use.
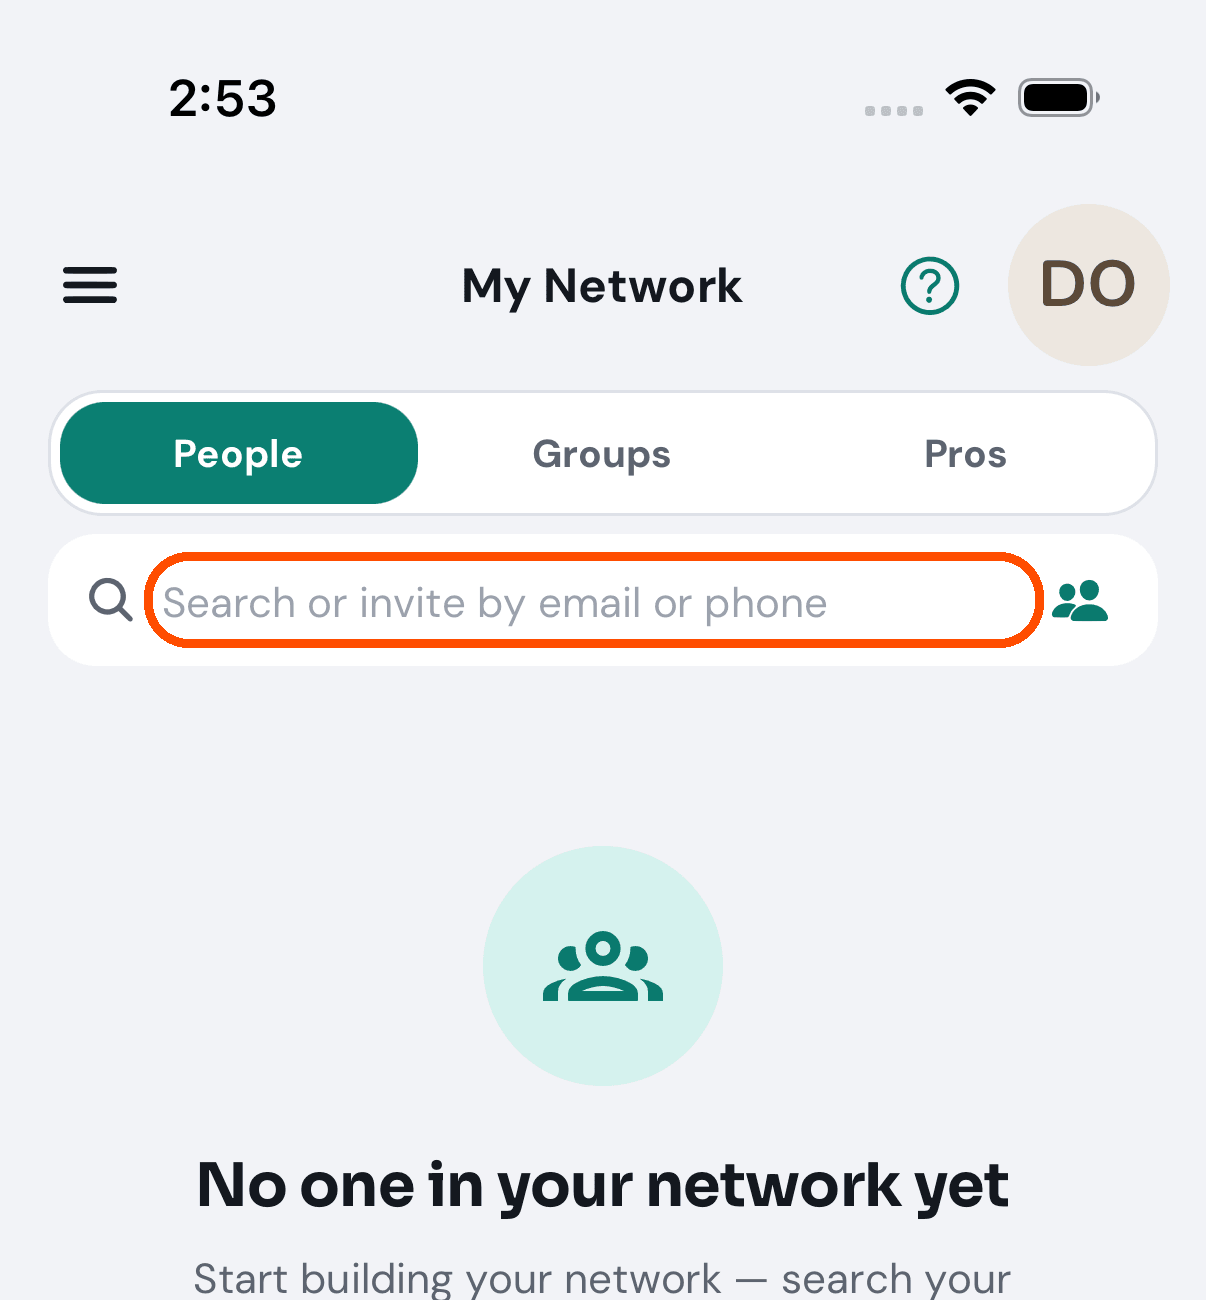
-
If they are on TryMyPro, tap Add. If they are not, the screen says “Not on TryMyPro yet”; tap Invite by email, Invite by text or Share invite link.
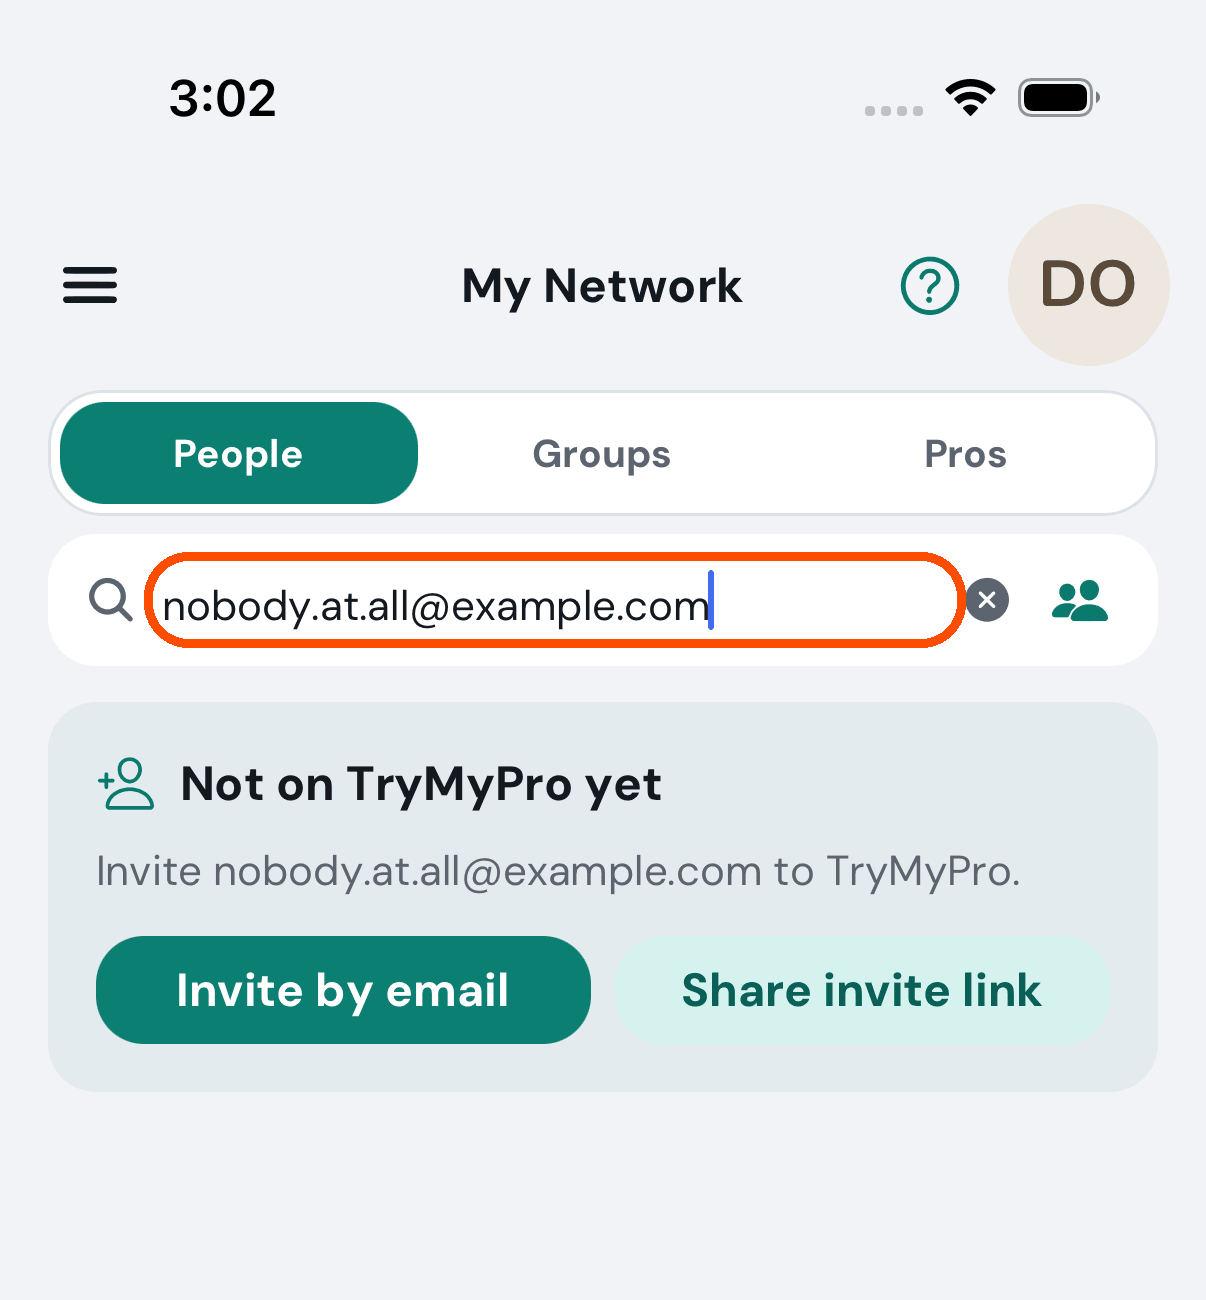
An invitation waits under Pending Invitations, and they join your network when they open your link in the app, or sign in with the address or number you sent it to. When somebody adds you, a card on Home offers to add them back.
Step 8: Save a deal, and use it
When: you want to see what providers near you are offering.
-
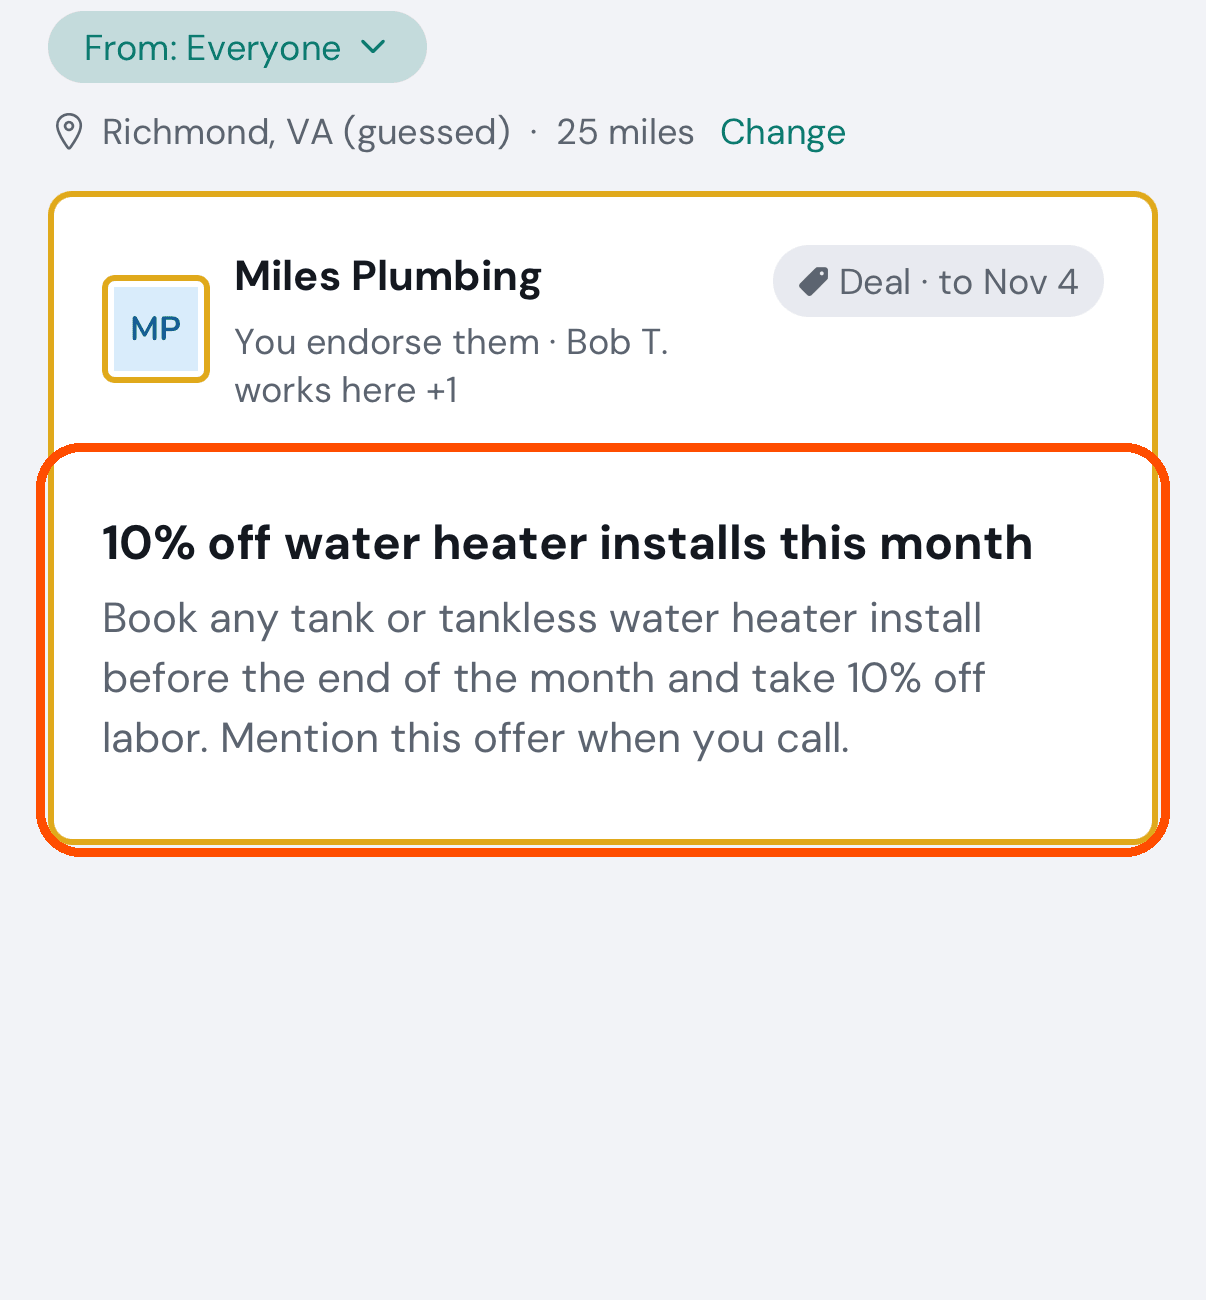
Tap the menu button, then Pro Offers. It shows deals, posts, tips and events from the providers you follow; tap From: Providers I follow under the search box to see Everyone’s near you, or the providers your people endorse. If it is still empty, it is usually distance: tap the line under the search box (Richmond, VA · 25 miles · Change) and set your ZIP code.
-
Tap a deal’s card, then Save this deal. The line under it says how long it is kept for you.
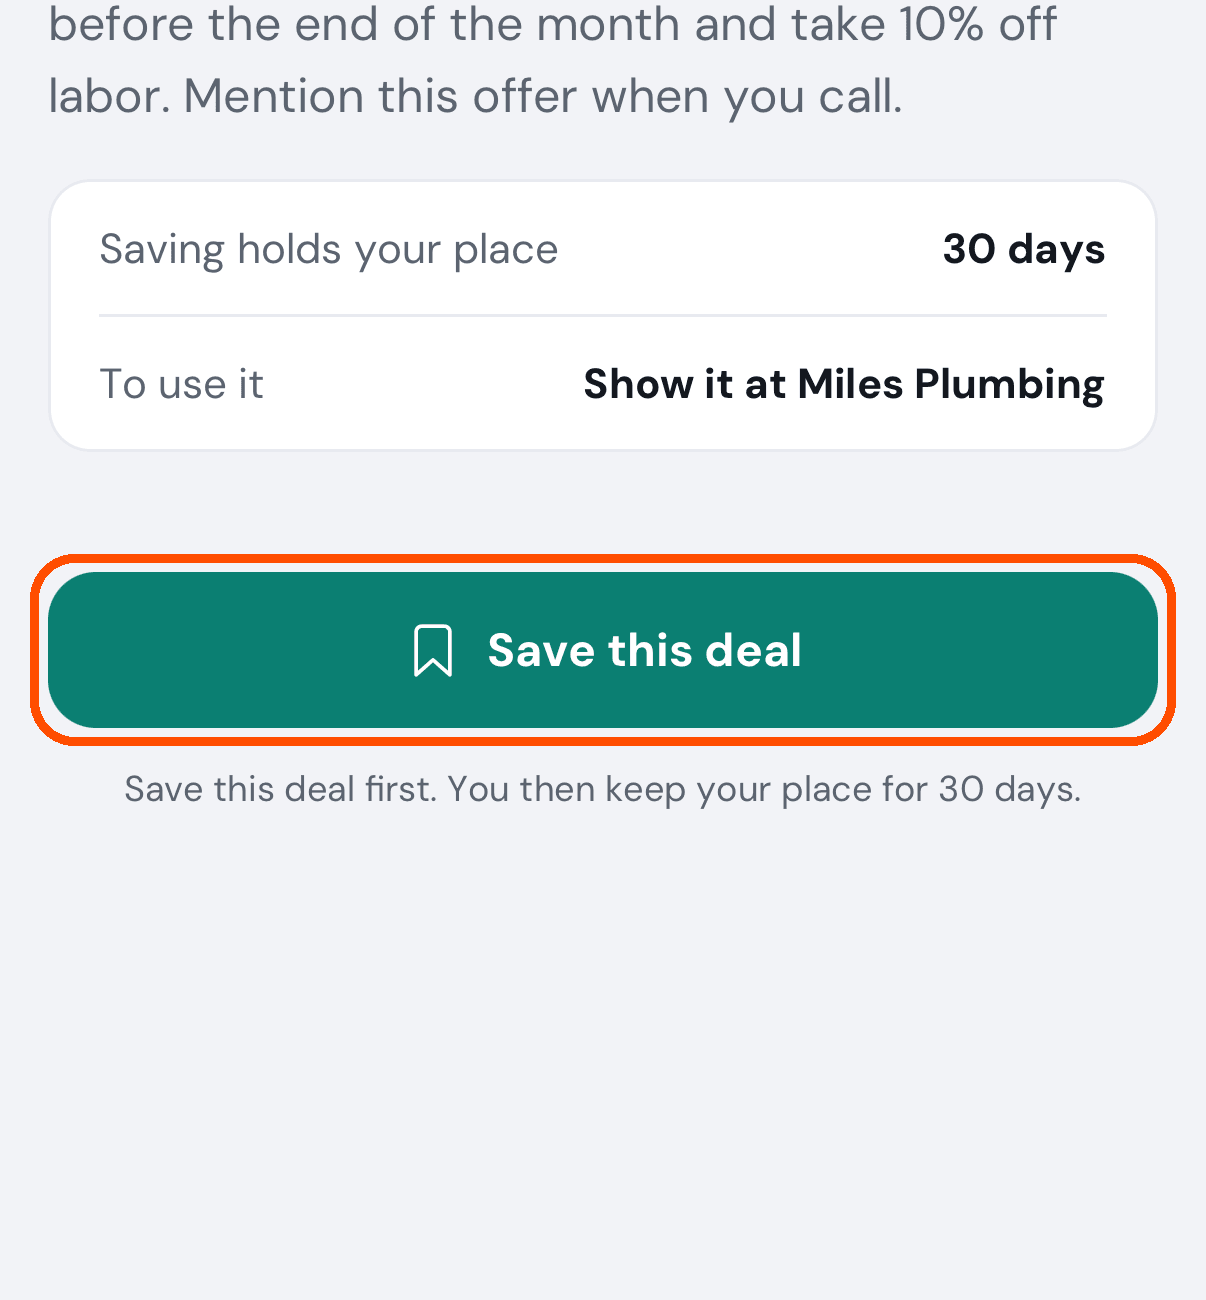
-
When you are with the business, open the deal again (the menu button, then Saved, which lists everything you saved) and tap Use this deal, then Use it. This cannot be undone. Show the business the receipt: a coupon, or a QR code with a six-character code under it for them to scan or type.
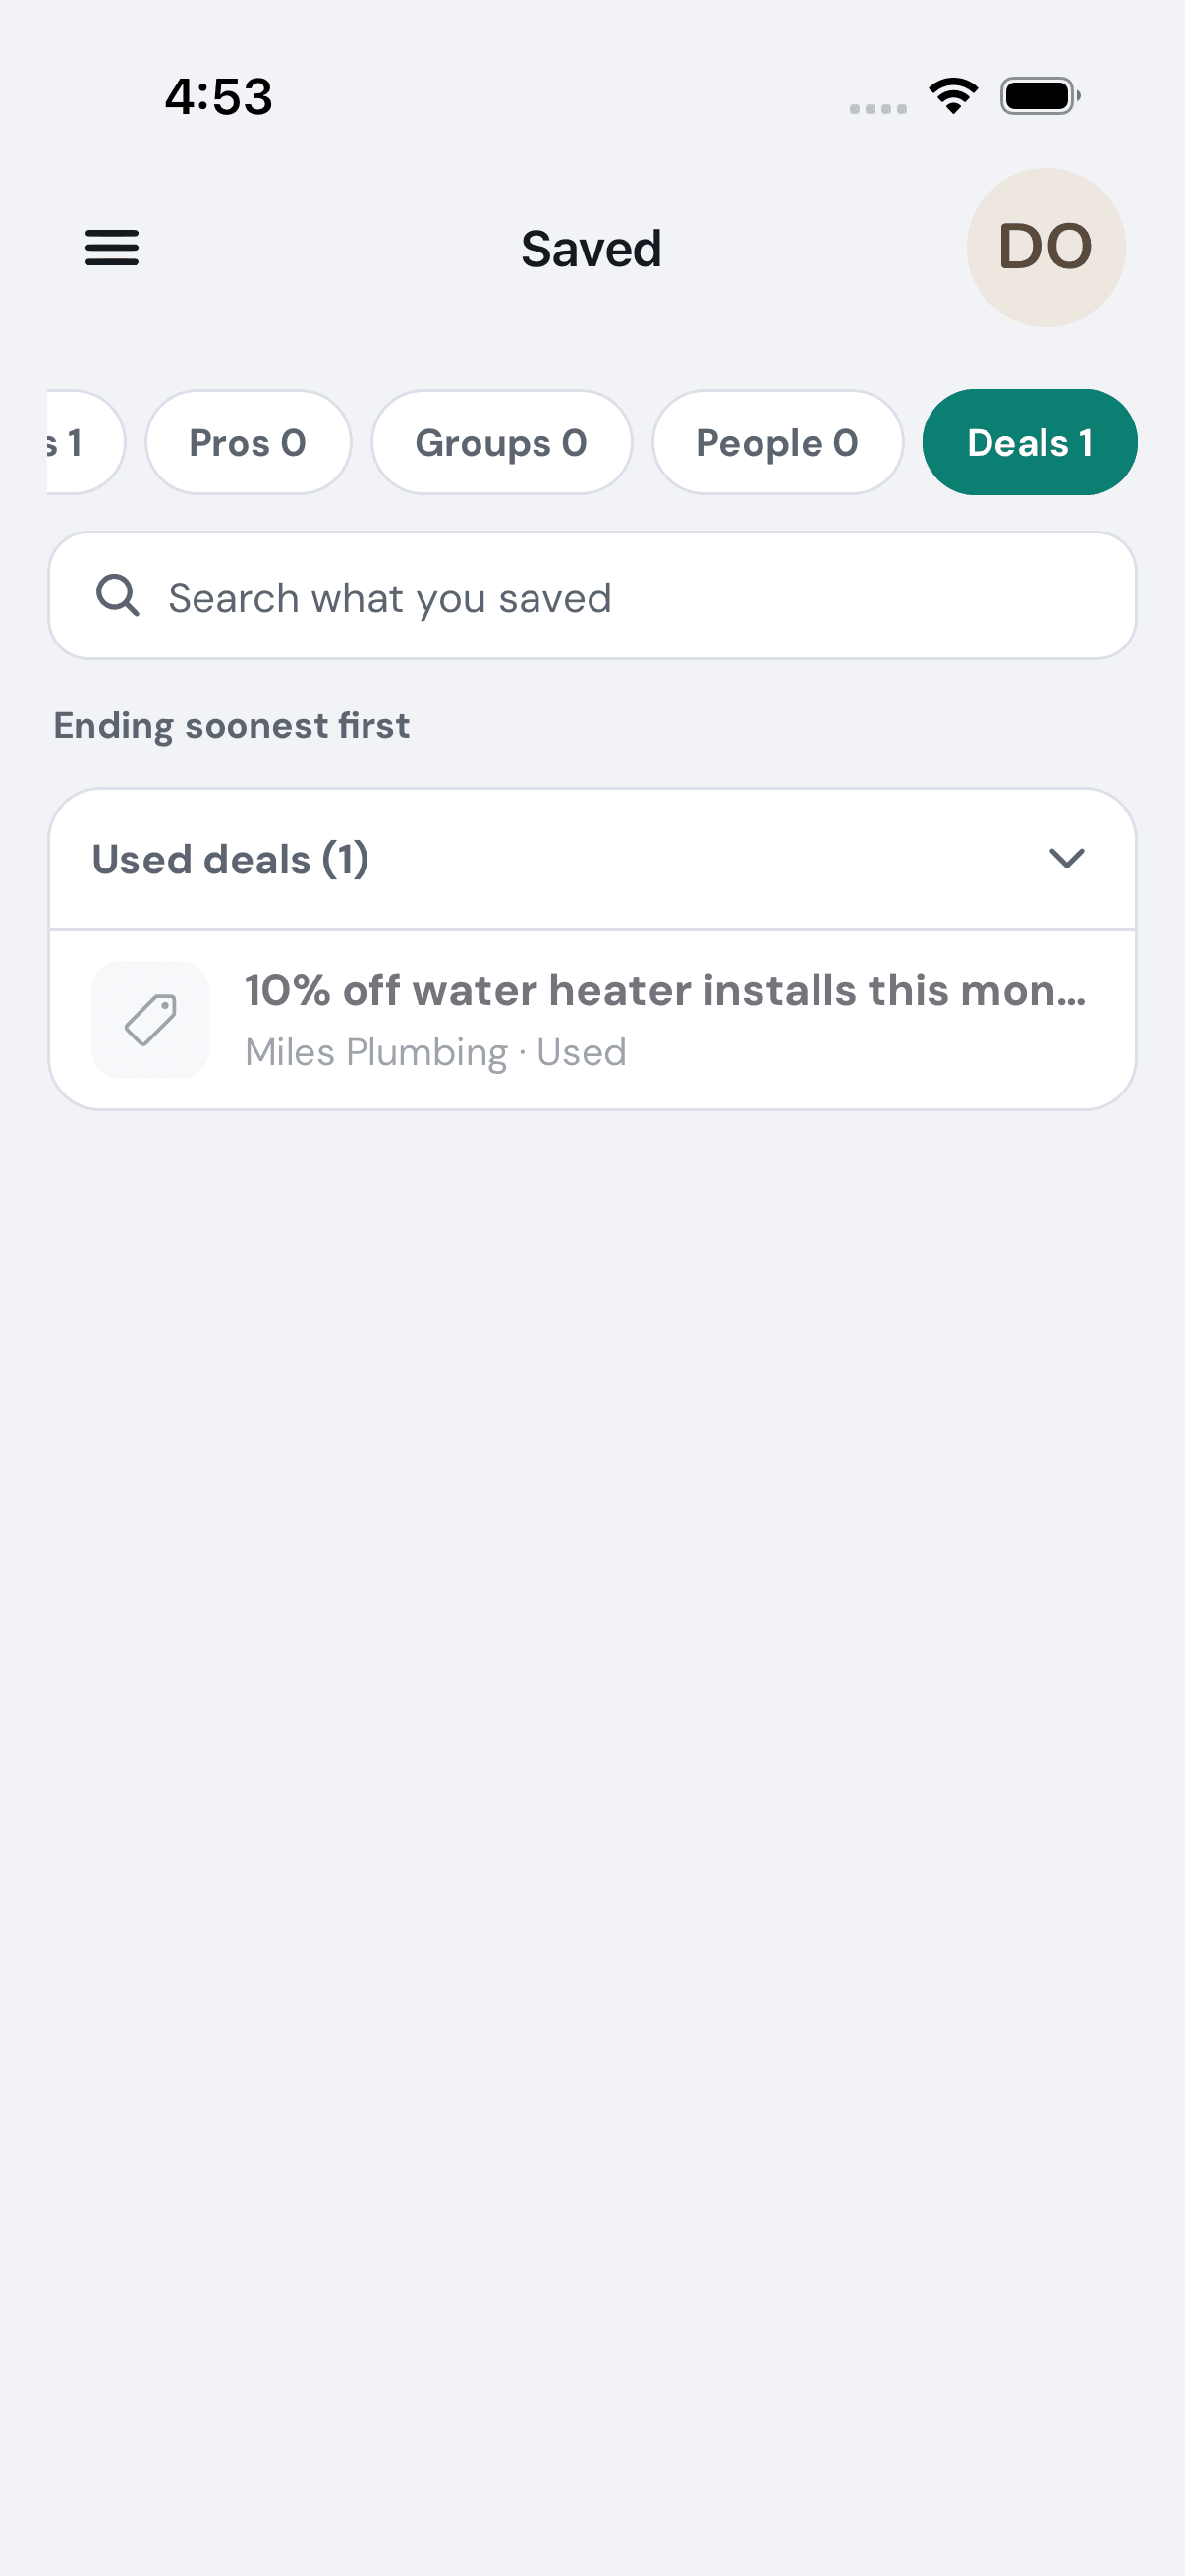
Saved keeps providers, pros, groups, people and deals apart; tap Deals at the top for the deals.
The business confirms it on their side. To see the receipt again, open the deal and tap Show it again.
Step 9: Leave your first review
When: a provider has done a job for you. Your review is what helps the people who trust you choose.
-
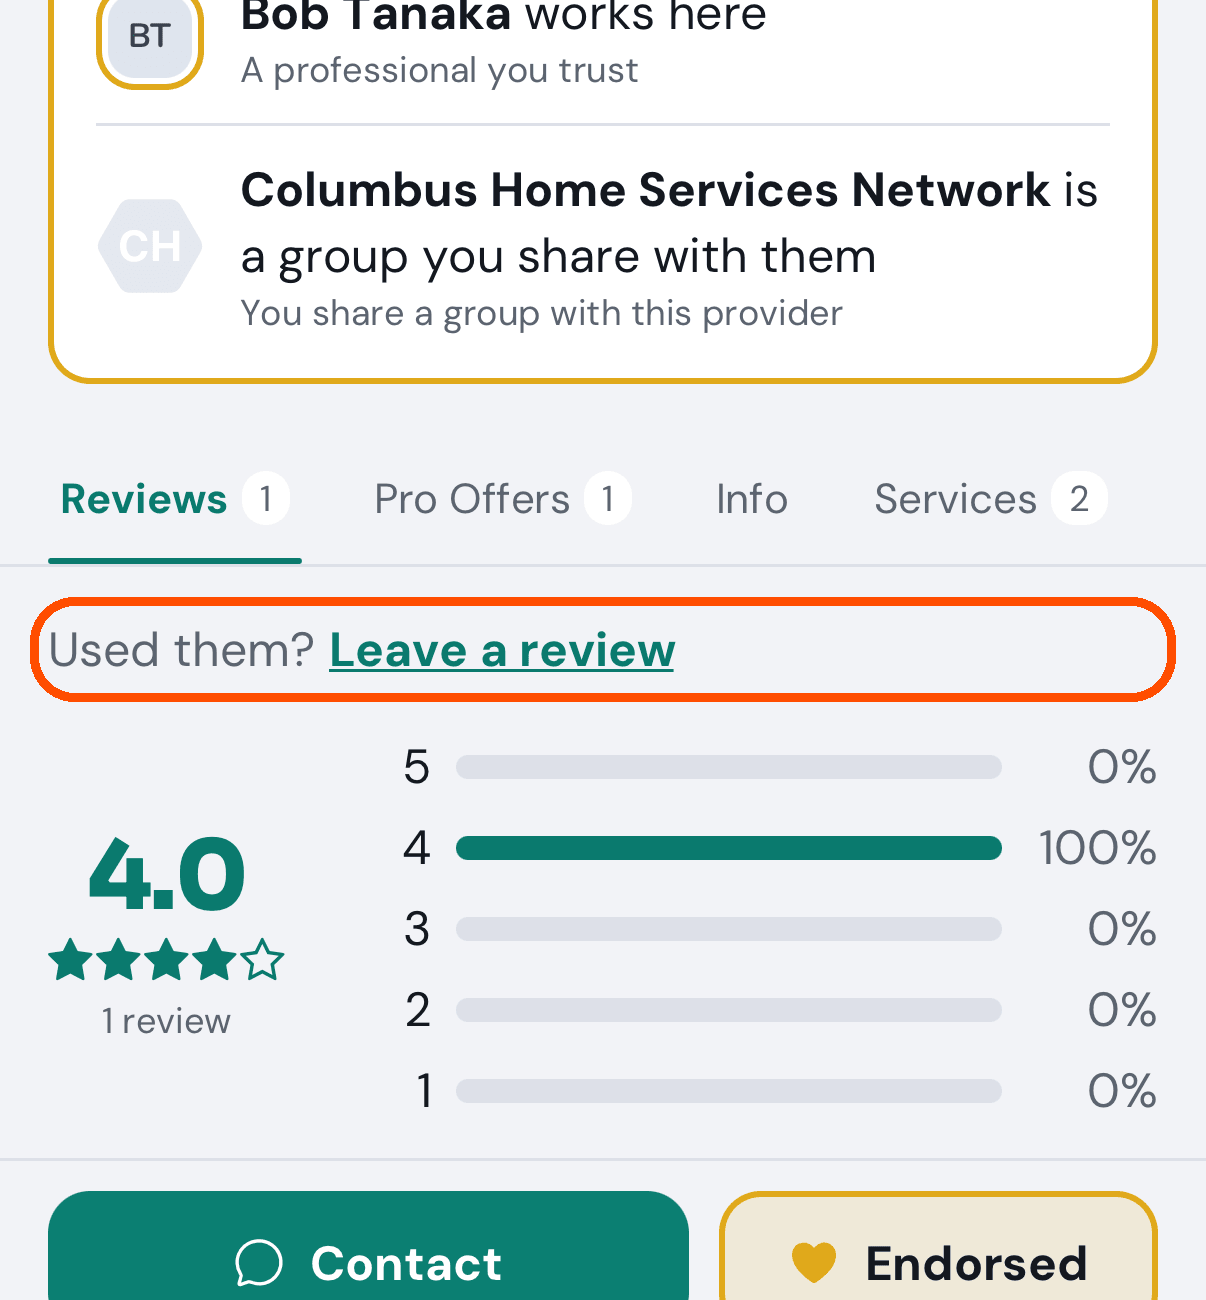
Open the business’s page (from Find or from Saved), tap the Reviews tab, then Used them? Leave a review. (A provider that asked you for a review puts a card on Home with its own Leave a review button.)
-
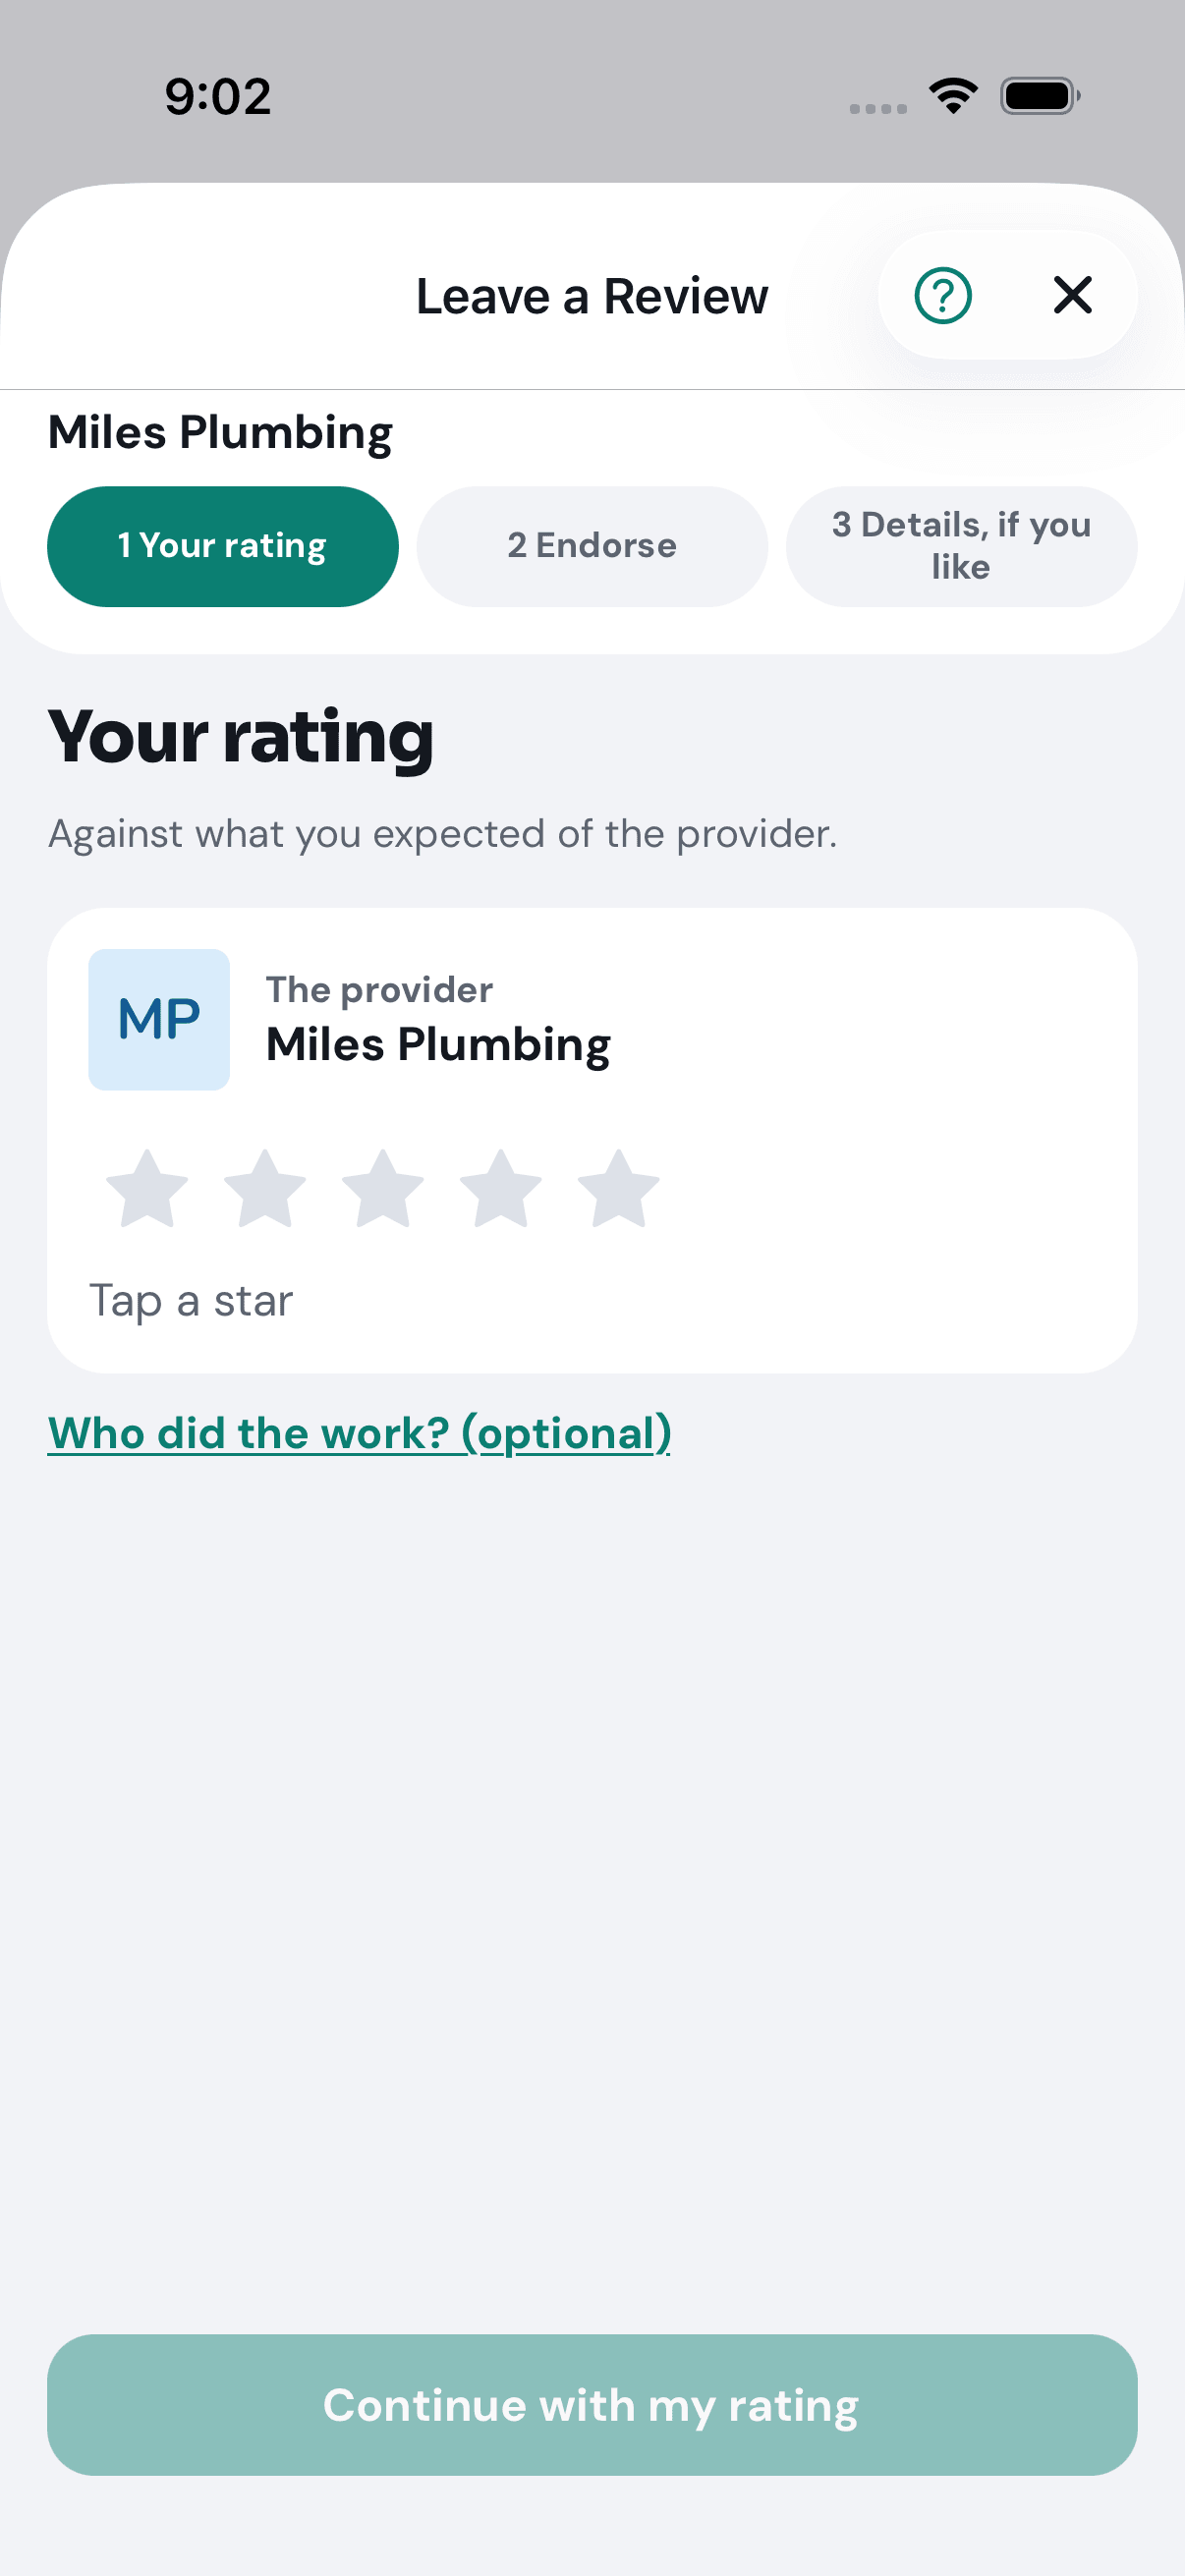
Tap the stars. If one person did the work, tap Who did the work? and give them their own stars too.
-
Endorse them if you would vouch for them (offered at four stars or more).
-
Add details and your own words if you like, then tap Send my review.
Your stars count at once. Your words go to the business first, and appear on its page once it approves them. If a provider sent you a link asking for a review, opening it takes you straight to this form with the business already filled in.
Step 10: Choose what TryMyPro tells you about
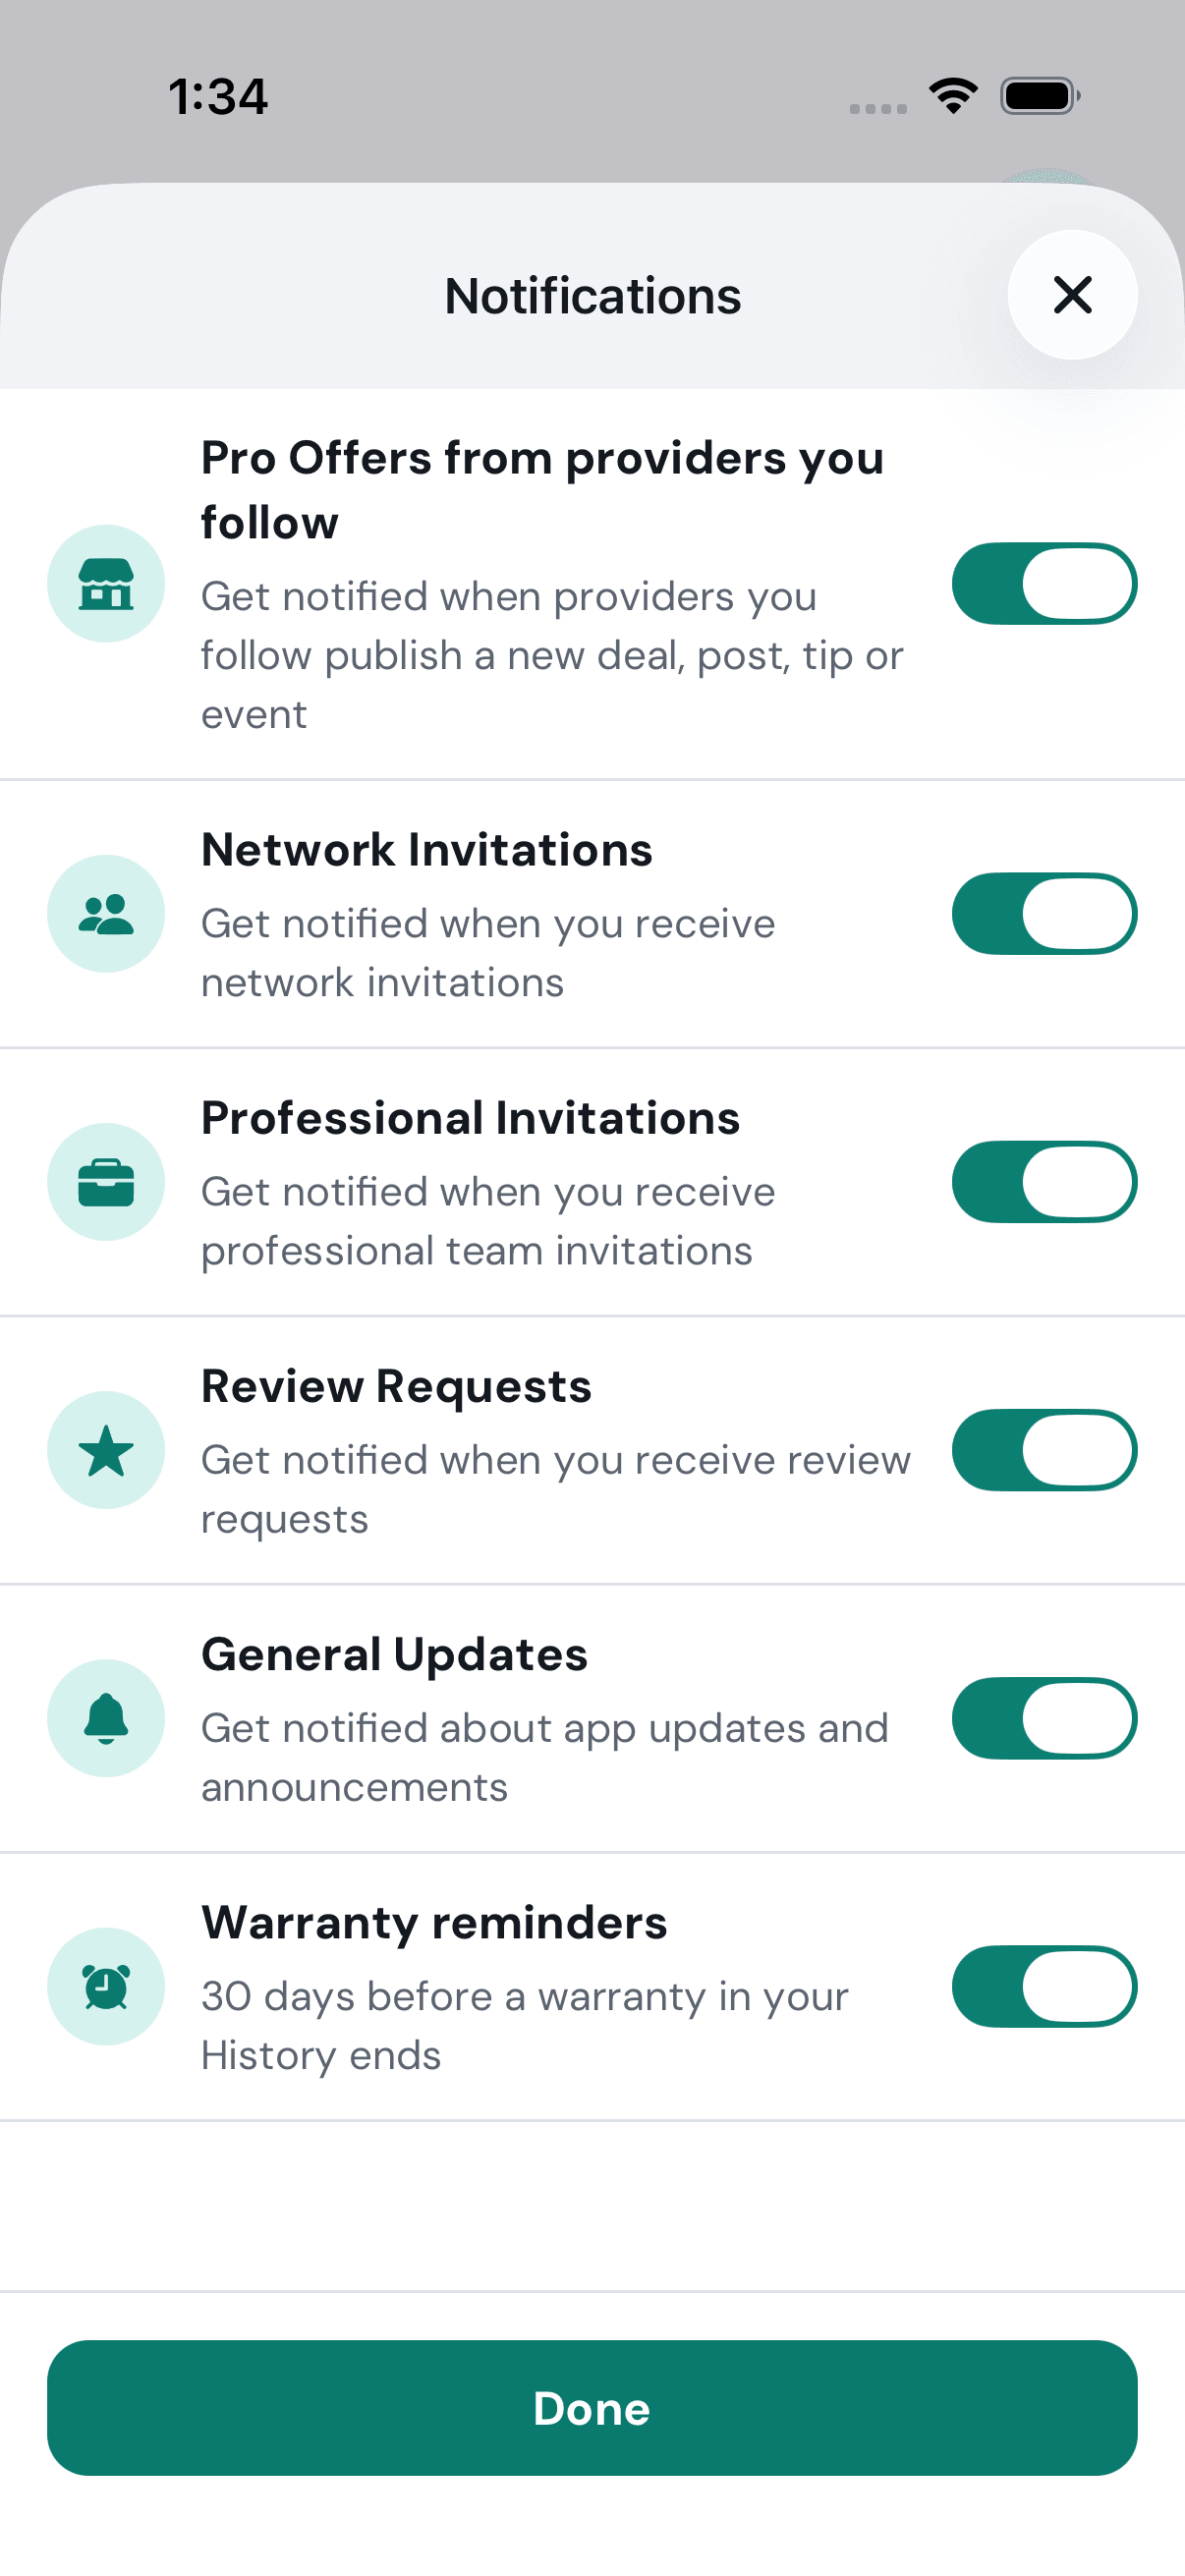
When: once you are set up. Two seconds after you first sign in, the app asks Turn on notifications? and says what they are for. Turn on brings up your phone’s own question (allow it); Not now asks again in three days. Then choose which.
-
Tap your picture (top right), then Account and settings, then Notification Preferences.
-
Each switch says what it covers: deals from providers you follow, network invitations, review requests, and so on. Each one saves the moment you flip it.
-
Tap Done.
You are set up
You have an account, the people you trust, a provider or two you have looked at, a deal saved and a review written. From here:
- Run a provider, or work at one? Tap your picture, then Become a Provider. It hands you to TryMyPro for Pros, still signed in; your customer account stays.
- Somebody asked you for a review, or invited you to their team? It waits on Home under Waiting on you.
- Anything else — changing your email or number, your picture, removing someone, deleting your account — is in the how-to guide.