
Answers to “how do I…”, one task at a time. For what each screen is, see the user’s guide.
Two different people use this app. If you own the business, everything here applies to you. If you work at one, only the last section does — your app has three destinations rather than ten.
Getting in
How do I sign in?
When: the first time you open TryMyPro for Pros, or after you have signed out. There is no password at any point; the first time you do this, it creates your account.
-
Open the app. Signed out, it shows one first screen (More customers, from the ones you already have.), with no price on it.
-
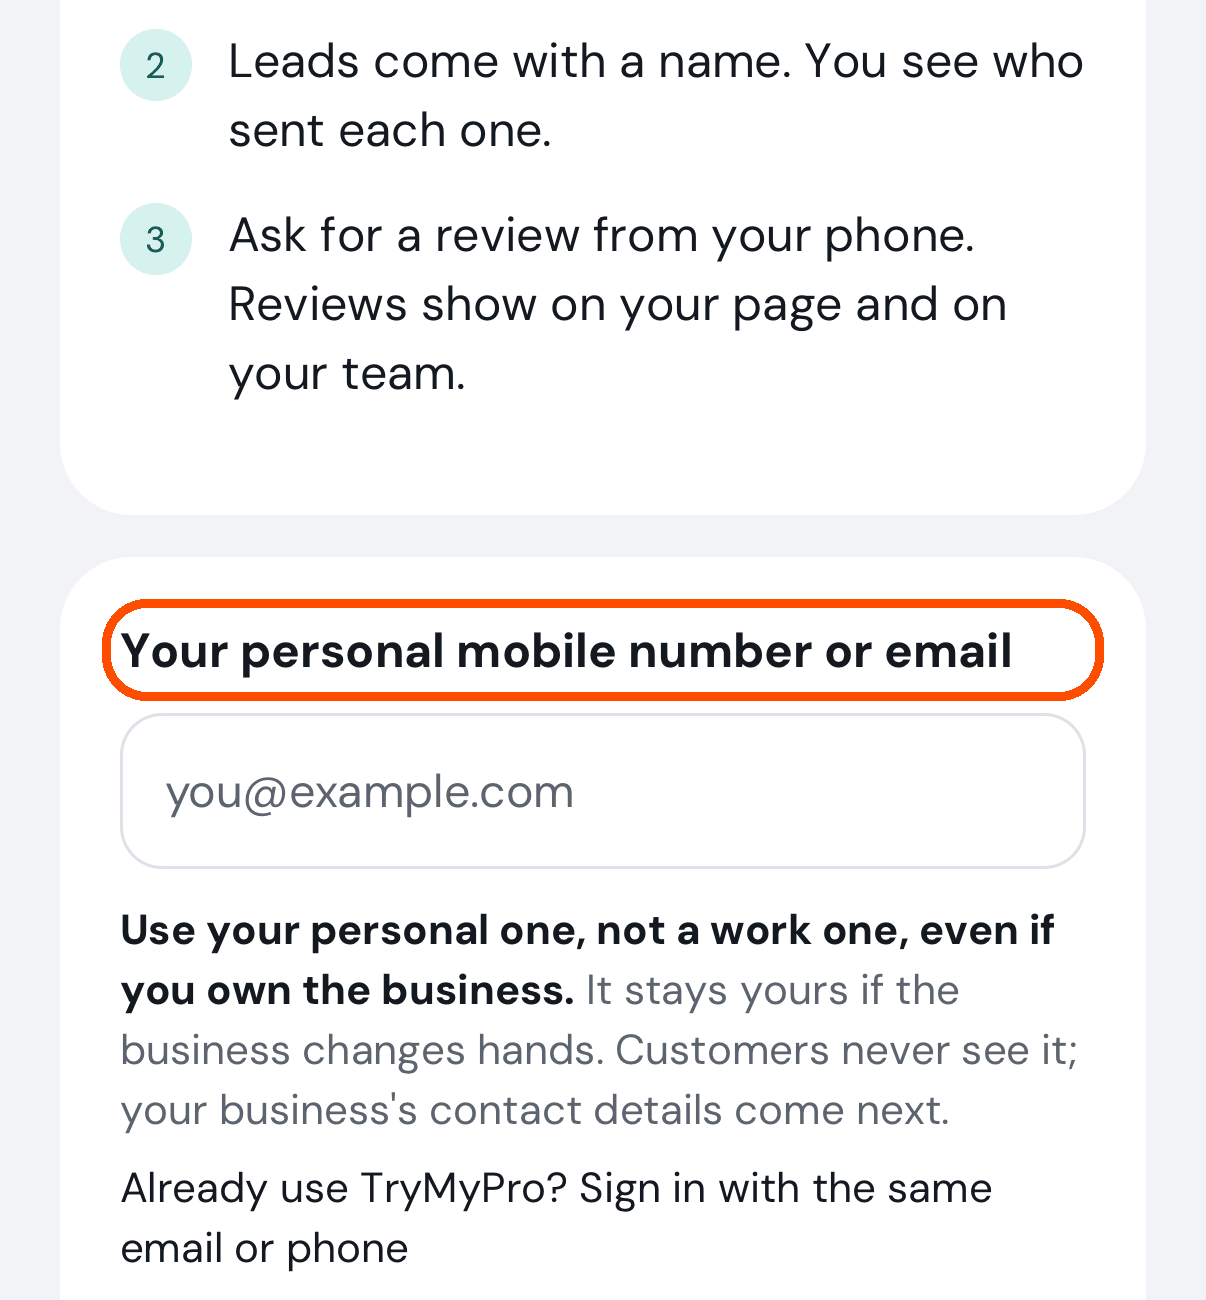
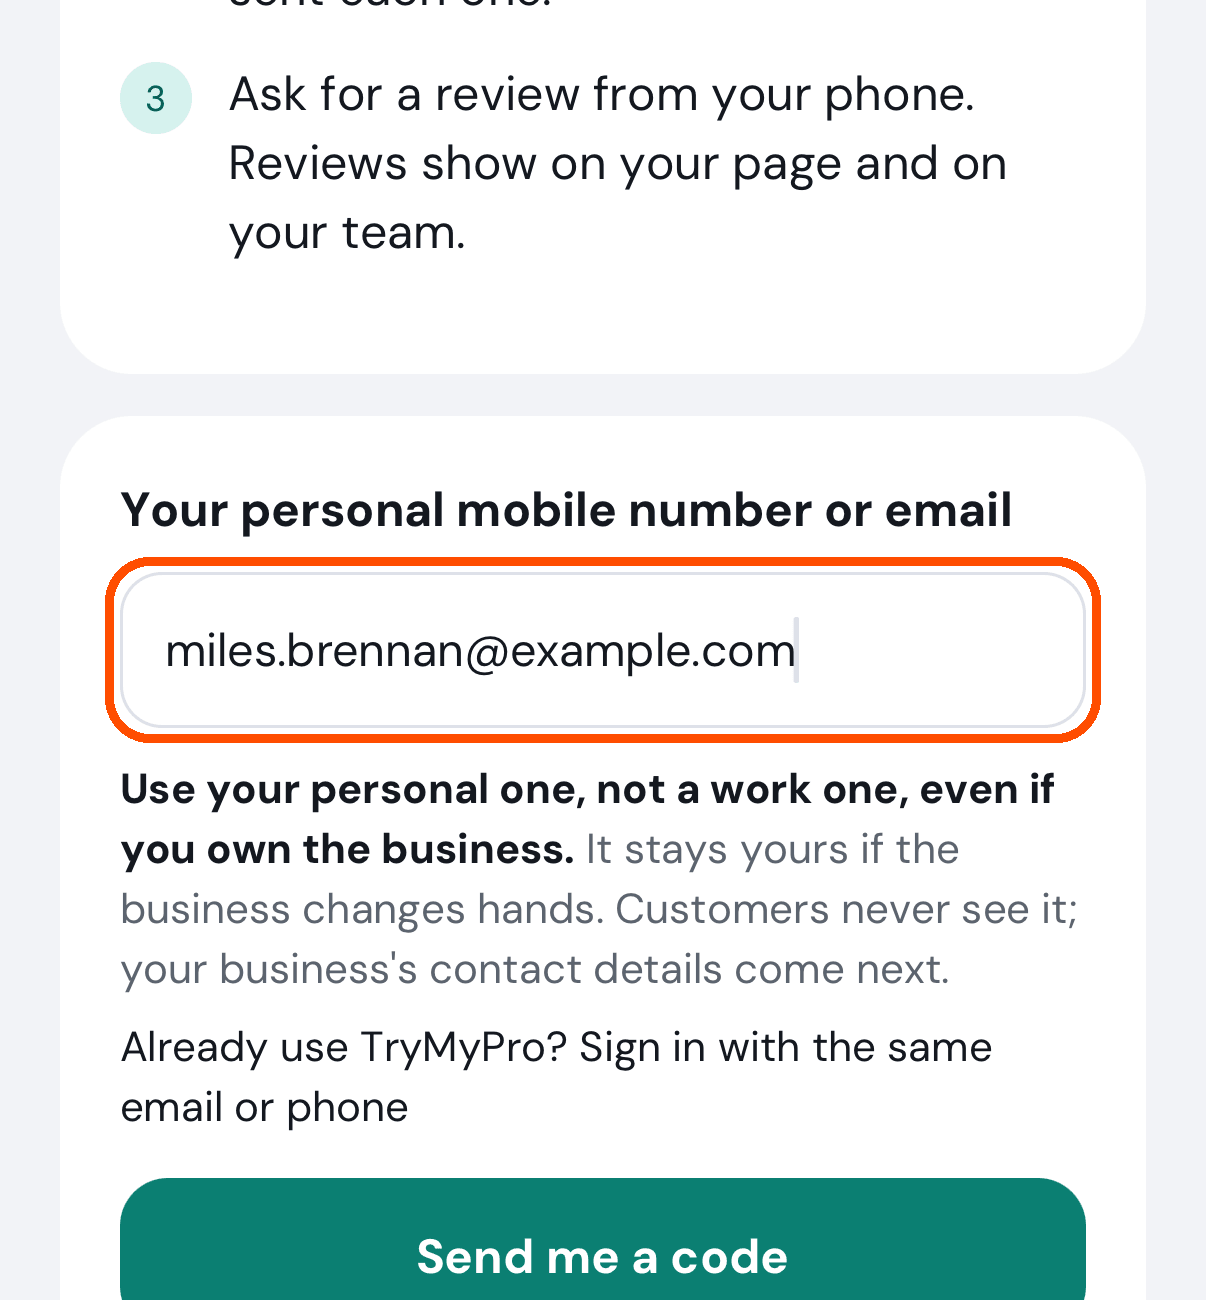
Tap the box Your personal mobile number or email and type it (the email keyboard opens, with @ on its first page and the usual 123 key). Use your personal one, not a work one, even if you own the business: it stays yours if the business changes hands. Customers never see it; your business’s contact details come later. Under the box a line reads Already use TryMyPro? Sign in with the same email or phone: if you already have an account, type the same email or phone you used before and you come back to it.
-
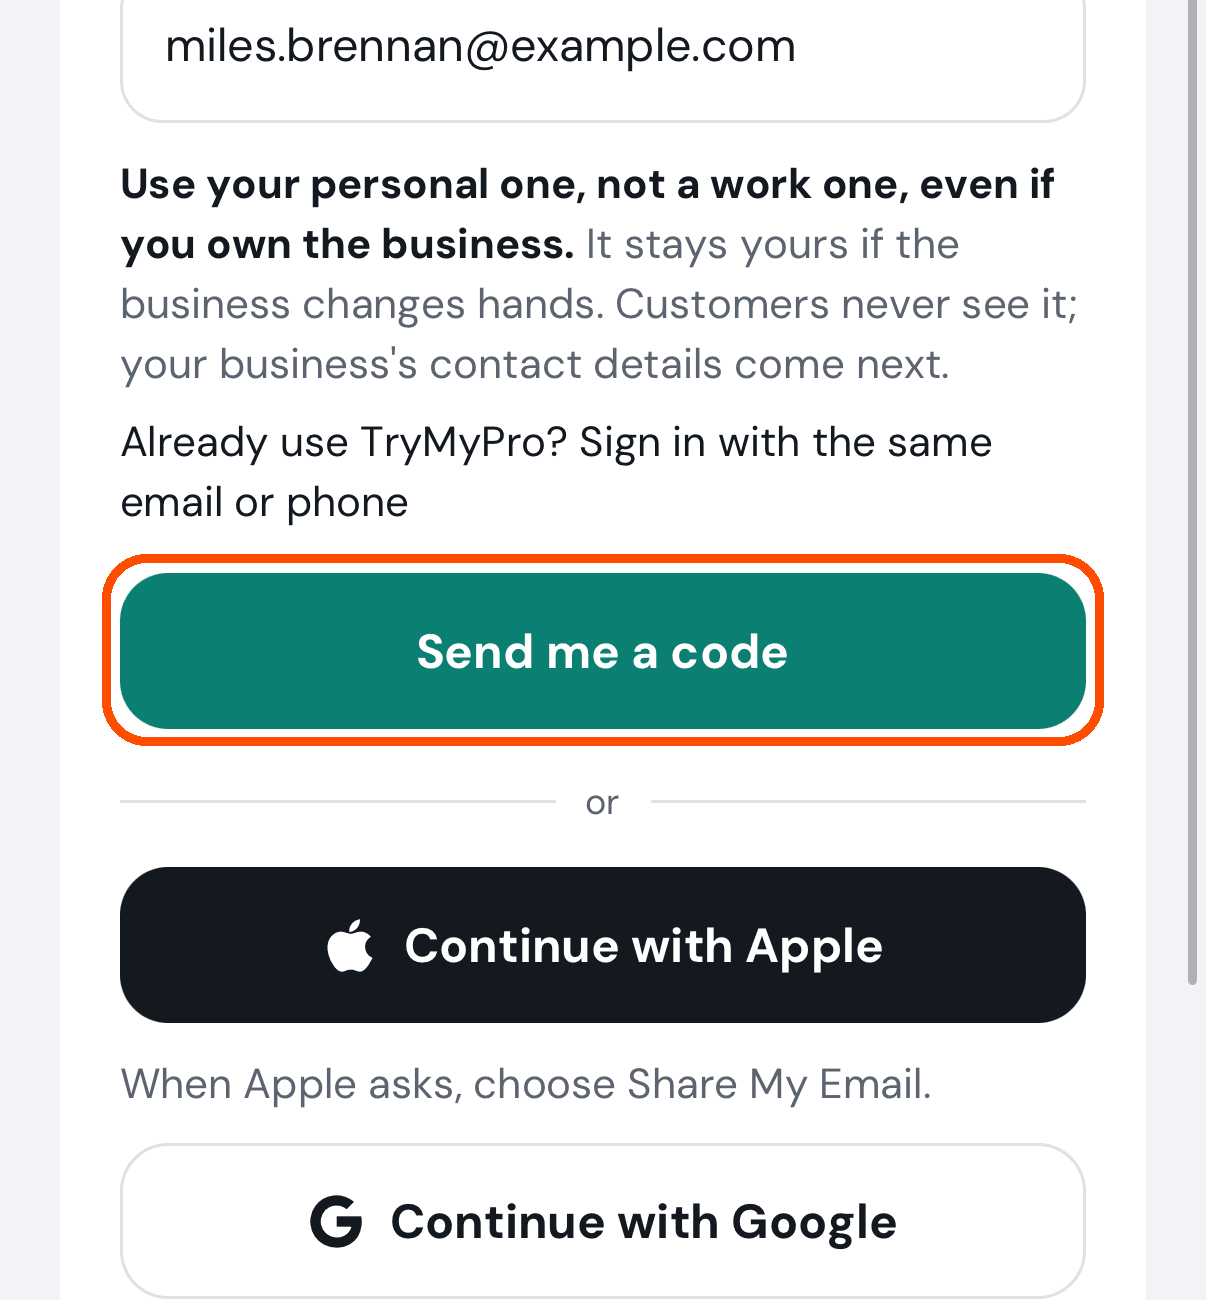
Tap Send me a code.
-
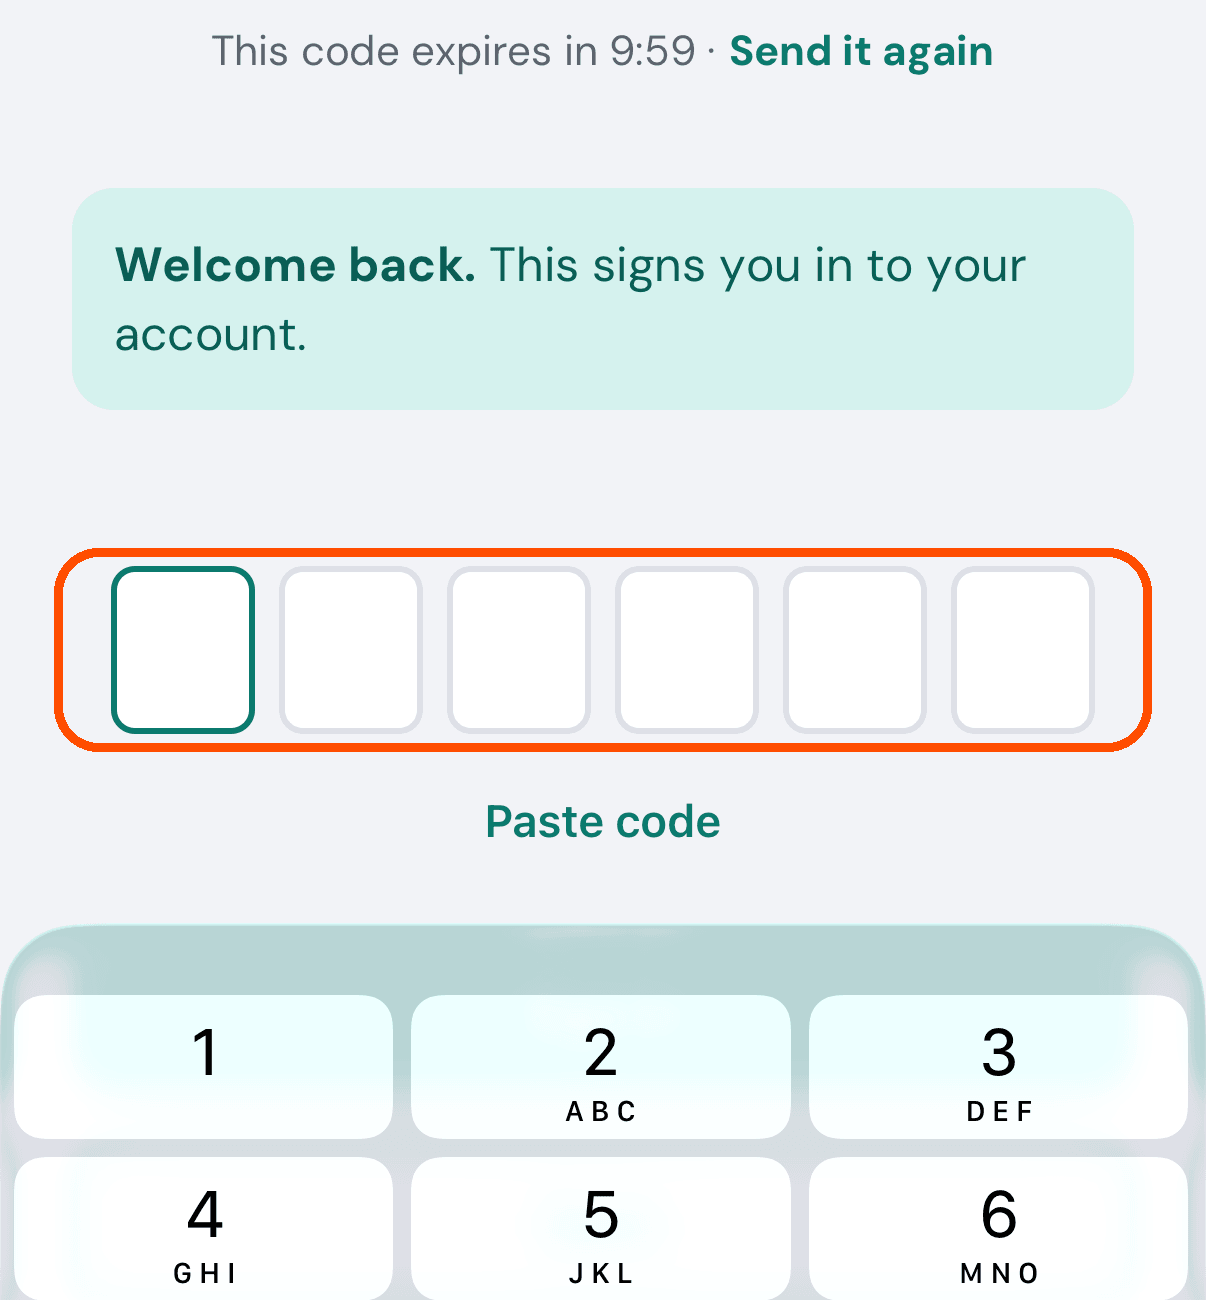
A six-digit code arrives by text or email. Type it into the six boxes (or long-press them to paste a copied code): the moment the sixth digit is in, the keyboard closes and the app signs you in by itself. The Sign in button is there if a code arrives short.
Another way in. Newer versions of the app also show Continue with Apple (iPhone) and Continue with Google under Send me a code, so you can sign in without waiting for a code, and you land in the same place a code would take you. When Apple asks, choose Share My Email or Hide My Email: both sign you in. If you hide it, a note says so once, and the private address Apple gives us works for signing in. Under Google the screen says Choose your personal Google account, not a work one.
Afterwards the app opens where your account belongs — on your business if you own one.
The code lasts ten minutes, and the screen counts it down, with Send it again on the same line. It sends the same code again — it does not replace it — once a minute (Send it again in 30s while you wait). A code that does not work clears the boxes and says so (That code didn’t work. Check it and try again, or ask for a new one.). If you ask for codes too often, the screen shows the reason it was given. The screen also tells you whether this will make a new account (New here? This makes your account.) or sign you in (Welcome back.); if it says new and you already have an account, tap Use a different email or number, which returns to the first screen with the box empty, and use the one you joined with.
Not sure how it works yet? The link How it works, and FAQs ↗ on the first screen opens trymy.pro in your phone’s browser.
No picture of the code typed in: the automated walk types it only after the last picture is taken. (Right after you delete an account, the first screen opens with “Your account has been deleted.” at the top.)
Why did the app open on a different screen from last time?
Because it sends you where your account belongs, not to the screen you last looked at. If you own a business you land on its Home. If you work at one you land on your own Home, which shows your new reviews. If you are neither, you land on the form for adding a business (it starts with Find your business), which is how you become a provider.
The app asked me “Welcome back!” and which profile I wanted. Why?
You should not see that screen any more. The app now waits until it has really heard back about your account before deciding where to send you; it no longer gives up after a fifth of a second and shows the profile chooser. If it ever does appear, nothing is wrong with your account: close the app and open it again.
How do I switch to my other profile?
When: you own a business and are also a customer, or you run more than one business, and want the app to act as the other one.
-
Tap your picture at the top right of any screen.
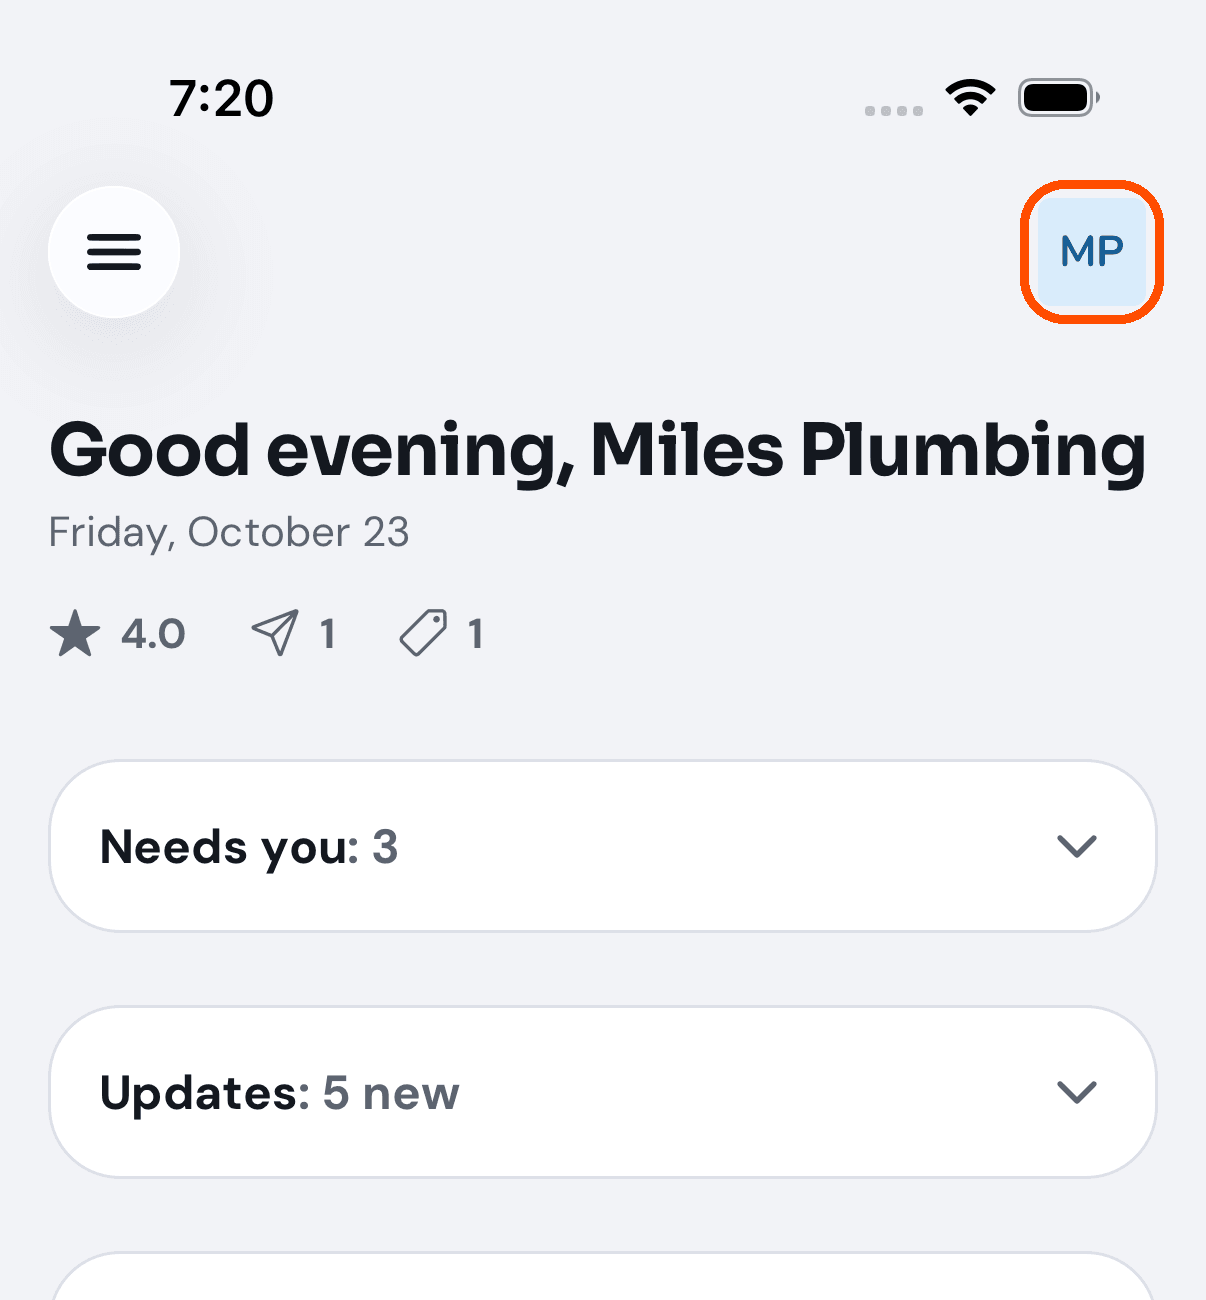
-
In its menu, tap Switch profile (it is there once you hold two profiles).
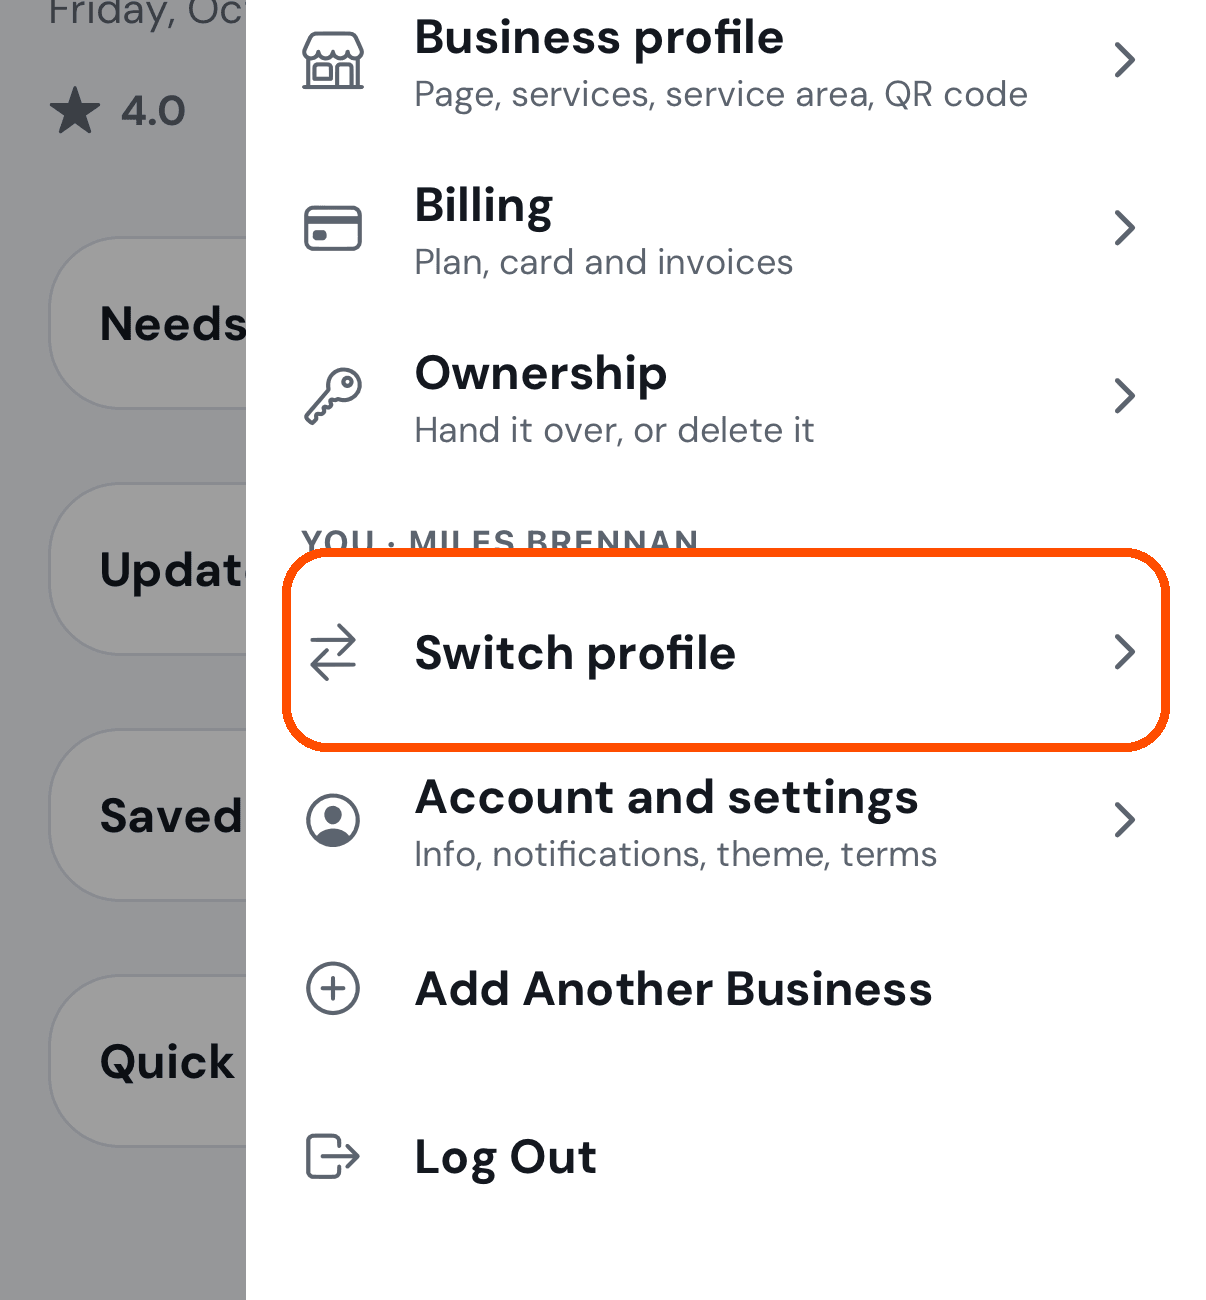
-
On Switch profile, tap the one you want. The one you are using now says Using now; each row says what it is (Your business · Owner, A group you run, You as a member).
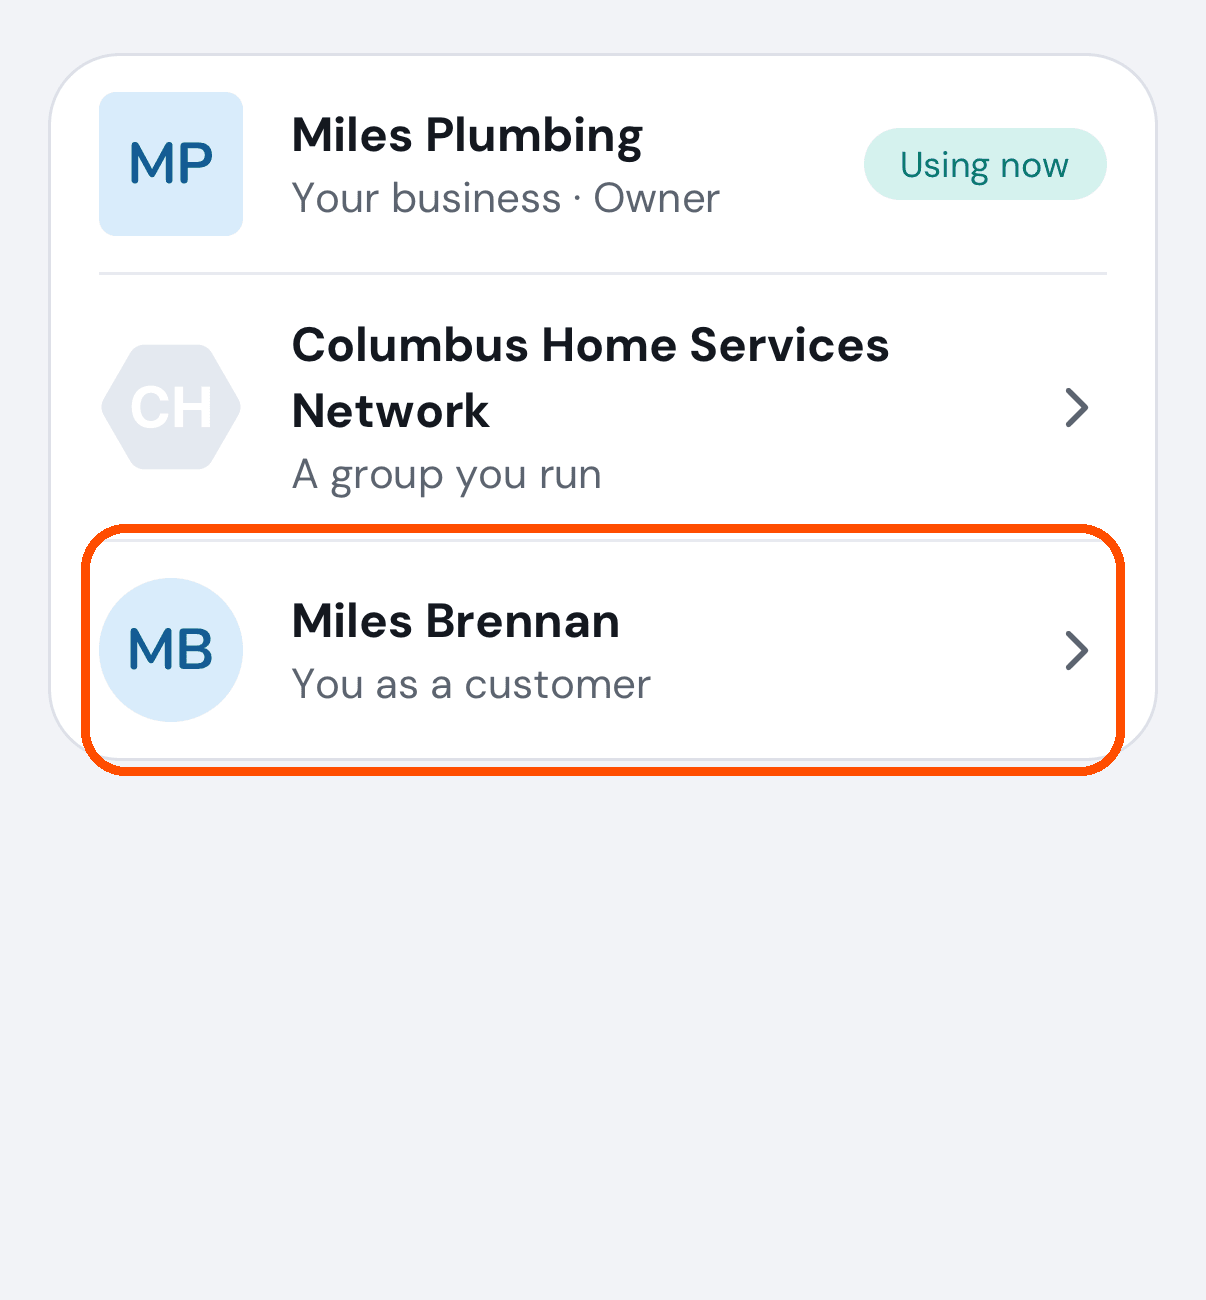
Afterwards the app is that profile. Choosing your Member profile opens the customer app, TryMyPro, because that is where a customer’s screens are.
A professional does it the same way — the picture at the top right, then Switch profile.
No picture of the app after switching: the automated walk rings the profile and goes back, so that Miles stays on Miles Plumbing.
Moving between the two apps
TryMyPro is two apps. TryMyPro is for customers. TryMyPro for Pros, this one, is for businesses and the people who work at them. One account can be all three things, and the two apps hand you between them.
I am a customer and I want to list my business. What do I do?
When: you already use TryMyPro as a customer and want your own business on it.
-
In the customer app, TryMyPro, tap your picture (top right), then Become a Provider. It hands you to this app, TryMyPro for Pros, already signed in — you do not sign in twice. If Manager is not installed it offers the app store and keeps your place.
-
Manager opens on the first of four steps, Business. Type your business’s name or address in Find your business and pick it from the list to fill the form in for you — or tap Can’t find it? Type my details in myself. Check the details (name, email, address and opening hours are required; if you have no set hours, tick By appointment only in the hours sheet). Anything you typed before tapping Yes, use these details is kept, and any day marked Check this day in the hours is one Google’s hours did not give clearly, so fill it in yourself. Add a few words About your business if you like. Say where you work (required): Customers come to us, We travel to them or Both — for the last two, give the ZIP code you travel from and how many miles you cover; Next stays grey until you have. Then tap Next: services.
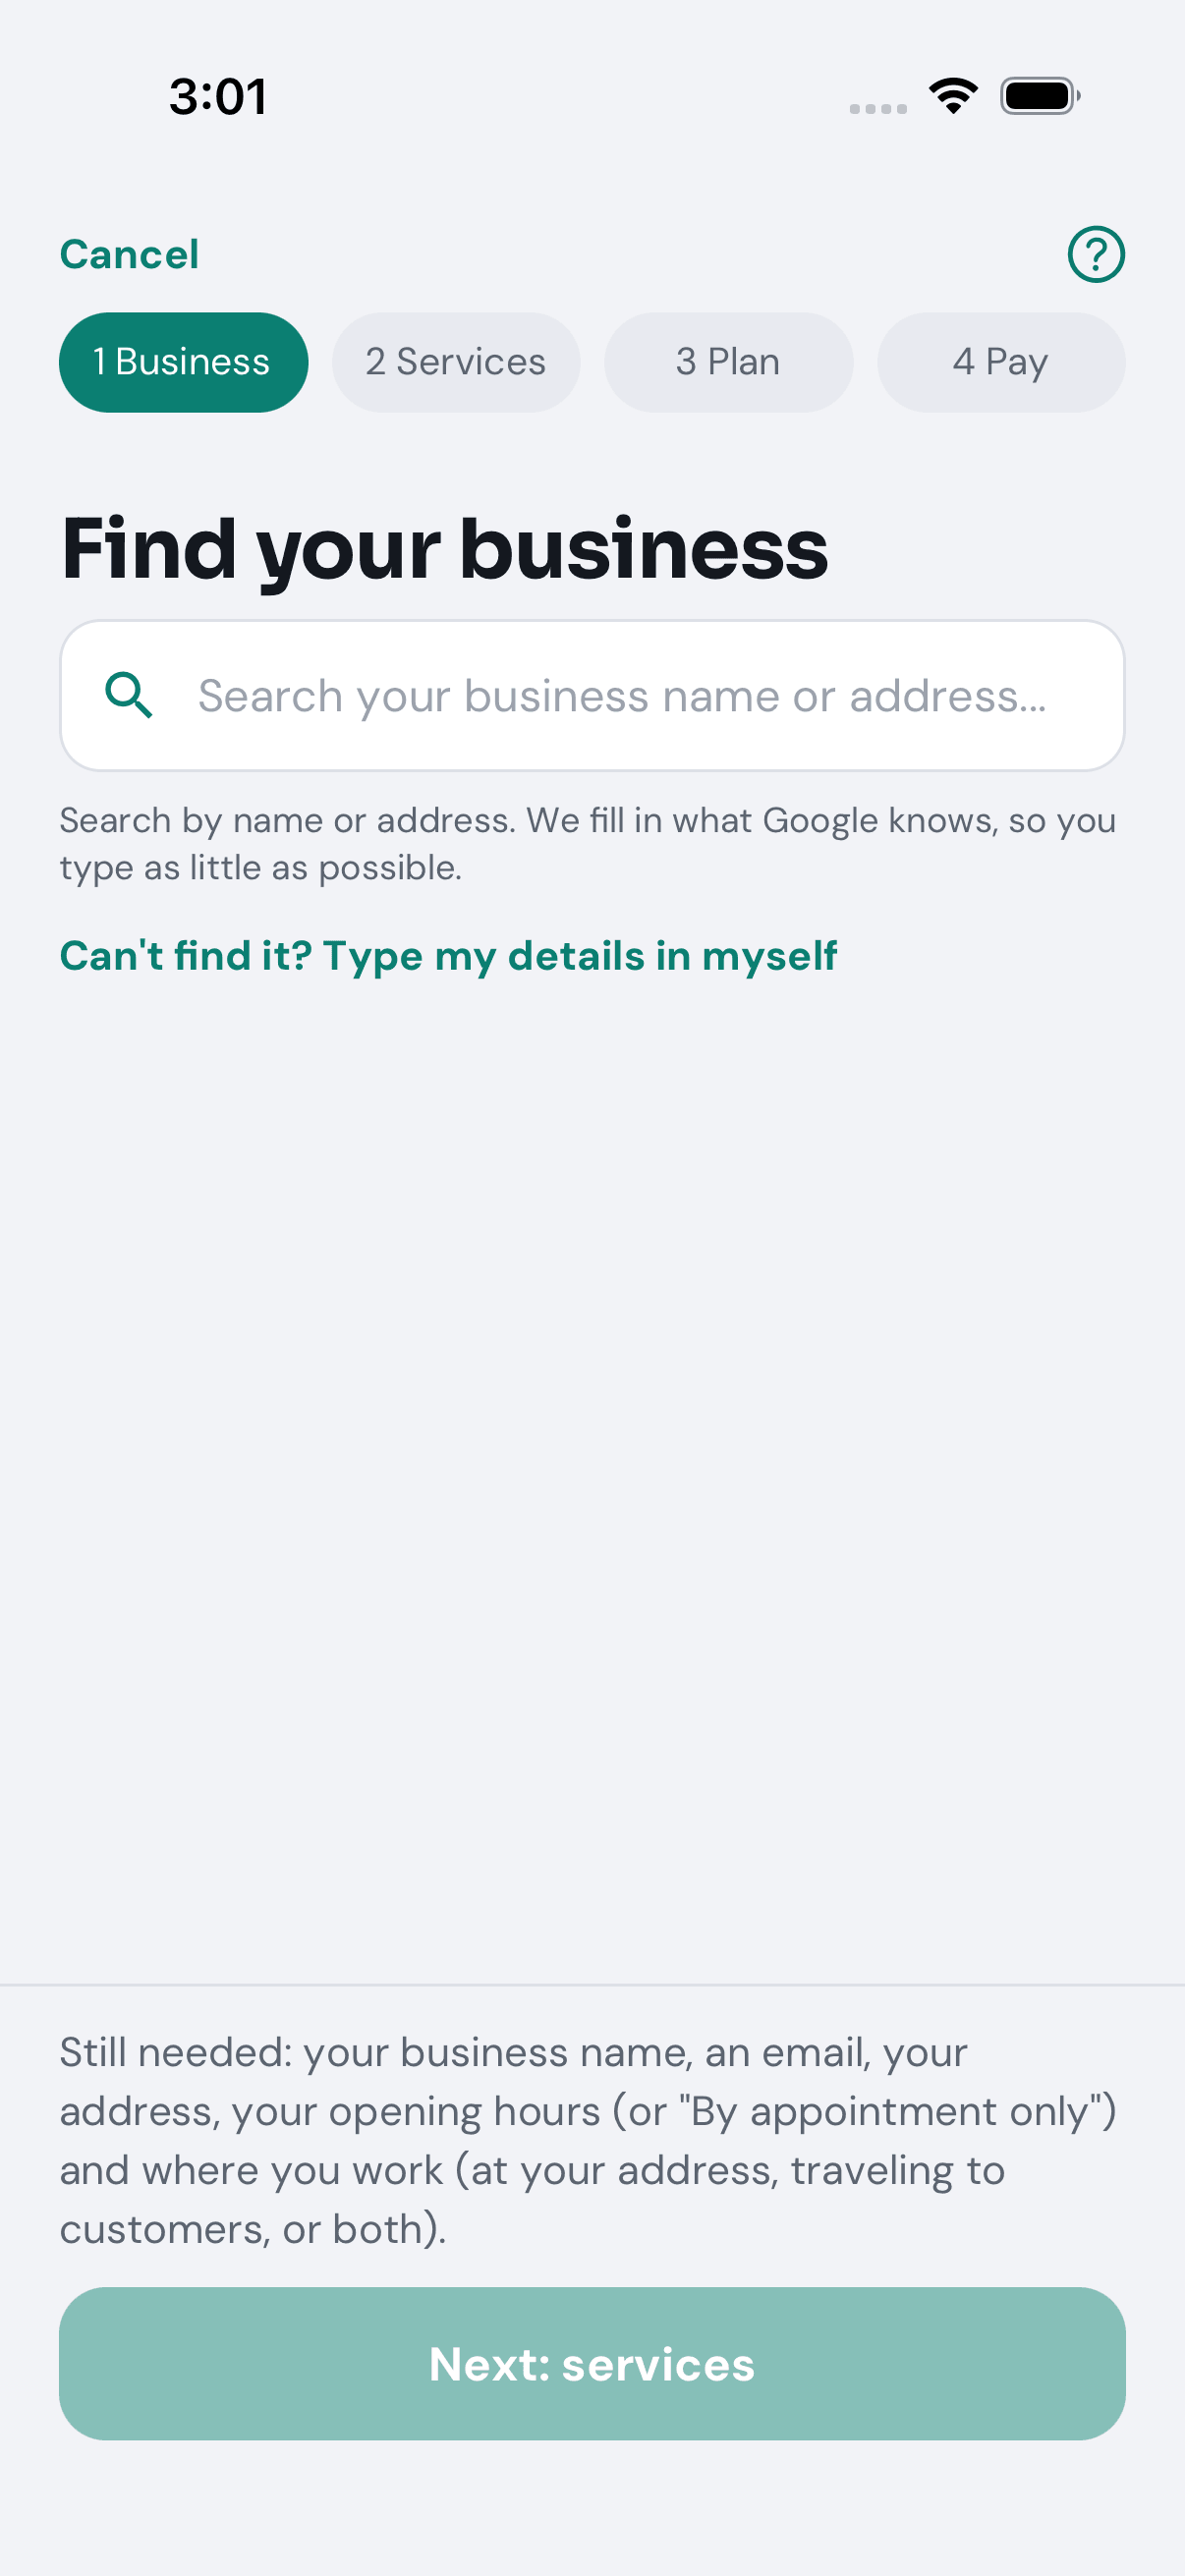
-
On Services, search for what you do or browse the kinds of work, tick what you offer, then Next: plan. Choose your plan (and enter a code if you have one), then Next: pay. The last step is Pay, and its button names the business and the amount. The big button stays grey until the step is complete, and a line beside it says what is missing. Nothing is created until the payment goes through. The link above the strip goes back a step; on step 1 it is Cancel, which asks what you want to do — Continue Upgrade is the only choice that keeps what you typed.
Afterwards, once the payment has gone through, Home says <your business> is live once, and your account has both profiles — customer and business — and you move between them from the circle with your initials at the top right.
Pictures of step 1 only, and none of the customer app: the automated walk opens the wizard as a customer and stops there, so that it never creates a business. The hand-over between the apps carries a one-time ticket, not your sign-in.
Somebody sent me a link to join their team. What happens when I open it?
It opens the customer app, TryMyPro, not this one. The screen names the business and welcomes you by first name, lists what joining means for you, and has one button, Join the business (a small This isn’t me offers Use a different email or phone or Turn it down). If the invitation carries a role, the ticked lines say what that role can do, for example a Manager’s, and the email says the same. After you accept, it offers to open TryMyPro for Pros, and to take you to the download if you do not have it yet. A link that is not yours, or has already been answered or withdrawn, says “This invitation is no longer waiting.”
I own a business and I am also a customer. Do I need two accounts?
No. One account, two profiles. Tap your picture at the top right, then Switch profile (it appears once you hold two profiles), and pick the other profile on the Switch profile screen. To run more than one business, Add Another Provider is in the same menu.
Home
What is “Waiting on you” for?
It is the one list on Home of what needs you. Its heading carries the total, such as Waiting on you 3, and its items sit in groups, each with a heading and a count, every item a small card with a button on its right. (When customers are asking for their past jobs the list starts open, with those requests at the top under Members asking for their past jobs: the first 3, then See all and the number for the rest. Answer or Not now on each.) The first rows are things waiting on the business, each with a count: 1 review to approve, 1 deal waiting to confirm, 1 team invitation not answered yet. Tapping a row takes you straight to it. Below those are your first jobs (ask a customer for a review, add your team, finish your profile, create your first deal, post, tip or event, invite people to your network).
Tapping the deal-waiting row opens Used deals, with the waiting ones in Waiting to confirm at the top. It counts only deals that need a scan, that a customer has shown on their phone, and that are still waiting for you to scan or type the code — not everybody who has merely saved one of your deals.
When there is nothing waiting and nothing left to do, the box is not shown at all.
Where is the activity feed?
This app does not have one, and will not: a feed is posts and deals, and the App Store accepts this app only for running your business, not for showing marketing content. The feed is in the customer app, which is where your customers see your posts and deals.
A job on “Waiting on you” will not go away. Why?
Because TryMyPro does not find it done in your business’s own records. Each row is checked every time you open Home; tapping a row ticks nothing, and there is no dismiss button.
- Ask a customer for a review goes once you have sent a review request, or a customer has already rated you.
- Add your team goes once somebody works at the business or an invitation is waiting.
- Complete your business profile wants a name, a proper email address and an address; the line under it says which is missing.
- Create your first deal, post, tip or event goes once the business has made any of them, even one that has since ended.
- Add providers you trust goes once somebody is in your network or you have sent an invitation.
- Add your logo (under Skipped when you signed up) goes when the business has a photo.
Do the thing, come back to Home, and the row is gone.
Your team
How do I add somebody to my team?
When: someone works at your business and should be on Team — to act for the business (post deals, answer reviews), to be shown to customers as a professional, or both.
-
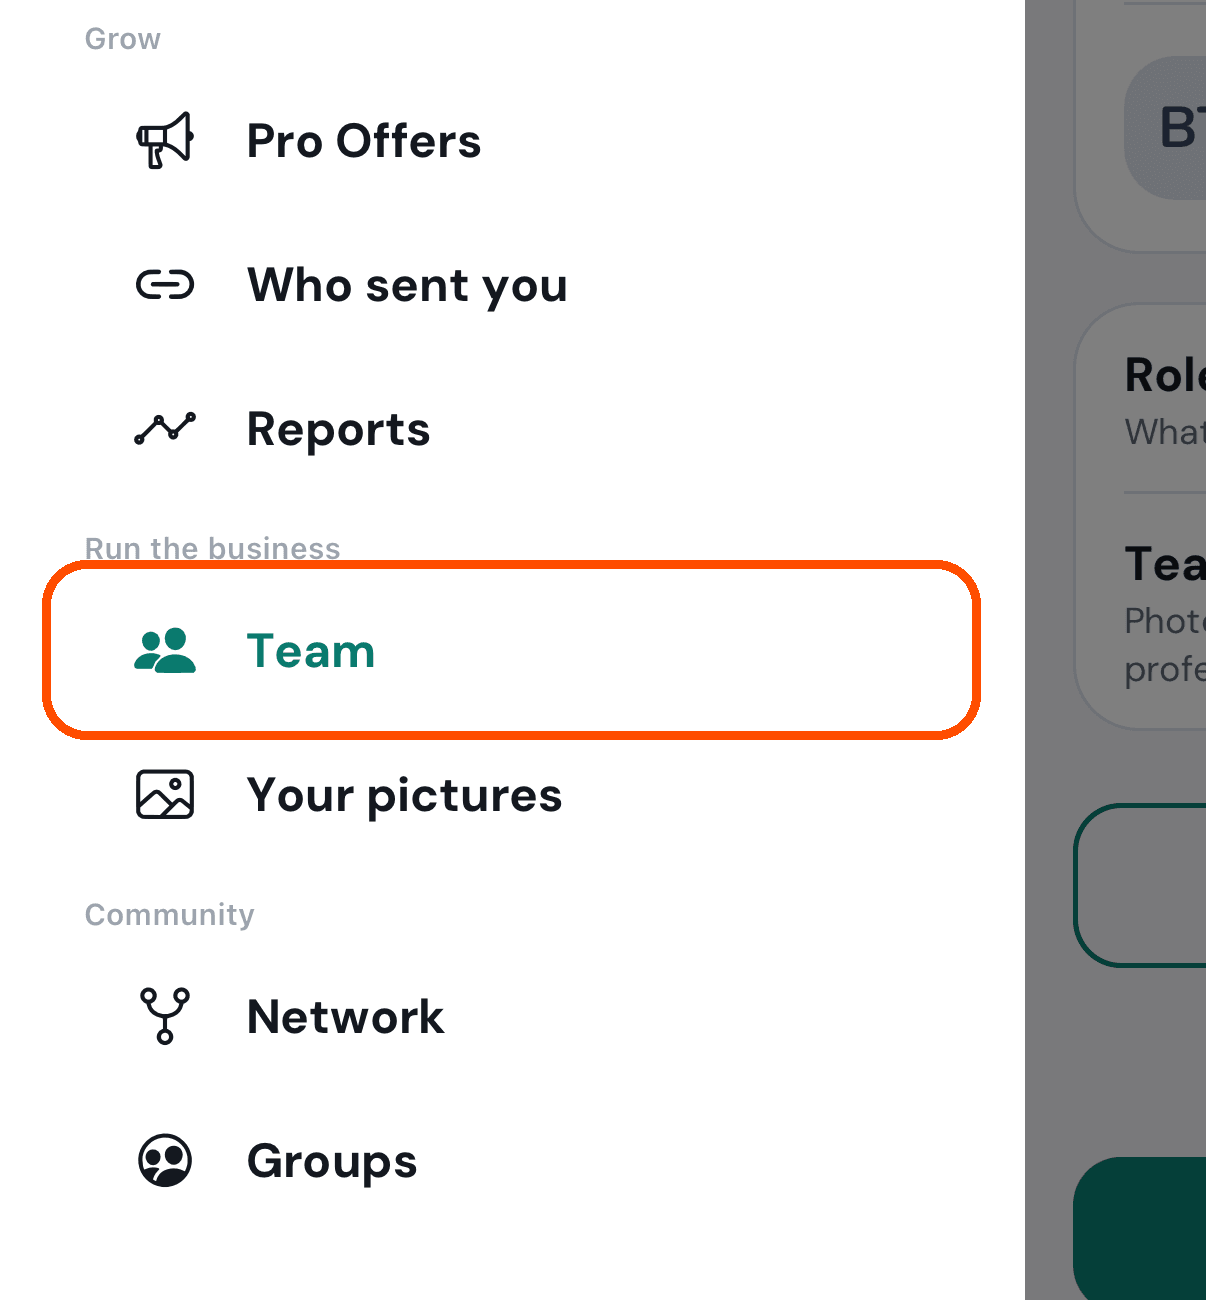
Open the menu (top left) and tap Team.
-
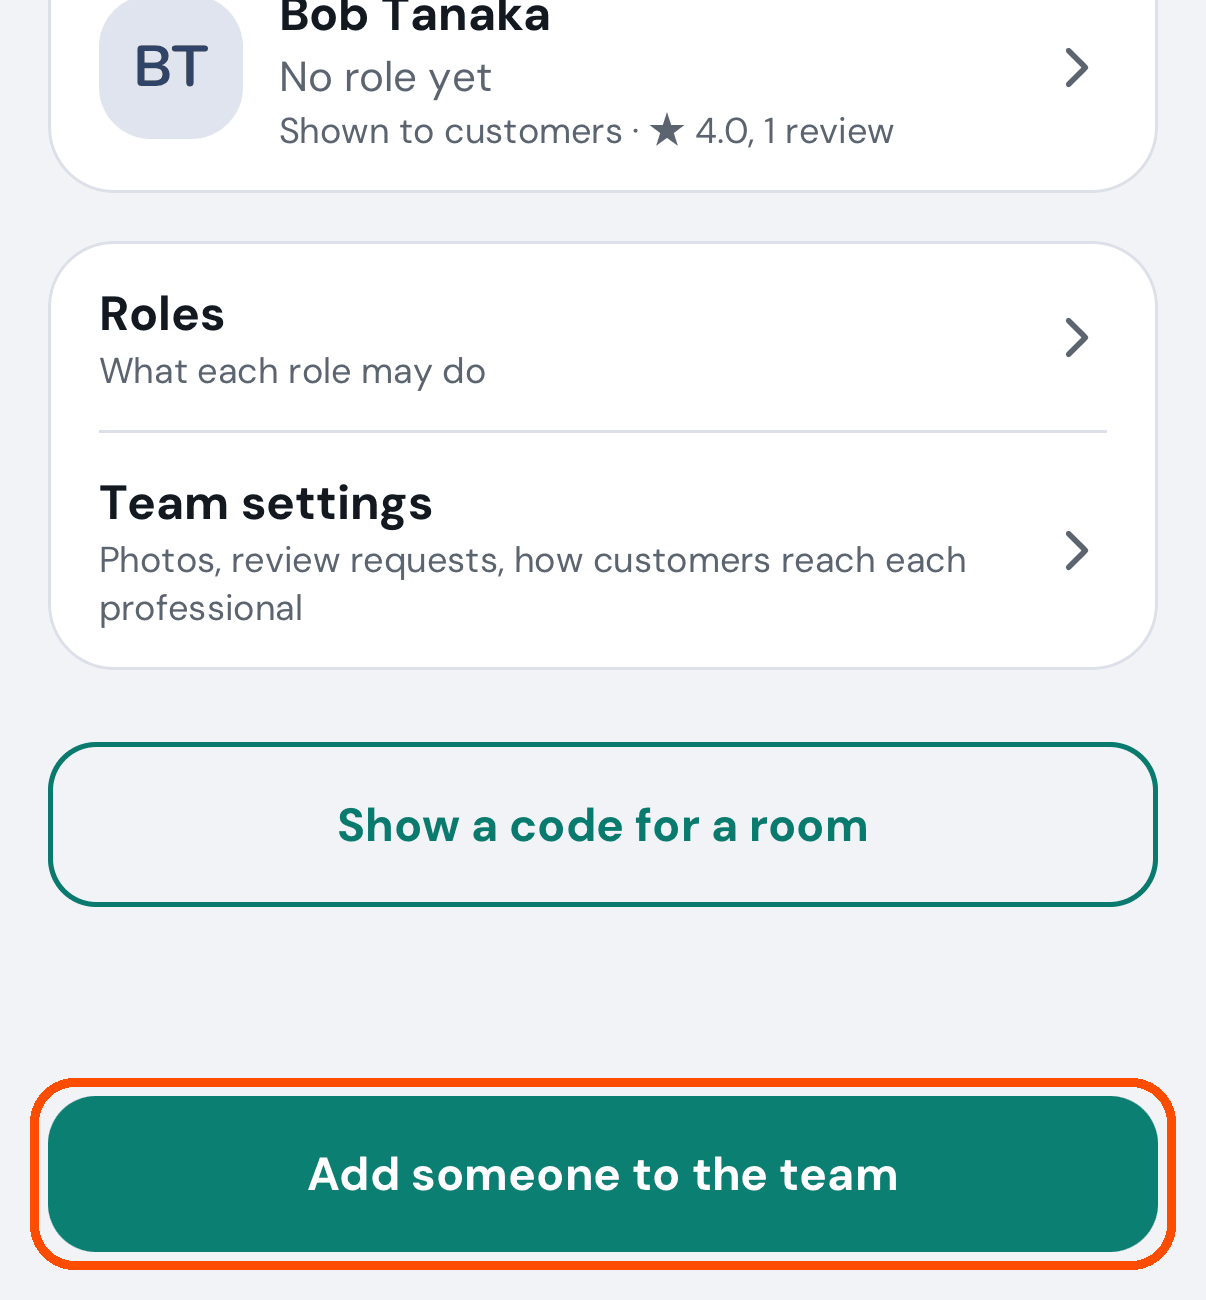
At the bottom of Team, tap Add someone to the team.
-
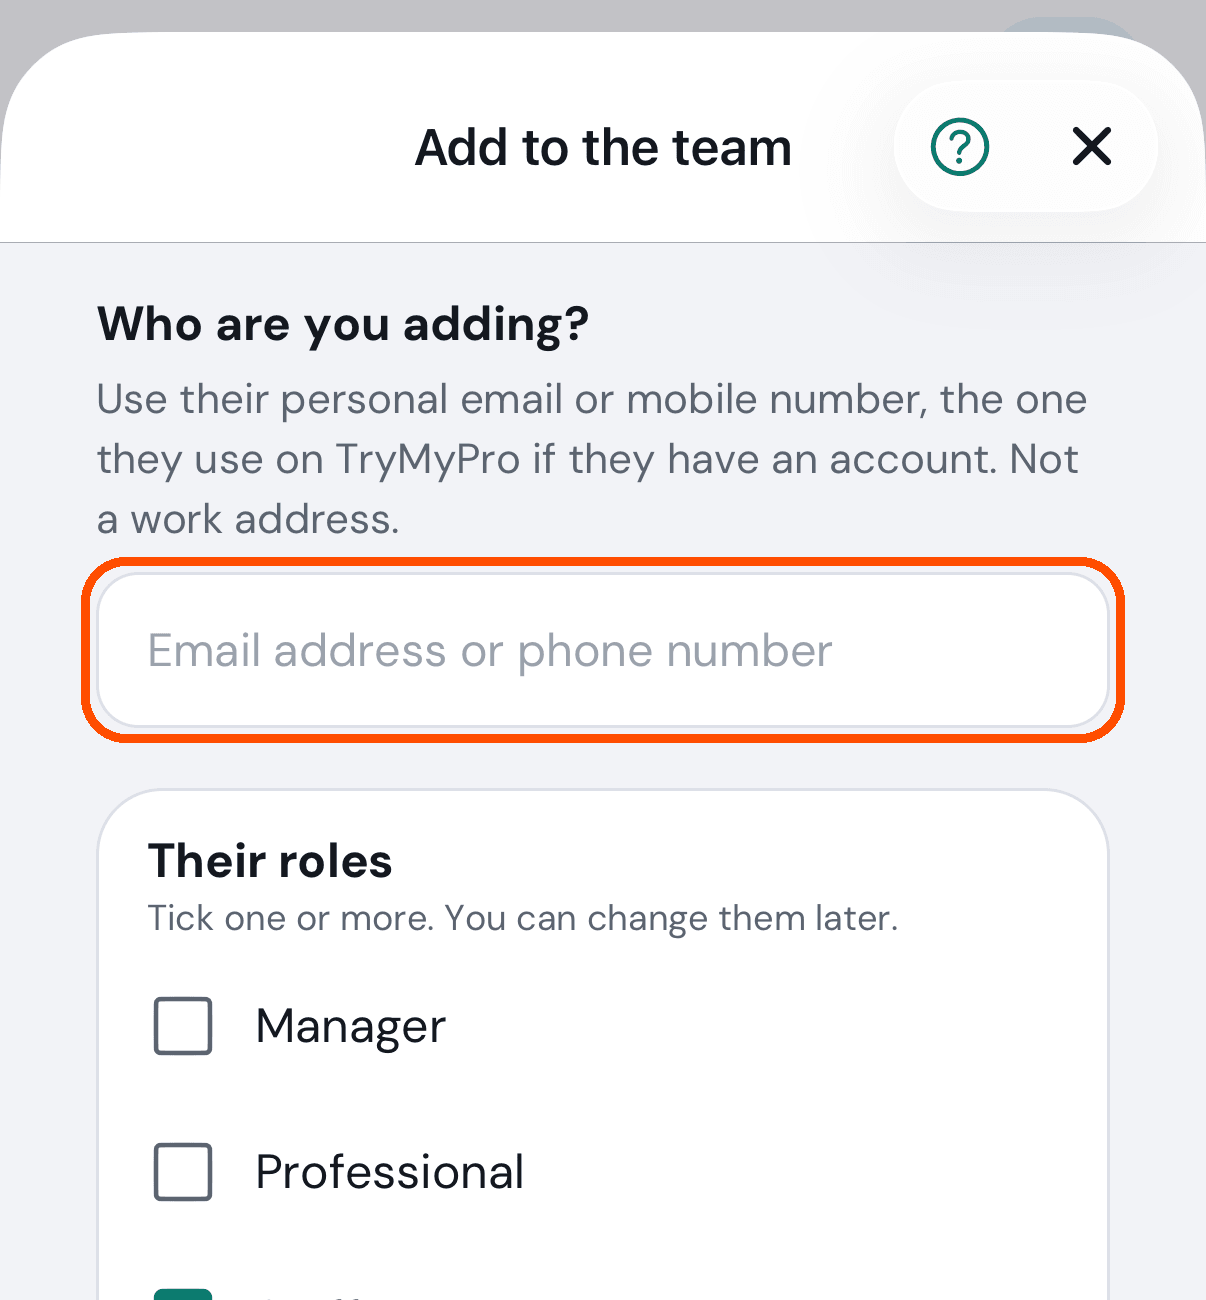
Type the person’s personal email address or mobile number, the one they use on TryMyPro if they have an account, not a work address. Nobody joins without accepting: someone with an account gets a notification and a to-do in the TryMyPro app, and you see their name; if they have no account, you send the invitation yourself.
-
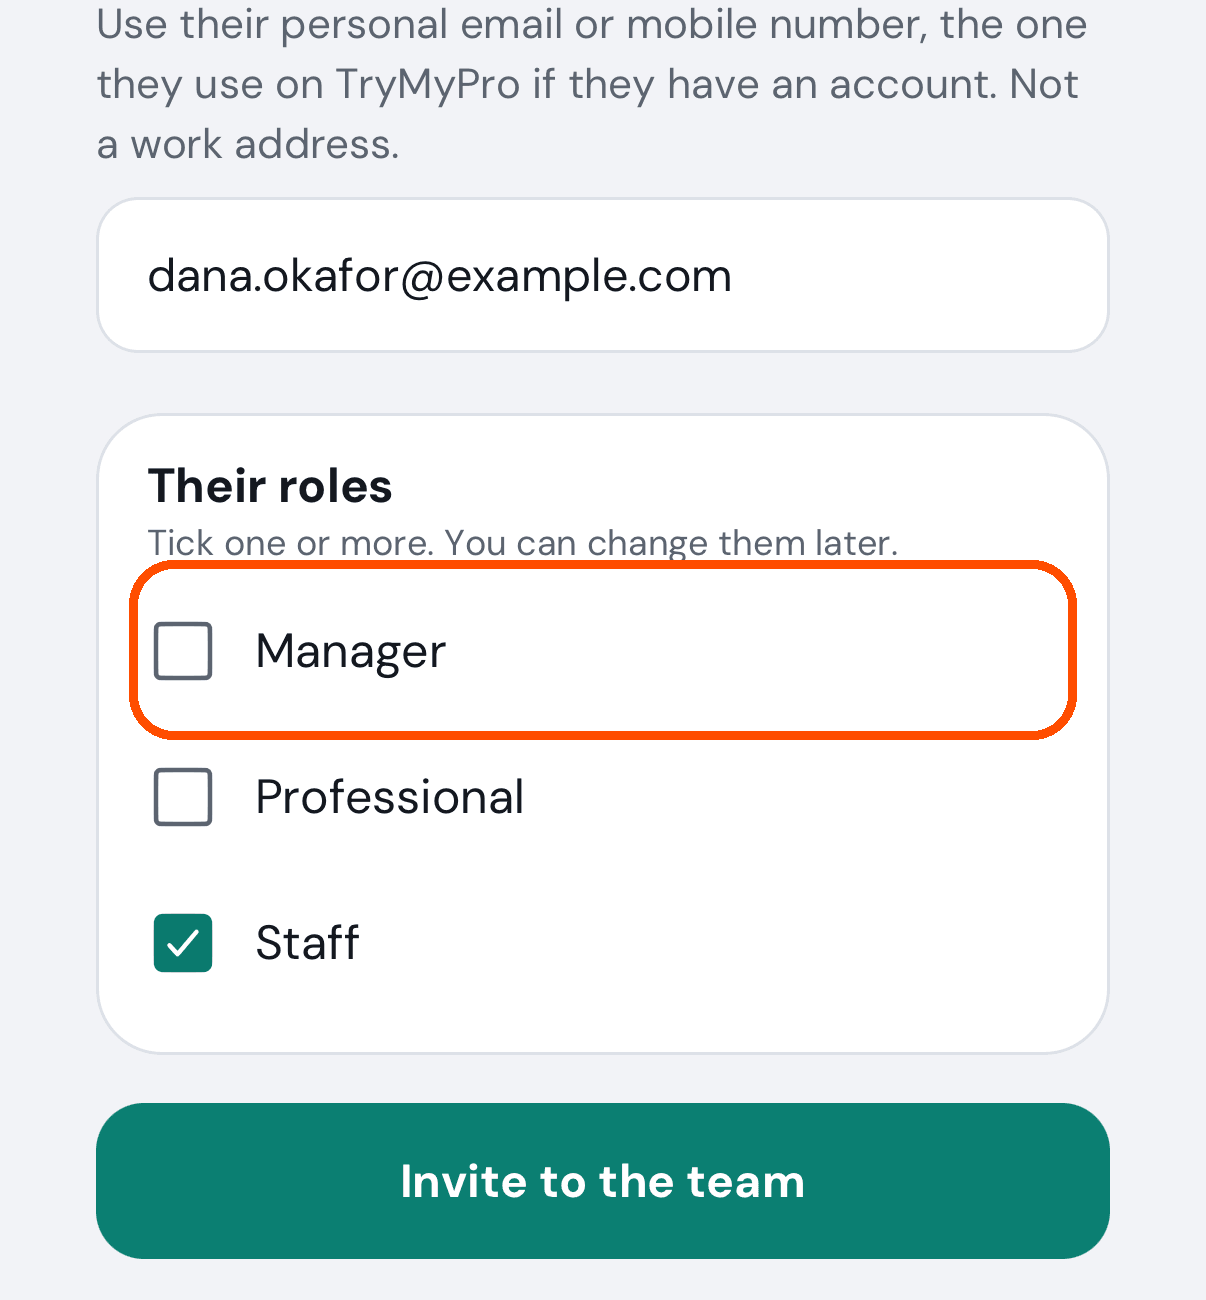
Tick their roles, then tap Invite to the team (or Send an invitation).
- Manager — runs the business day to day and approves reviews. Cannot see or touch billing, add or remove people, or touch the business itself until you give it.
- Staff — asks for reviews and confirms deals. Switch on anything more, such as posting deals, for that person or for the role.
- Professional — on the team with no business controls.
Afterwards the person is on Team (or under Invited, waiting for an answer until they accept). Tap their name to switch on Shown to customers, fill in what customers see about them (title, about, work email and phone), change their roles, or open What they may do to switch single things on or off — then Save. Remove from the team is on the same screen.
Three permissions carry a warning because they reach the whole business: Change card and plan, Delete the business and Hand the business over. They are off for everyone but you until you turn them on.
No picture of the person being added: the automated walk stops at step 4 so that it never adds anyone.
How do I add a whole room of people at once?
When: several people are in front of you, each with their own TryMyPro account, and you would rather not type each address.
- On Team, tap Show a code for a room.
- Tick the roles everyone in the room will have (Staff is ticked for you), then tap Show the code.
- Each person scans the code with their phone and taps Ask to join Miles Plumbing (your business’s name). They use the account they are signed in to; someone with no account signs up first.
- They appear on Team under Asking to join, and the menu shows a badge on Team. Tap Approve to put a person on the team with those roles, or Not now to turn them down. Nobody joins until you approve them, because a photo of the code can reach anybody.
A code stops working 24 hours after you made it. Turn this code off stops it sooner, and you can then make a new one with different roles.
No pictures yet: the automated walk does not cover the room code.
How do I let somebody help run my business?
Add them to Team with the role that fits (the answer just above), and leave Shown to customers off: they can then act for the business without appearing on your page.
How do I choose what services my business offers?
When: you are setting the business up, or you have started (or stopped) doing a kind of work. This list decides whether a customer searching for that work finds you.
-
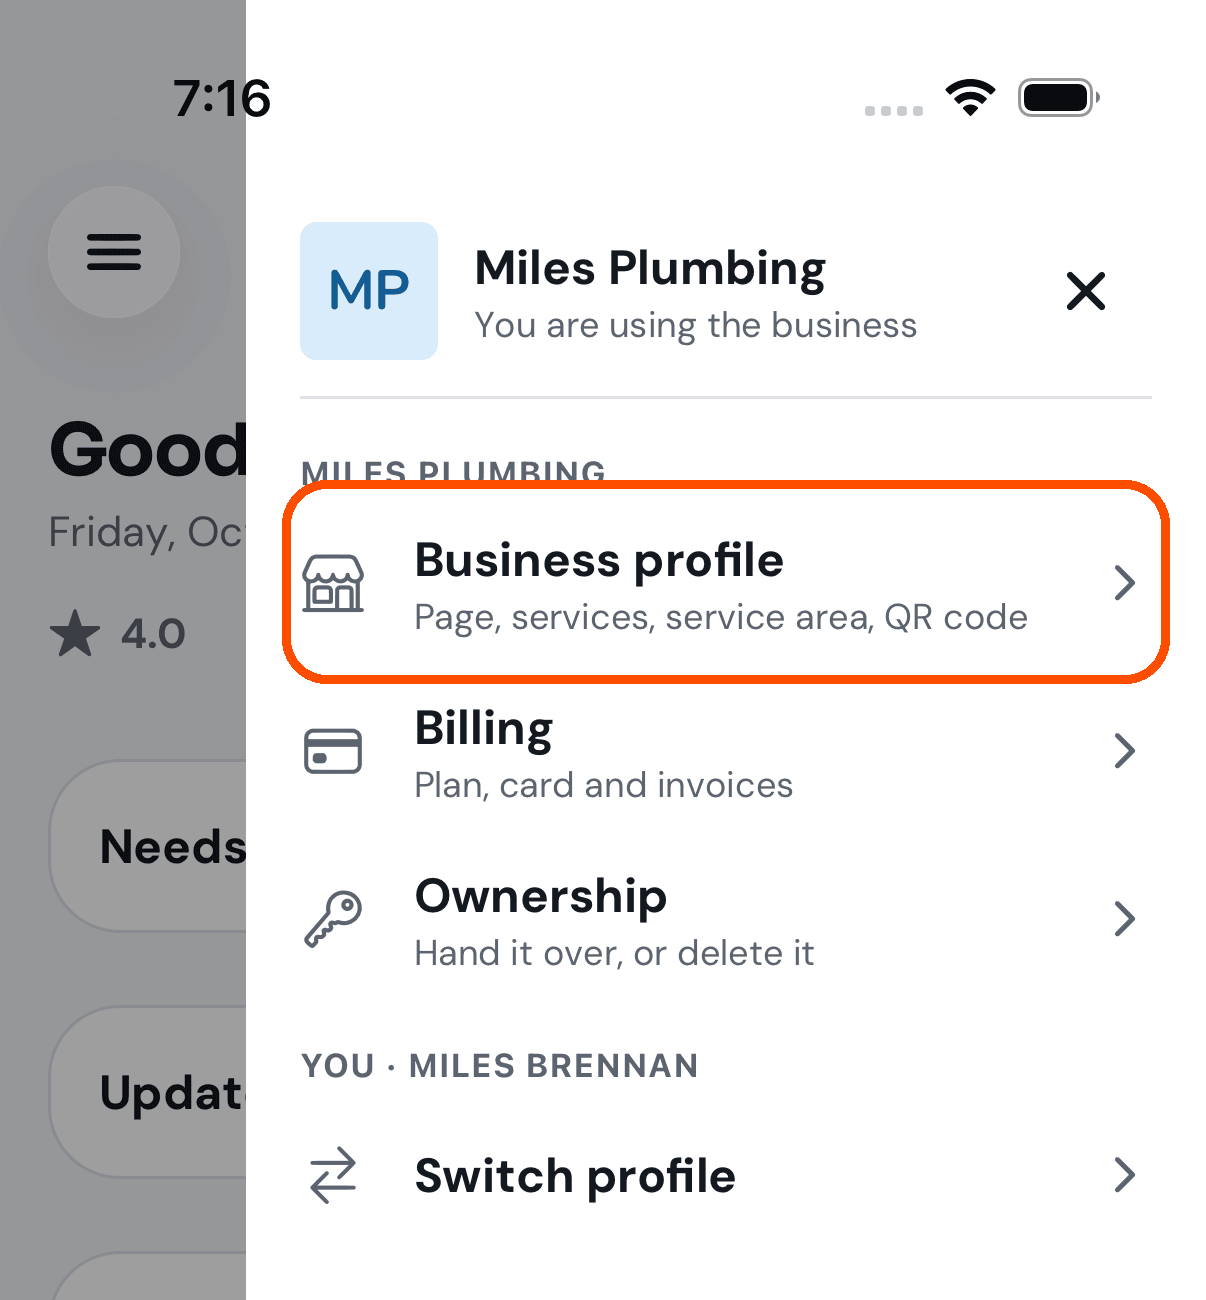
Tap your picture (top right), then Business profile.
-
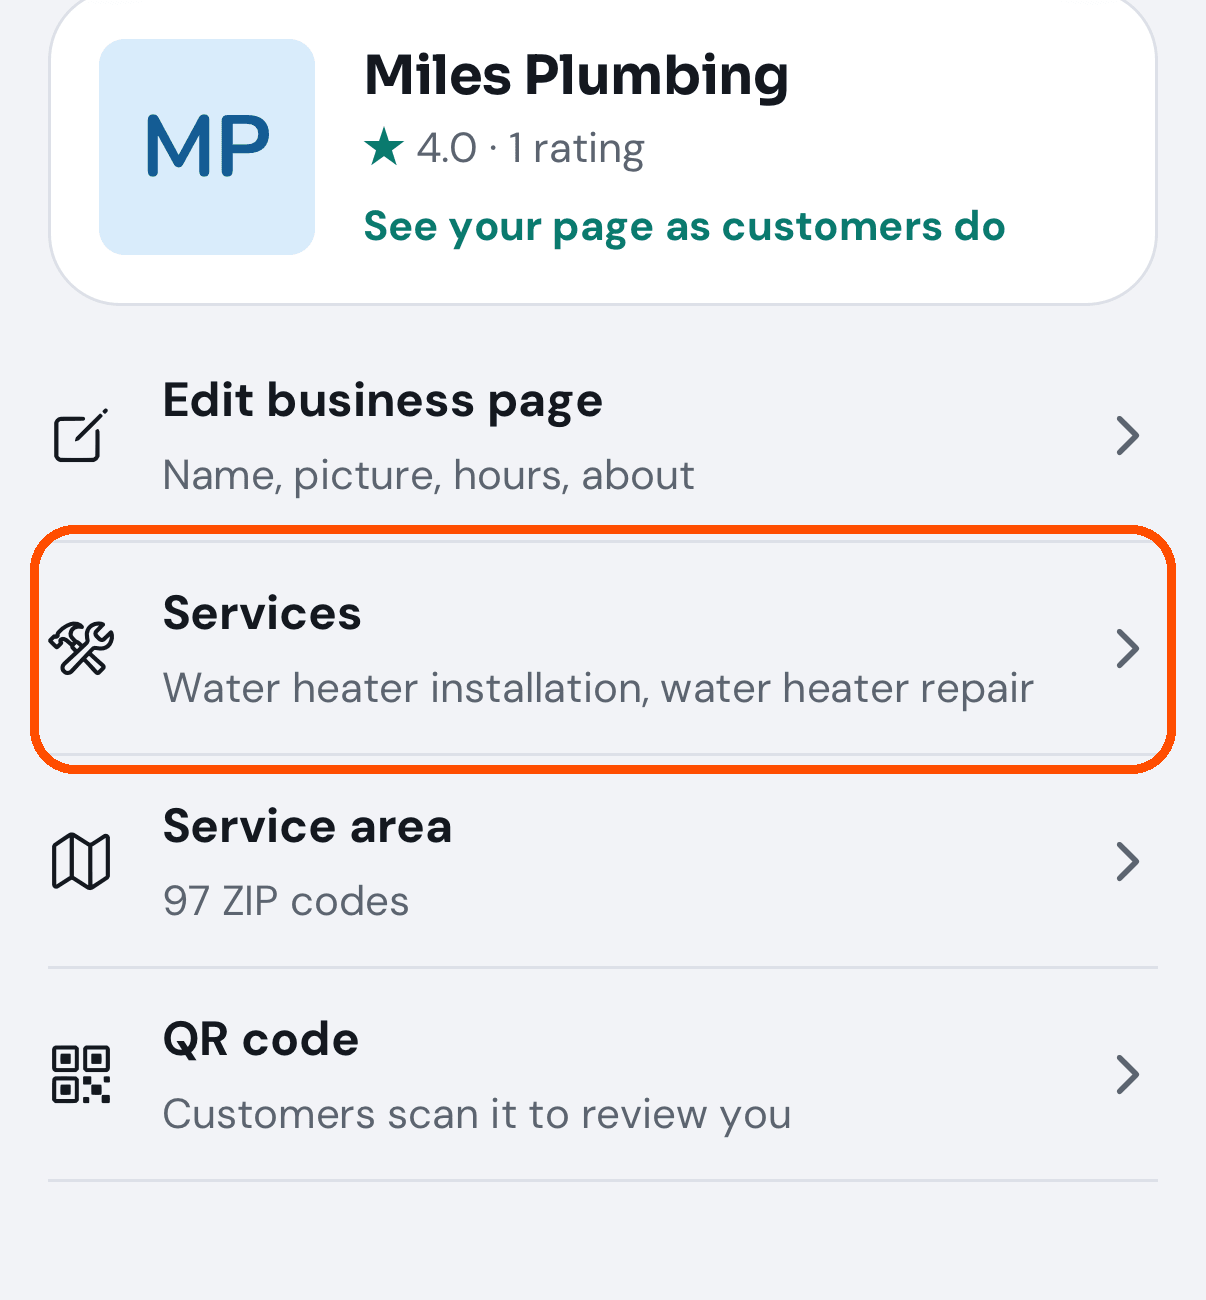
Tap Services.
-
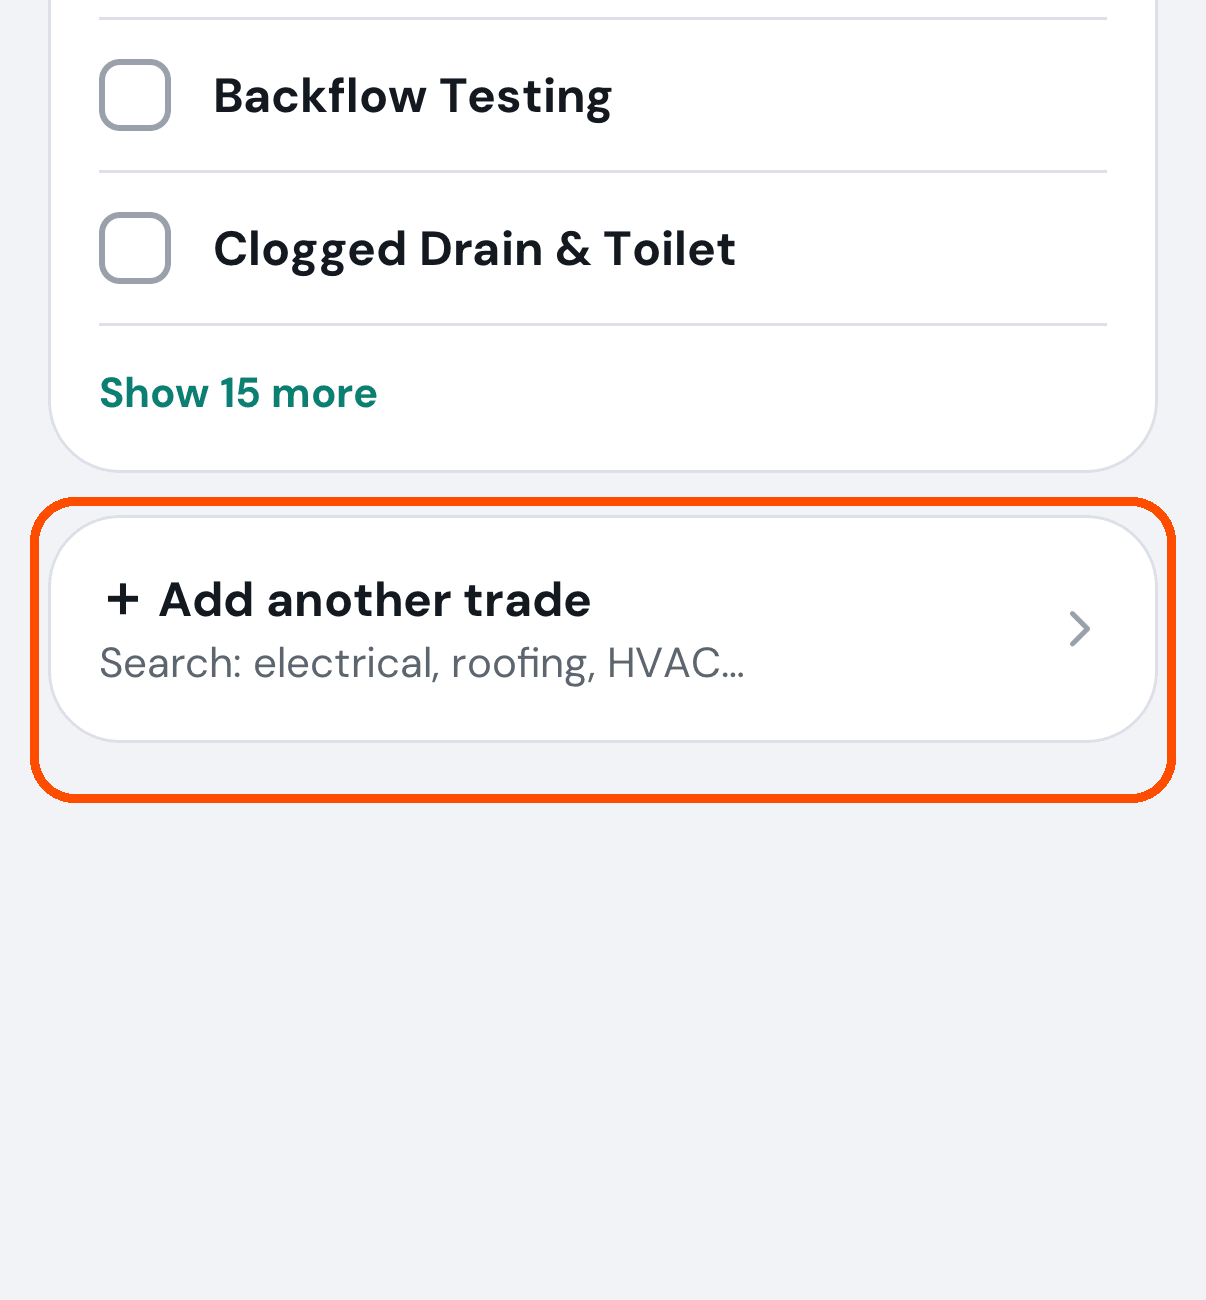
On Services, tap Add another trade (on a new business, Add your first service).
-
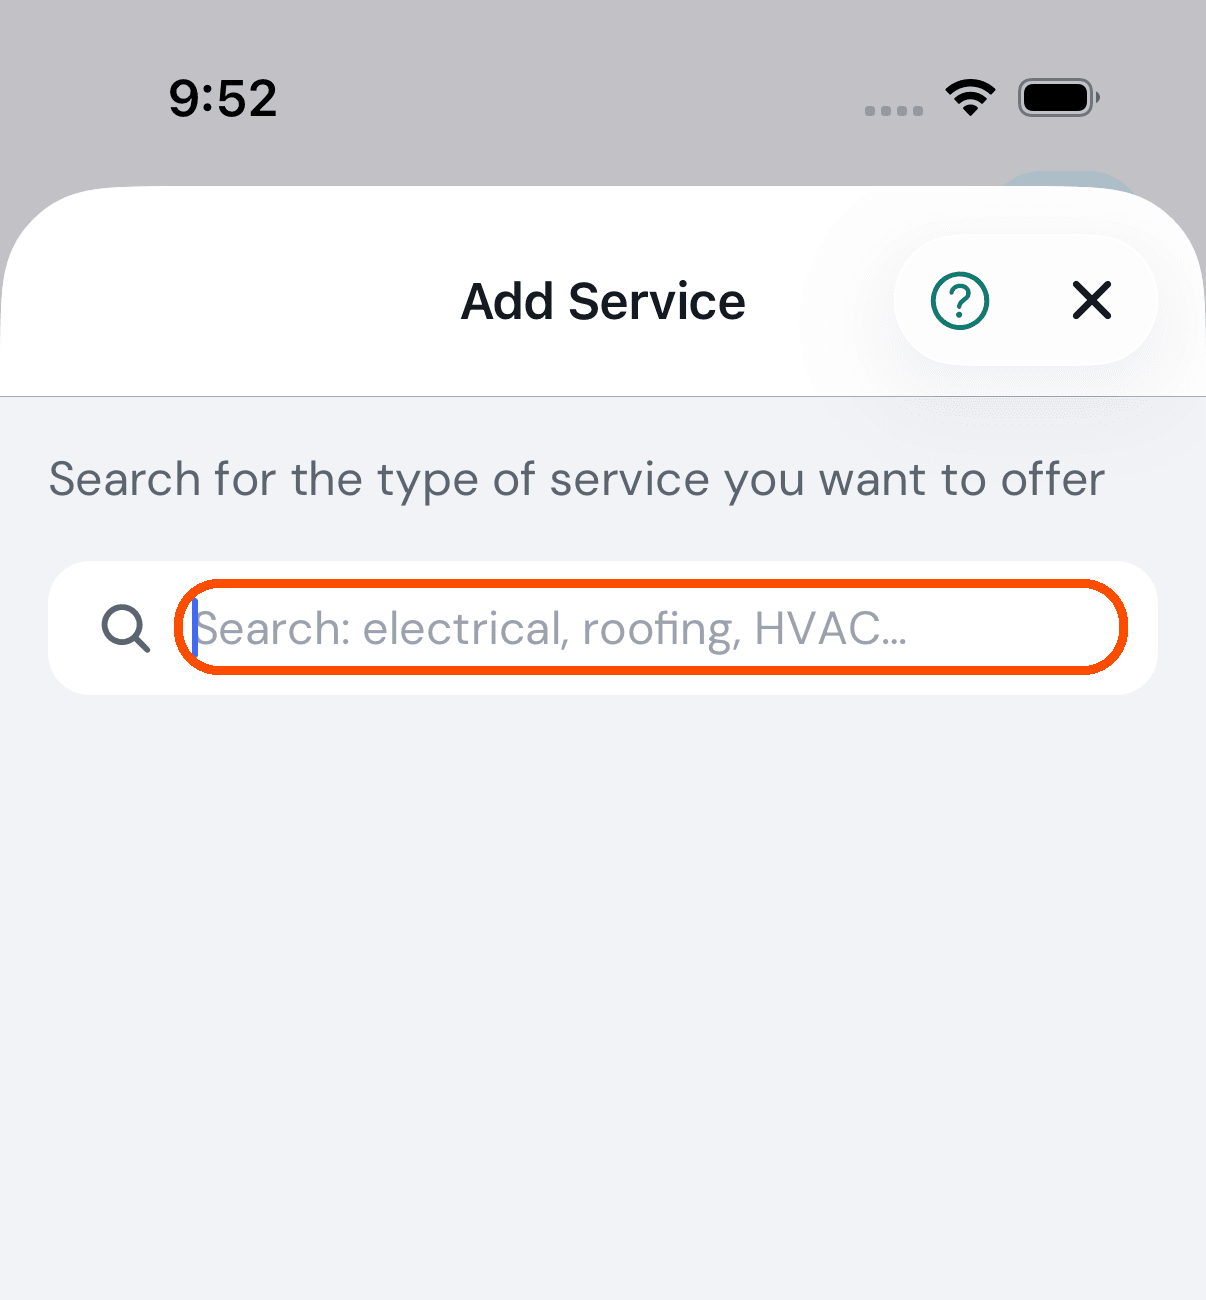
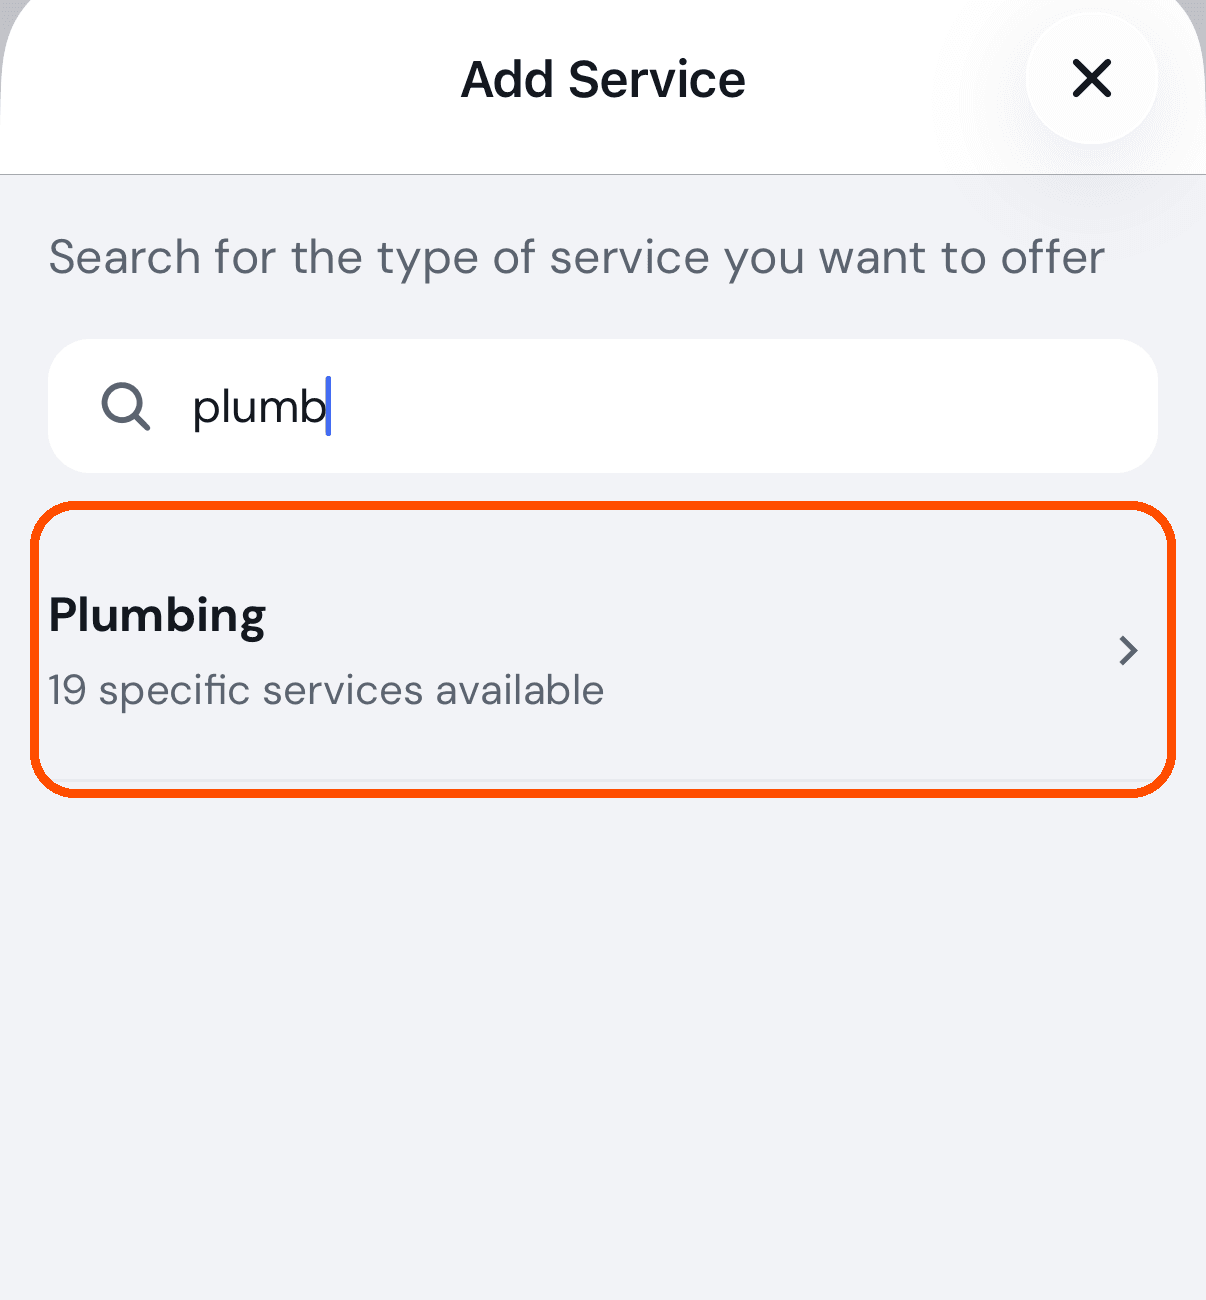
Type your trade — plumbing, electrical, cleaning.
-
Tap the trade when it appears. The line under it says how many services it holds.
-
Switch on each service you offer, then tap Add … Services at the bottom. The button counts them for you as you go.
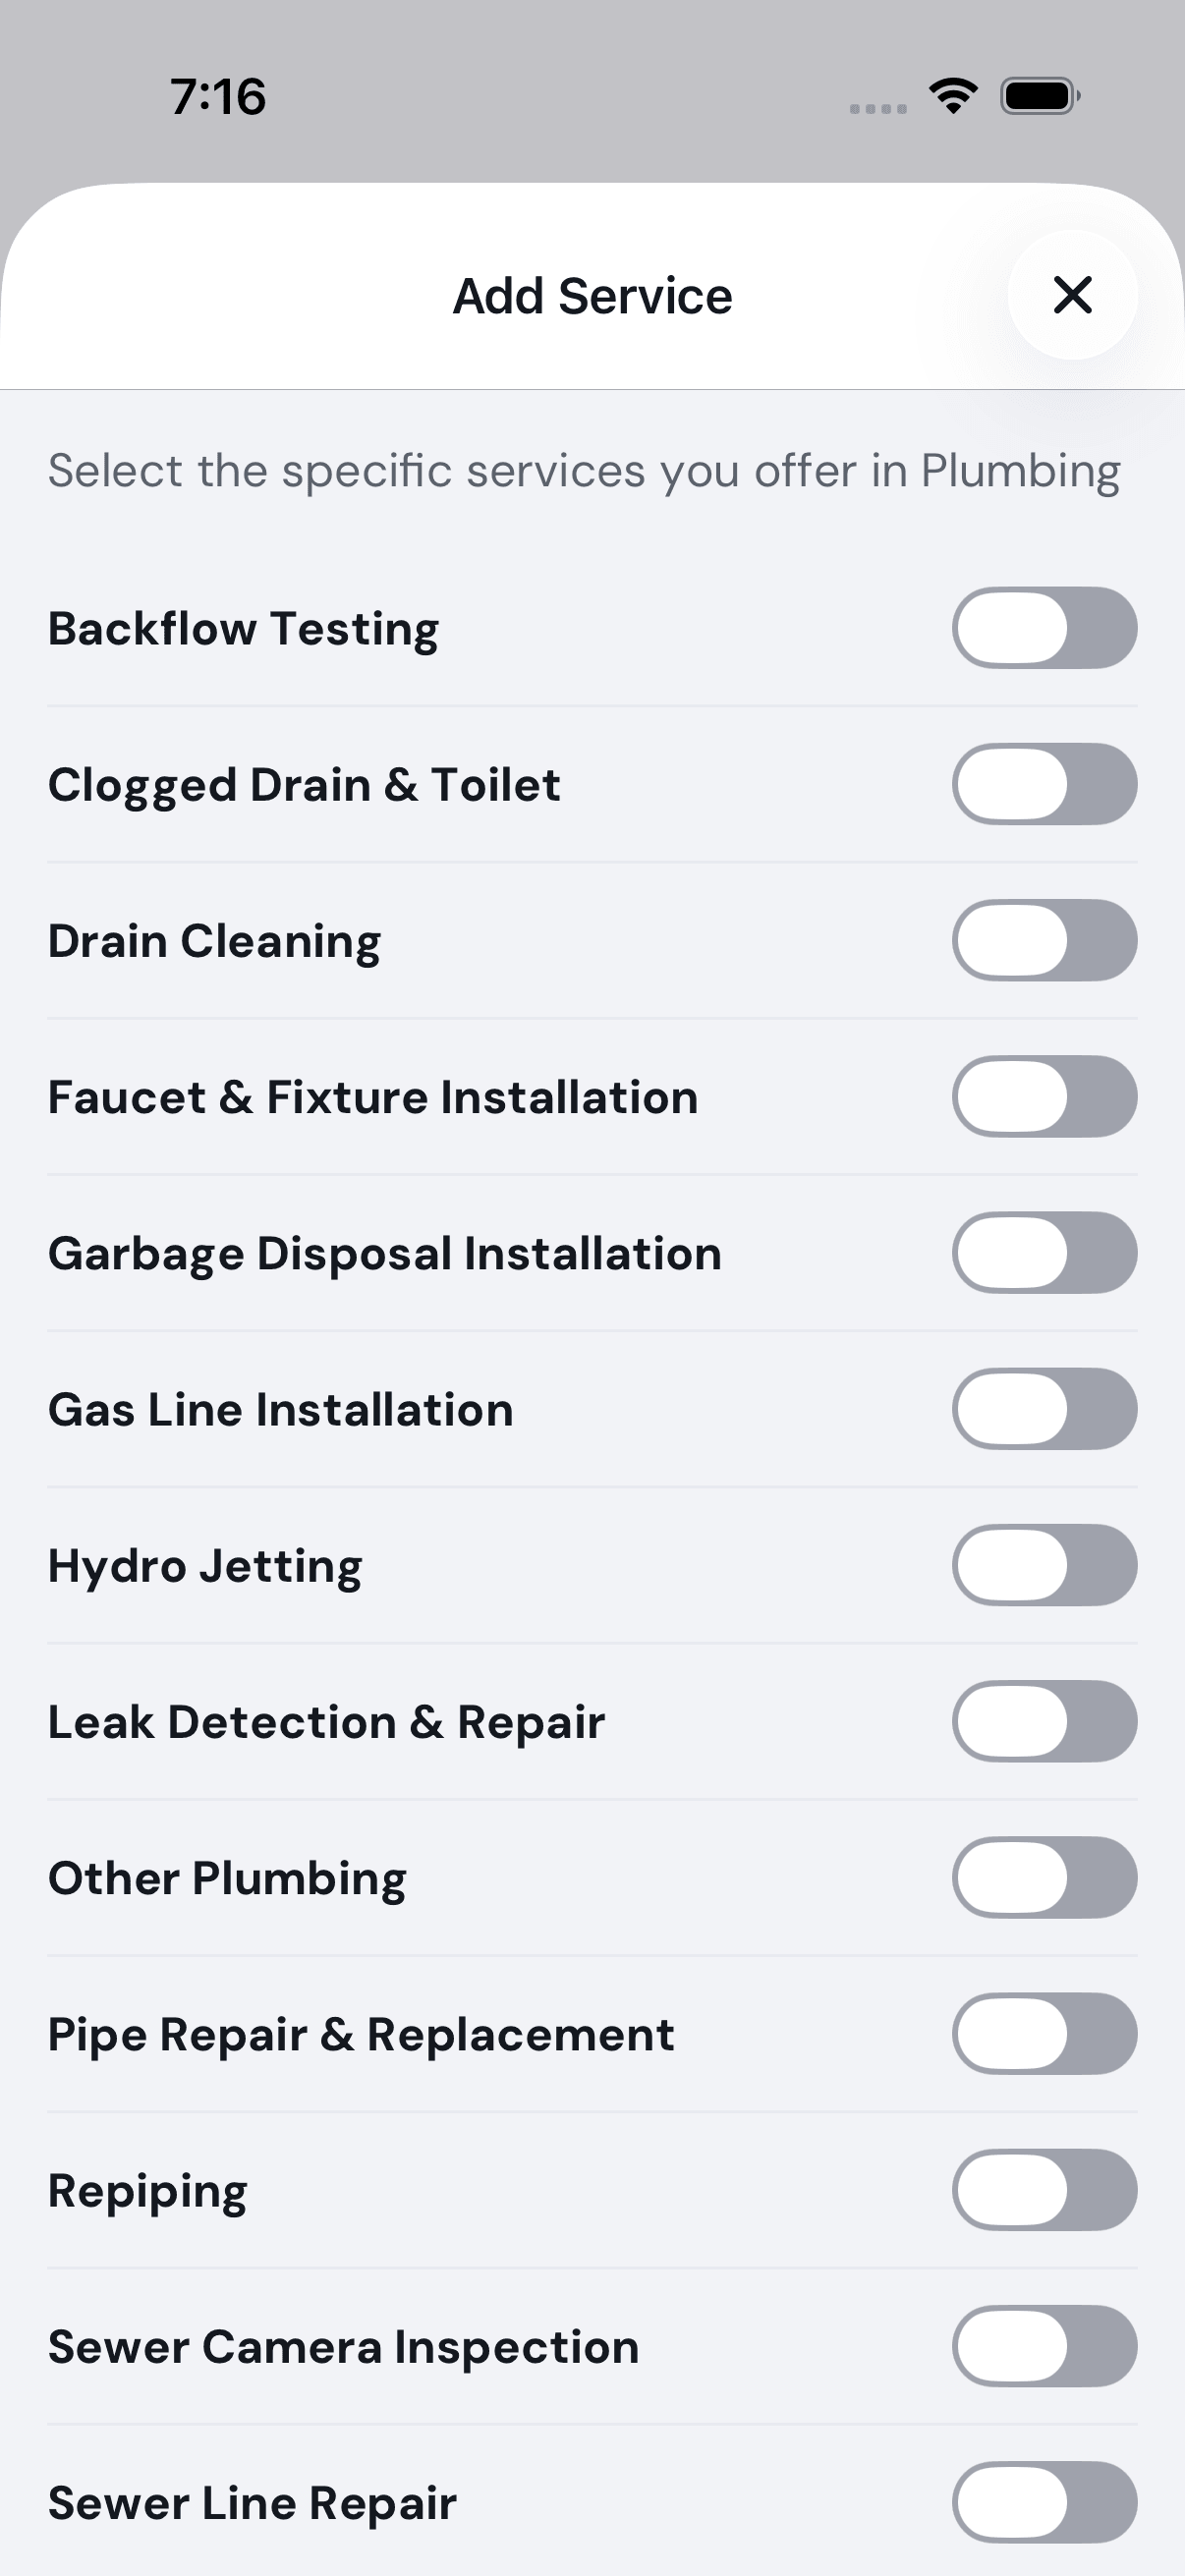
Afterwards the services are ticked on Services under their trade. To take one away, or to add another service in a trade you already have, tick or untick it there and tap Save changes.
Search for the trade, not the job. Typing drain finds nothing, even though Drain Cleaning is one of the services — it is inside Plumbing. Type plumbing and switch Drain Cleaning on in step 5.
No picture of the switches on or of the Add button being tapped: the automated walk stops at step 5 so that it never changes what Miles Plumbing offers.
How do I filter the reviews I am looking at?
There is no filter on Reviews. The screen has two tabs — Reviews and Requests, each with its count — and three numbers above the list: your average rating, how many reviews are Approved, and how many are Waiting for you.
How do I see invitations I have already sent?
When: you have invited someone to your team and want to know whether they have answered — or want to nudge them.
-
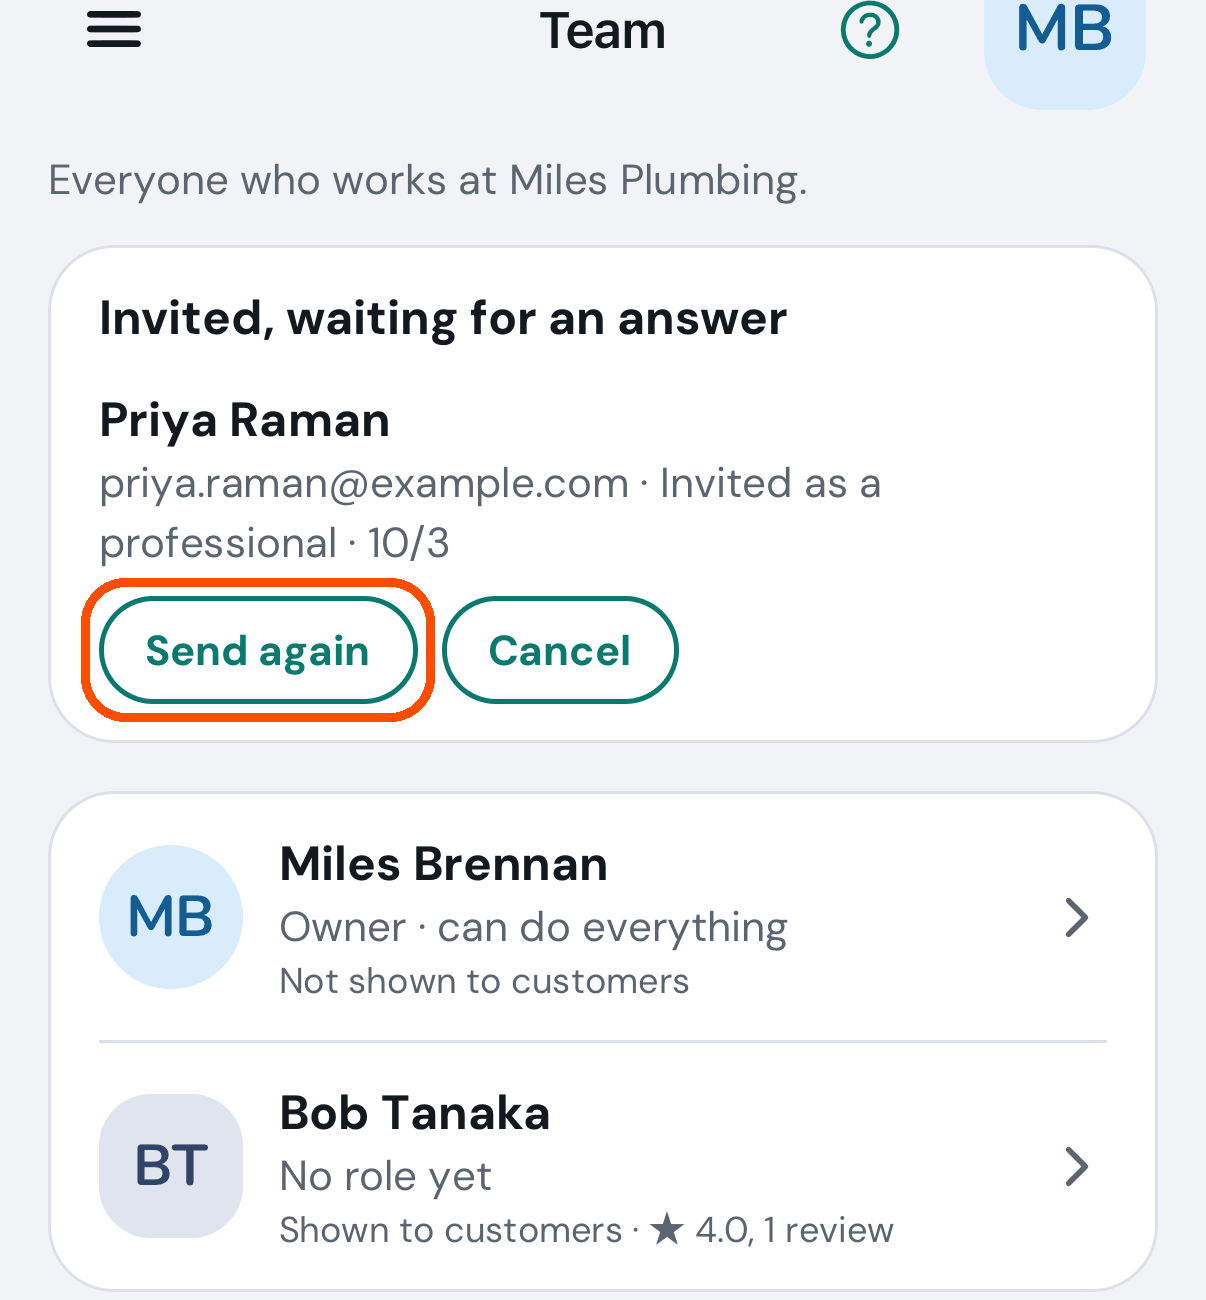
Open Team from the menu. Invitations nobody has answered are listed under Invited, waiting for an answer, above the people.
-
Tap Send again to send it again, or Cancel to withdraw it.
Somebody I invited has not replied. What can I do?
The invitation stays waiting until they accept it or turn it down. Send again it from Invited, waiting for an answer on Team — the steps are in the answer just above. Cancel withdraws it.
Reviews
How do I ask a customer for a review?
When: a job is finished and you would like the customer to say how it went — or simply to recommend you to the people they know.
Who can: the owner, or anyone given Ask customers for reviews. Without it Ask for a review and the Requests tab are not shown at all.
-
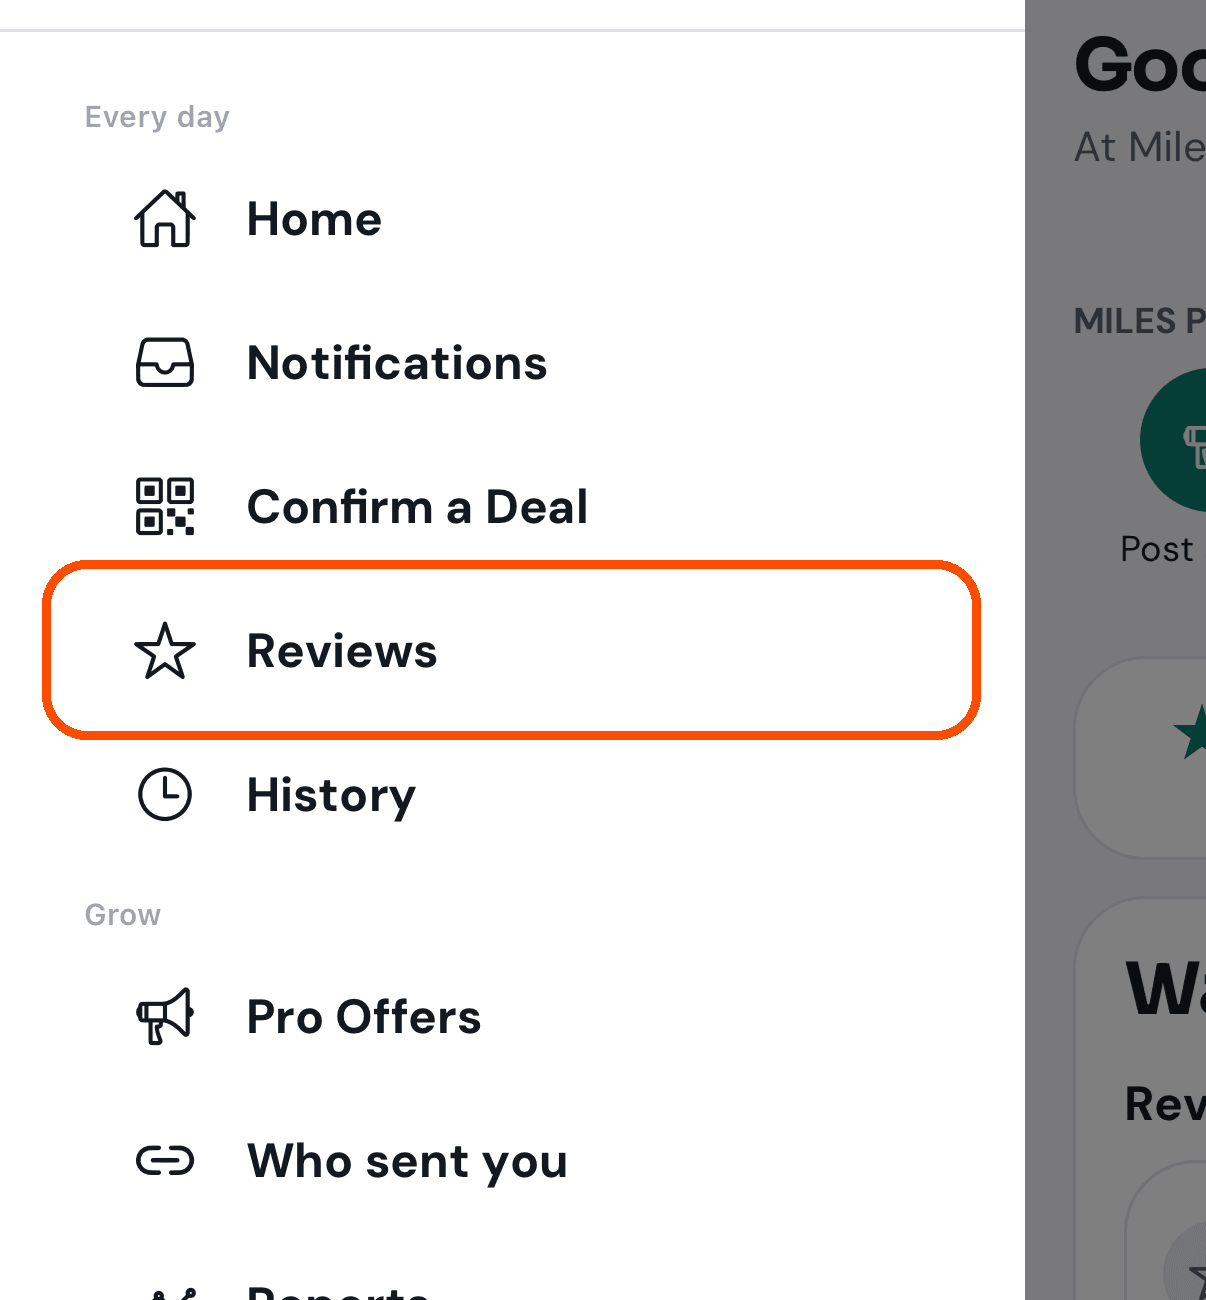
Open the menu (top left) and tap Reviews.
-
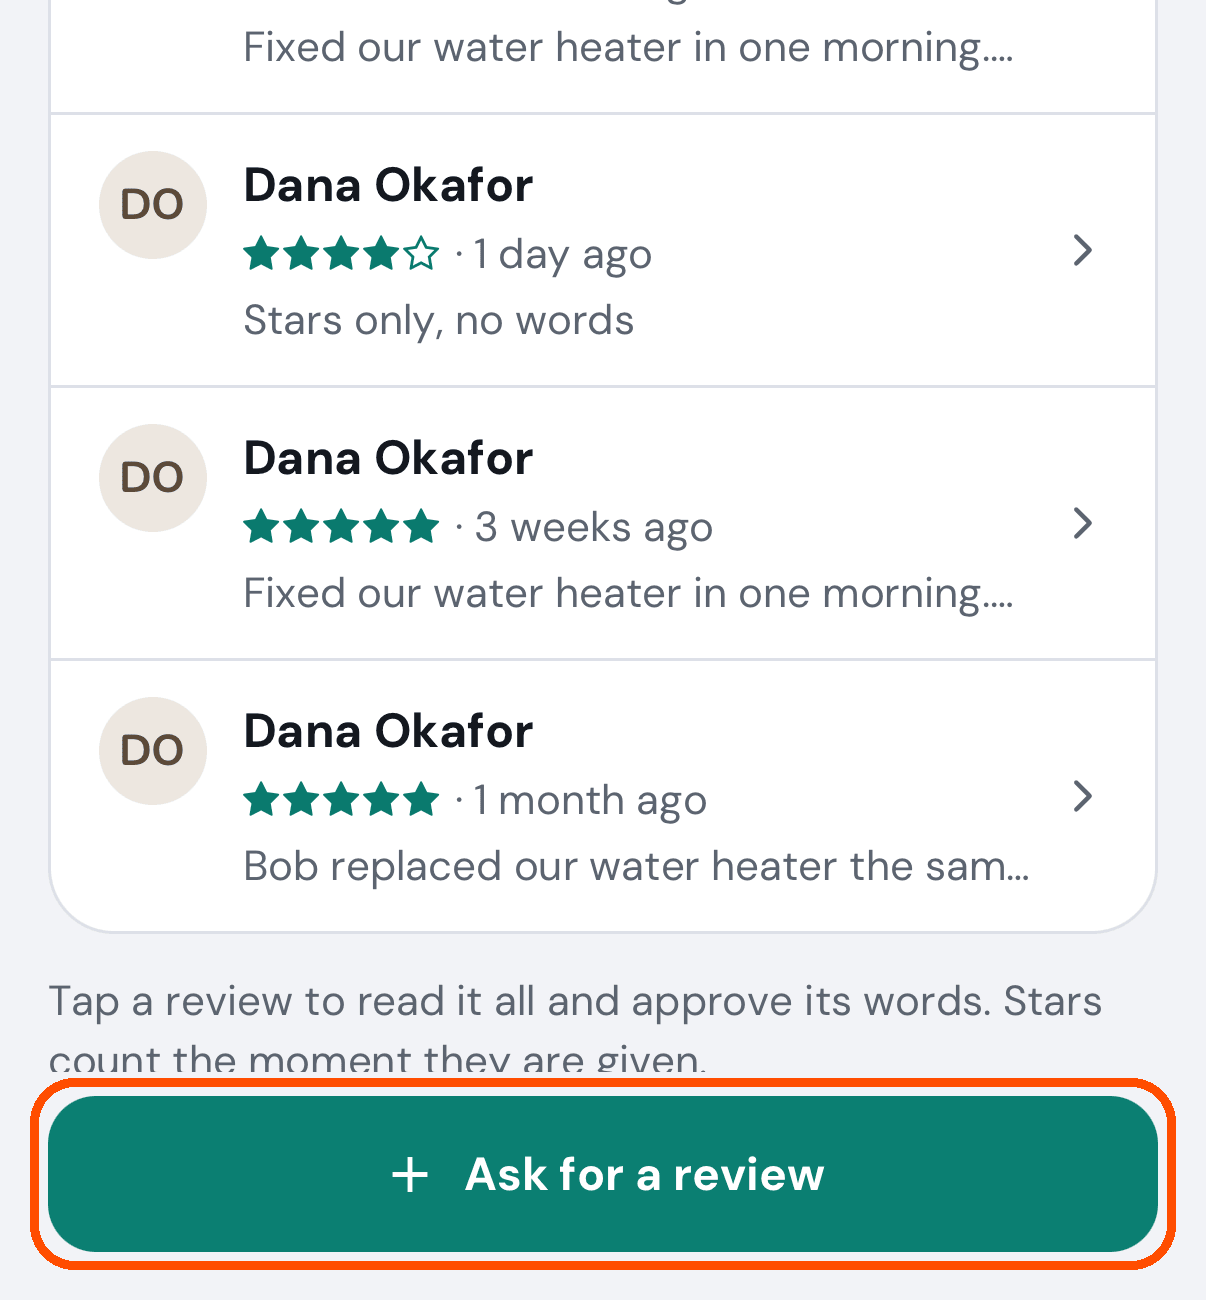
Tap Ask for a review, the wide button at the bottom.
-
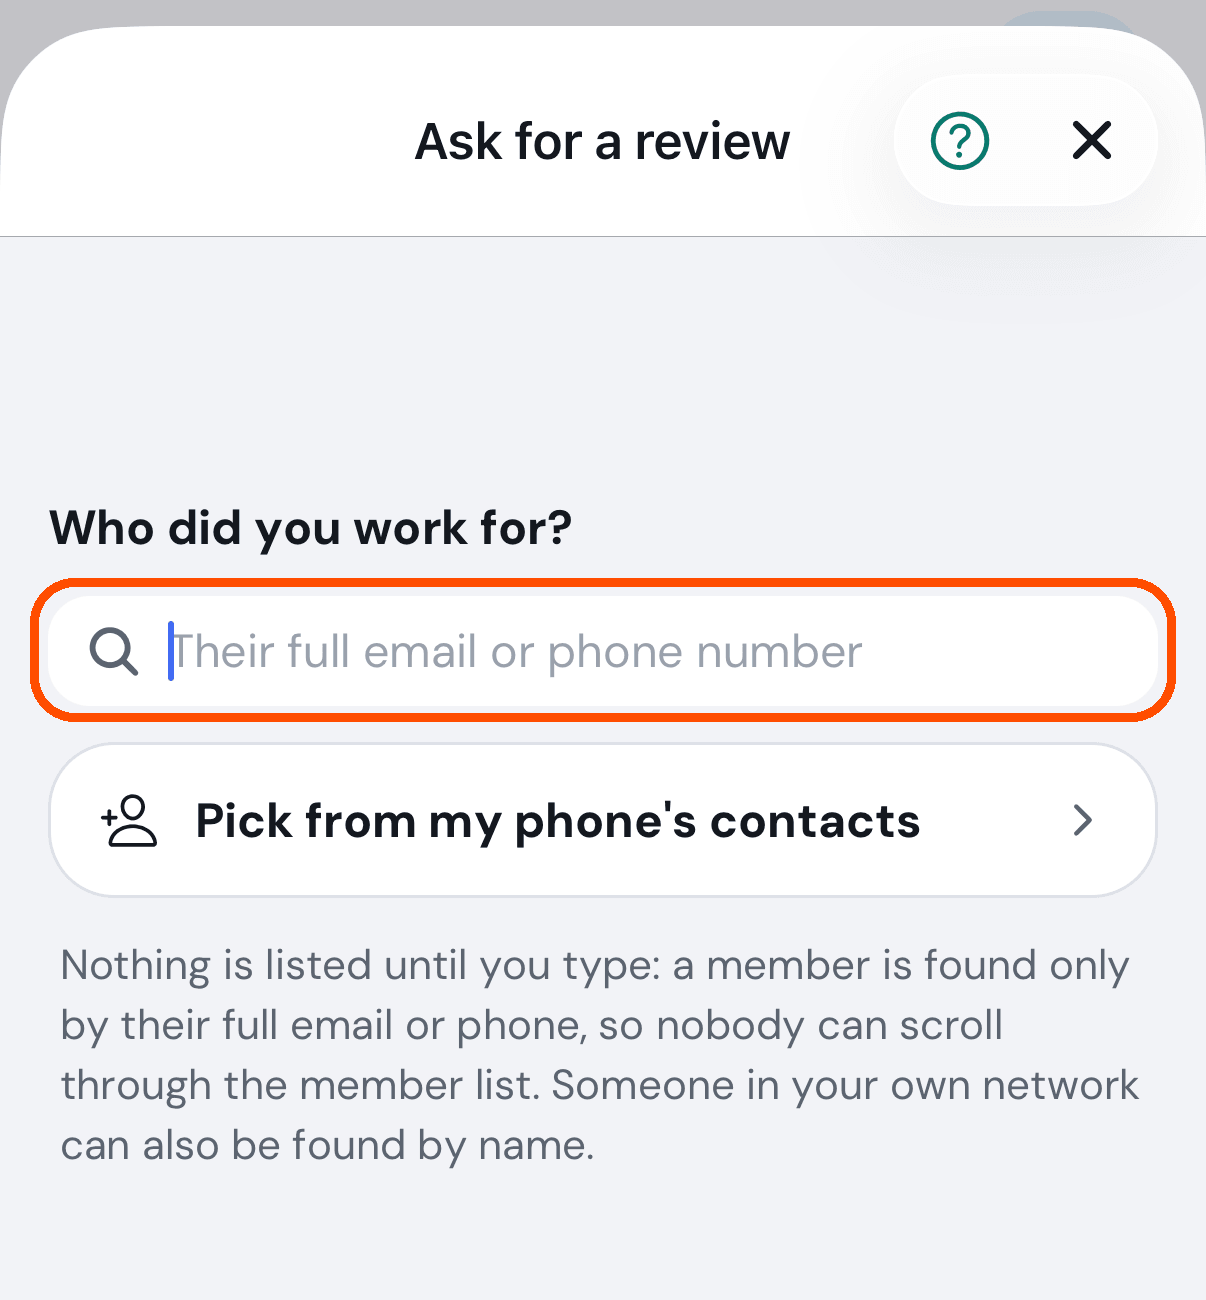
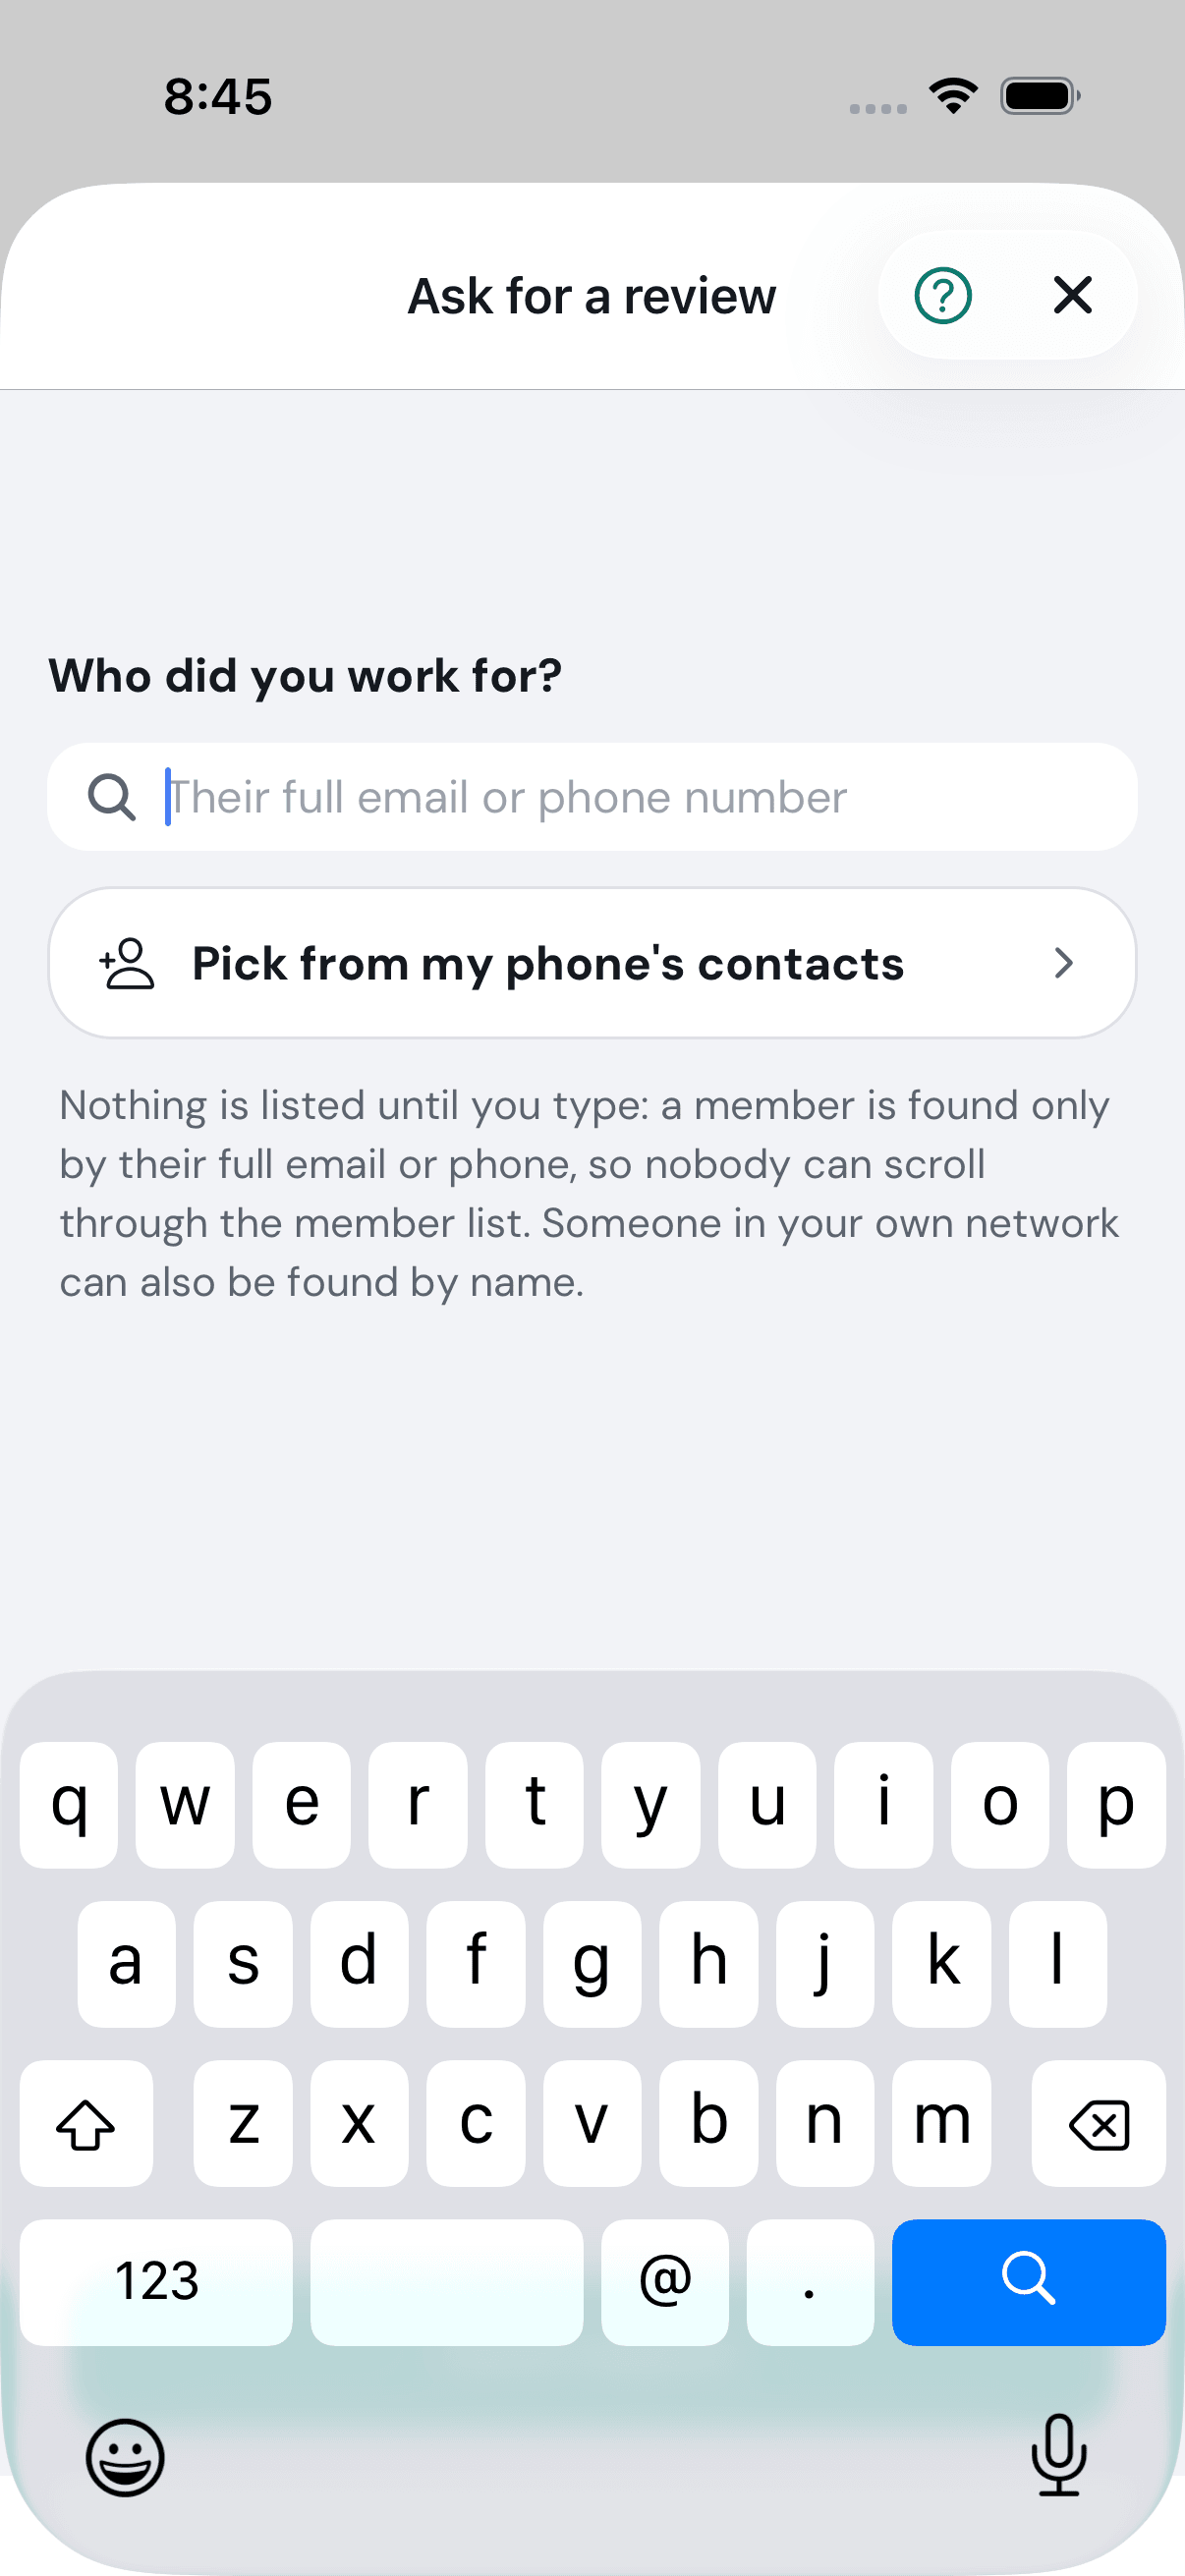
Under Who did you work for?, type the customer’s full email or phone number. Someone already in your own network can be found by name. Nothing is listed before that, so nobody can scroll through your customers. Pick from my phone’s contacts, under the box, brings them in from your contacts instead.
-
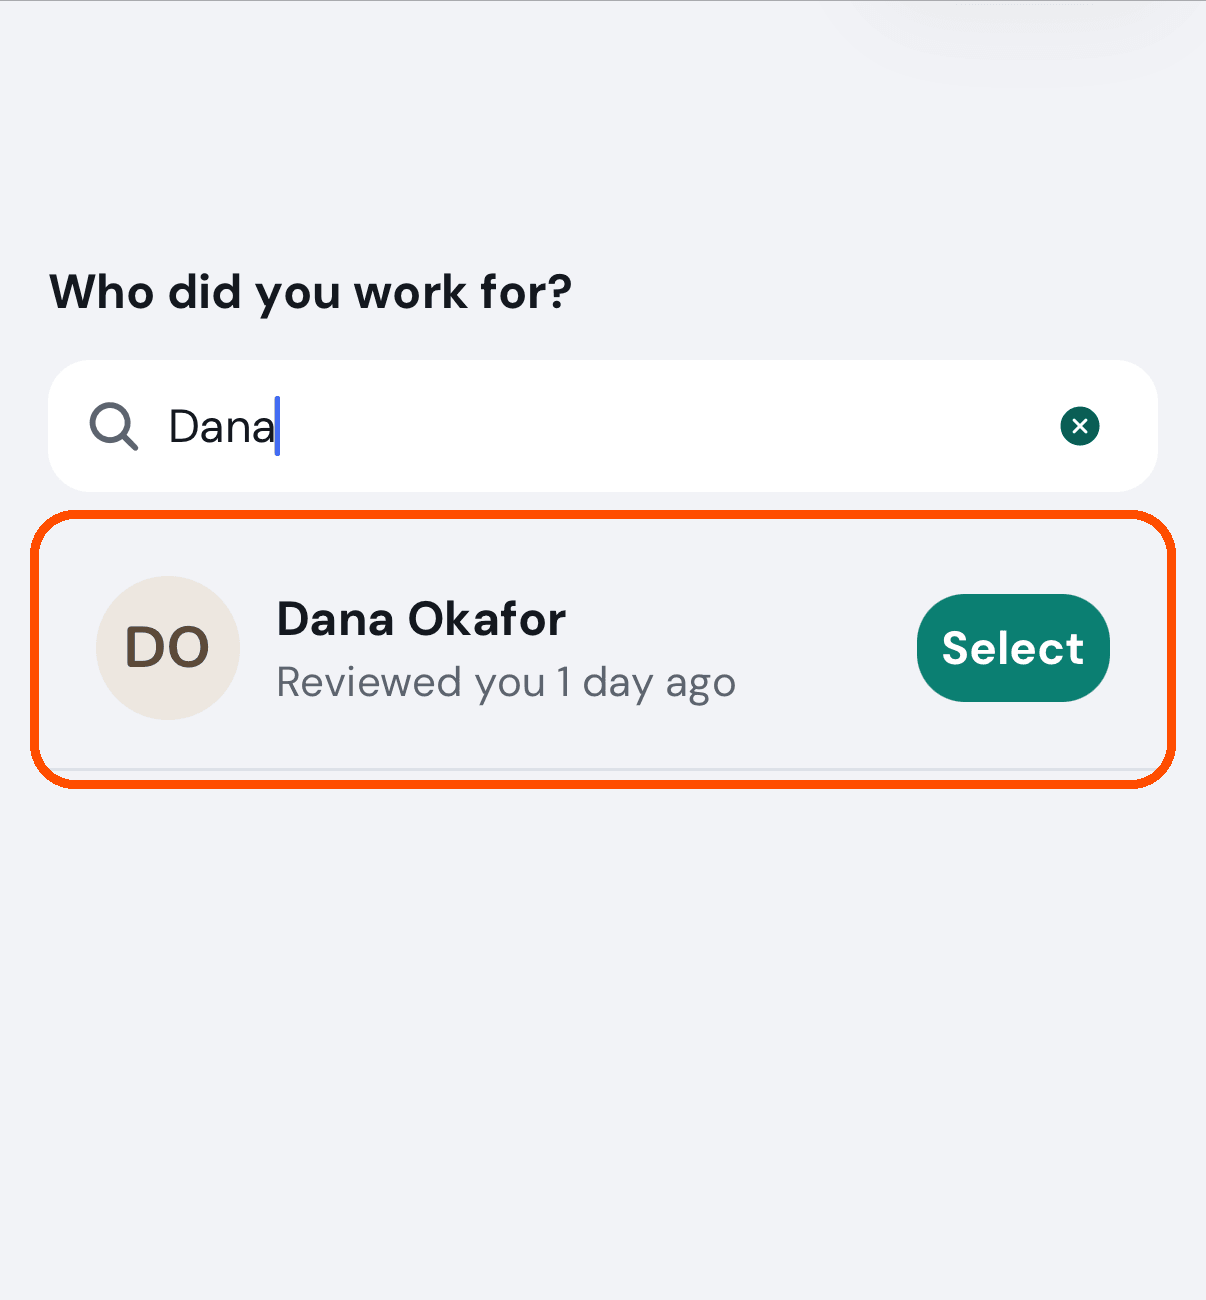
Tap the customer.
-
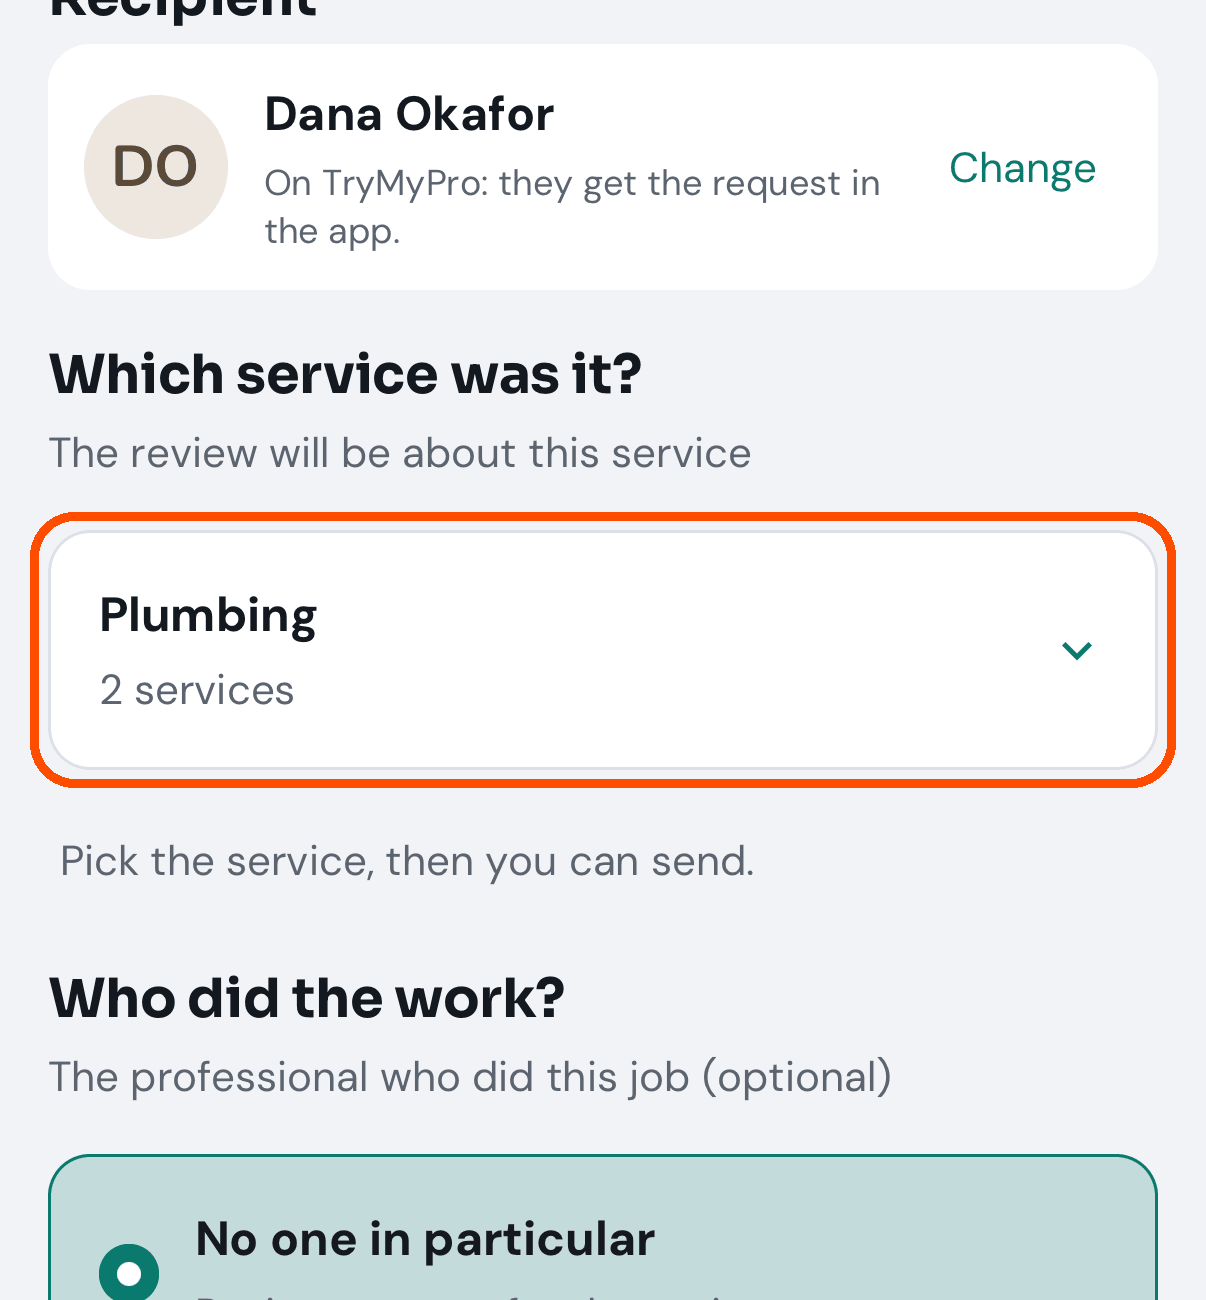
Open Which service was it? and tick the job you did. If you offer only one service it is ticked for you.
-
Tap the send button. Further down the same screen you can first name the team member who did the work and add a message of your own; both are optional. The button says what it does: Open Messages to send or Open Mail to send when you have a phone number or email for the customer (both buttons when you have both), and Send in the app for someone already on TryMyPro. It opens your own phone’s text or email app with the message and the review link already in it, ready for you to press send: “Hi Dana! Thanks for choosing Miles Plumbing. If we did a good job, would you endorse us on TryMyPro? It helps your friends and neighbors find us when they need a pro. It takes 30 seconds, no app needed:” and the link, or by email a short letter signed with your first name. Your message goes in too. The link opens the review form in the customer’s browser: stars, Endorse, then details if they like. The service and the team member are on that form.
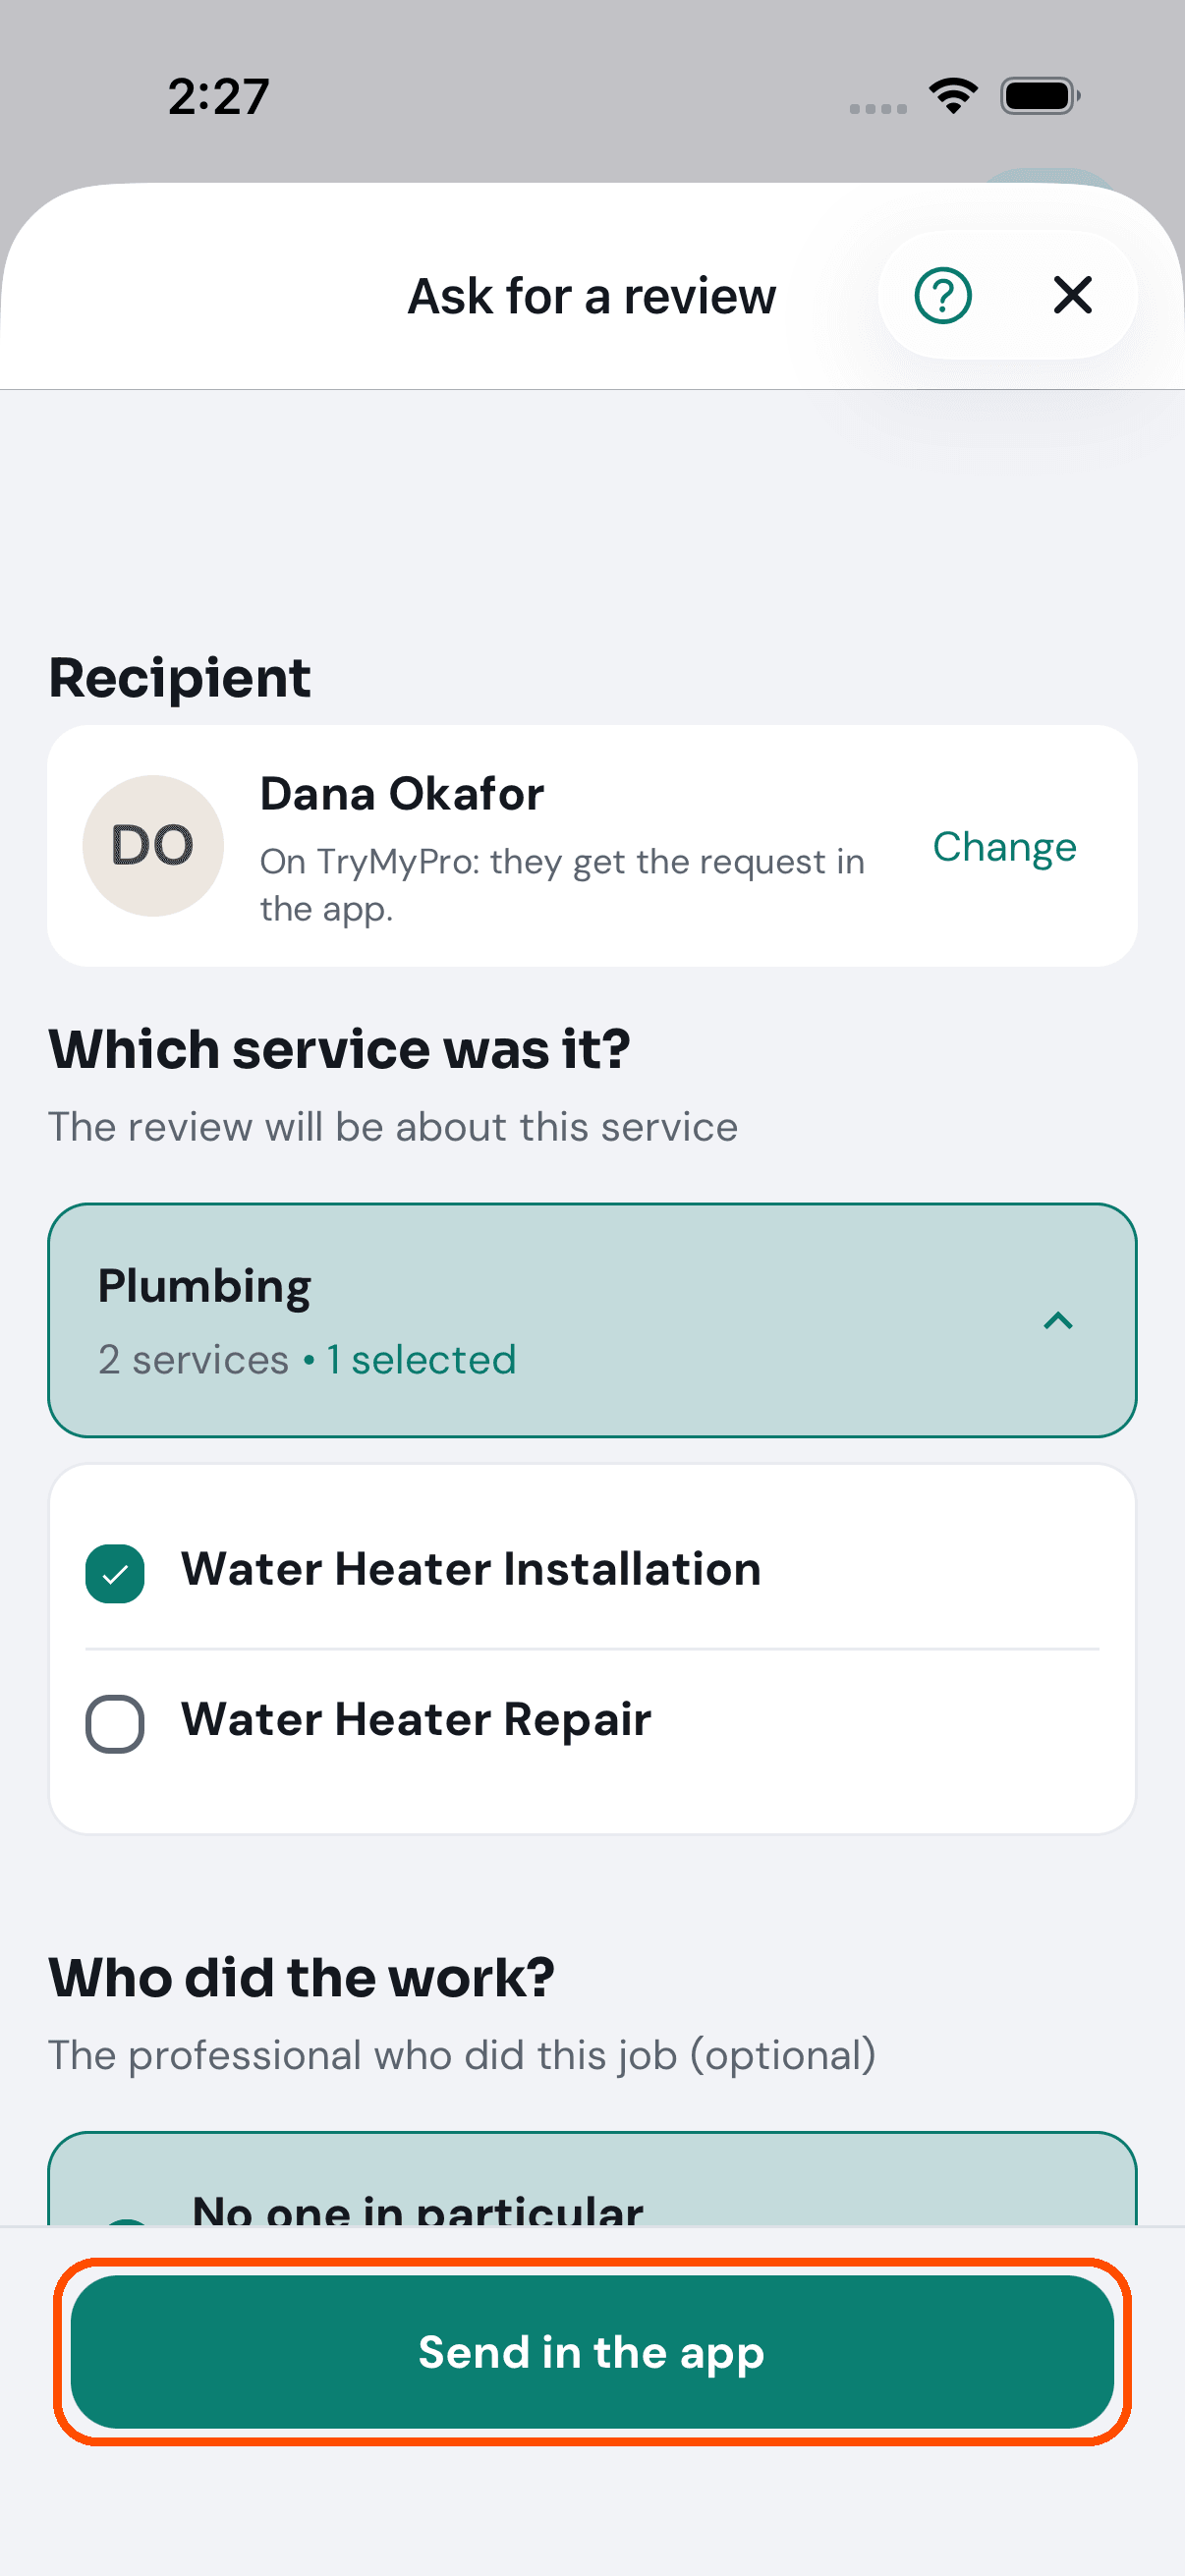
Afterwards the request is on the Requests tab of the same screen, under Open until it is answered: the customer’s name, the service and who did the work, Waiting until they answer, how it was sent (by text, by email or in the app, never their address or number) and how many days are left to answer, and your message. A request lasts thirty days. Send again (shown only for a customer who is on TryMyPro) gives it thirty more and reminds them in the app; Show QR code lets them scan it on the spot. Take back this request, the quiet line under the buttons, stops their link working; it asks first.
The send button stays grey until a service is ticked. The grey line “Pick the service, then you can send.” is the reason.
No picture of the request being sent: the automated walk stops at step 6 so that no request is created each time the pictures are retaken.
A review is not showing on my public profile. Why?
Star ratings appear as soon as a customer submits them. The words wait for you to approve them. Until you do, the review’s text is not published.
A review marked Waiting to join was left on the website by someone who has not joined TryMyPro. Only Members’ ratings count, so it stays off your profile and out of your stars until they join with the email or phone they gave and finish it in the app. You cannot edit it, approve it into publication, or share it meanwhile.
Can I change what a customer wrote?
No. The Edit Review screen shows you the customer’s own rating form, but the system refuses any change to their ratings or their words — the only thing you may change is which services the review is filed under. The screen offers more than it will accept, so do not expect a change to the stars or the text to stick.
Who sent you is empty. Is it broken?
Not necessarily. It lists only the customers who have answered the question “how did you find us?”, which the app asks when somebody looks at your profile. A question that was asked and never answered does not appear. With no answers in the period you chose, the screen says “No new member has answered yet in this period.” Try All time to see every answer.
Posts and offers
How do I post a deal?
When: you have a deal to tell people about.
Who can: the owner, or anyone given Post and edit deals. For everyone else there is no Pro Offers in the menu.
-
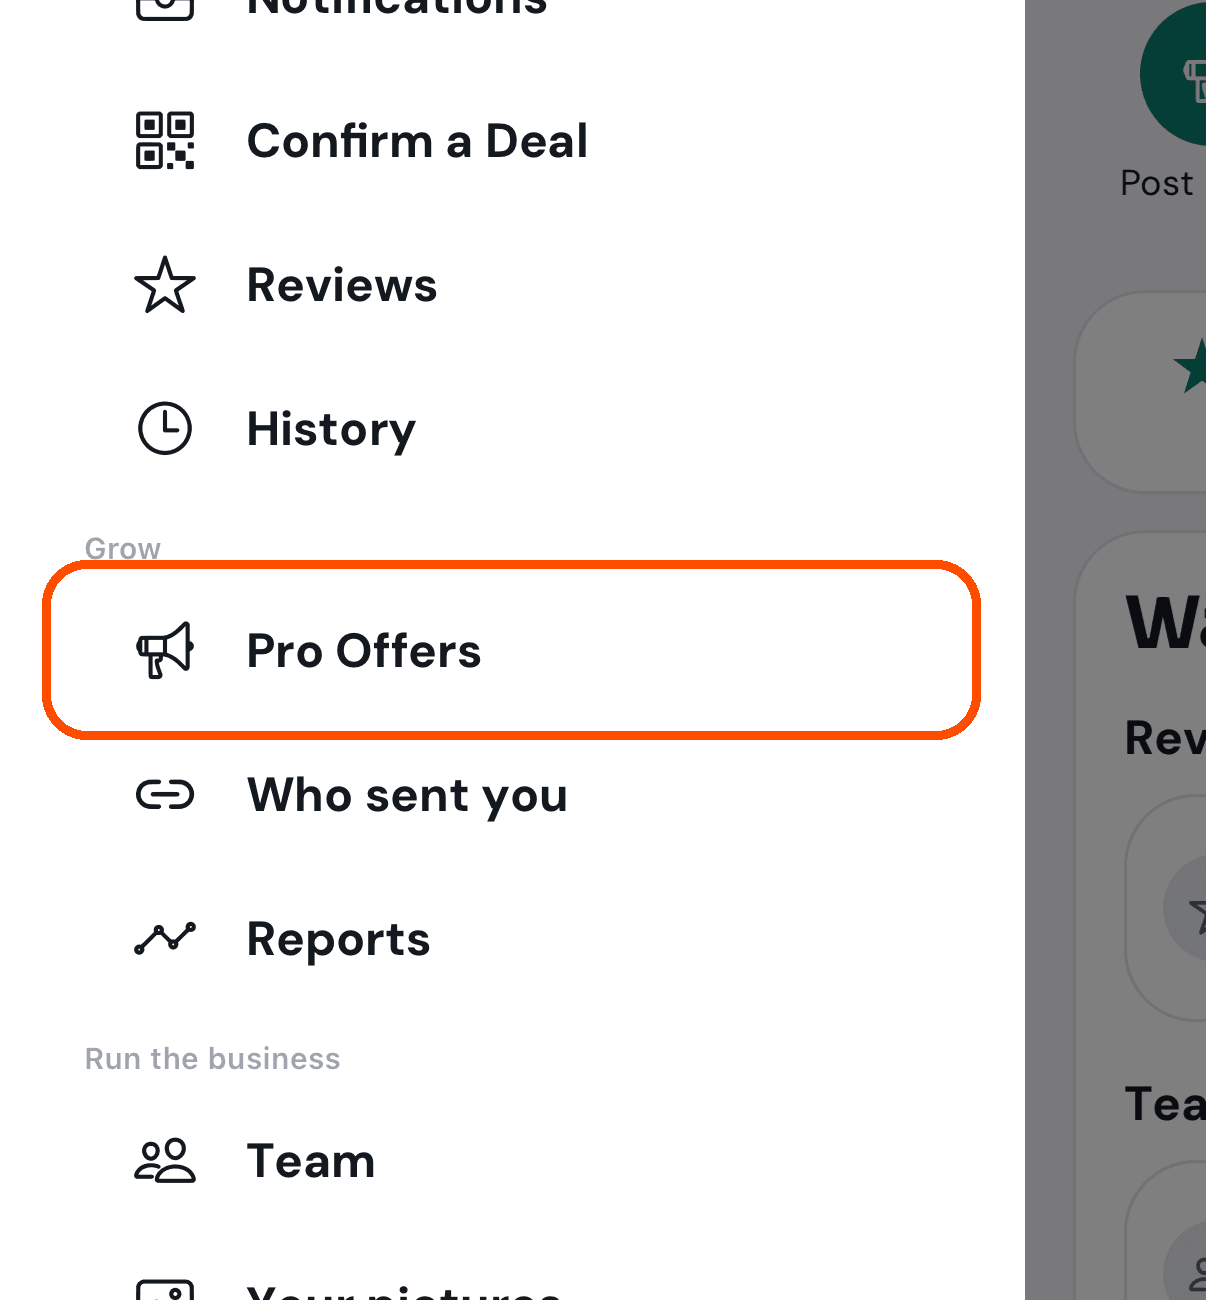
Open the menu (top left) and tap Pro Offers, under Grow.
-
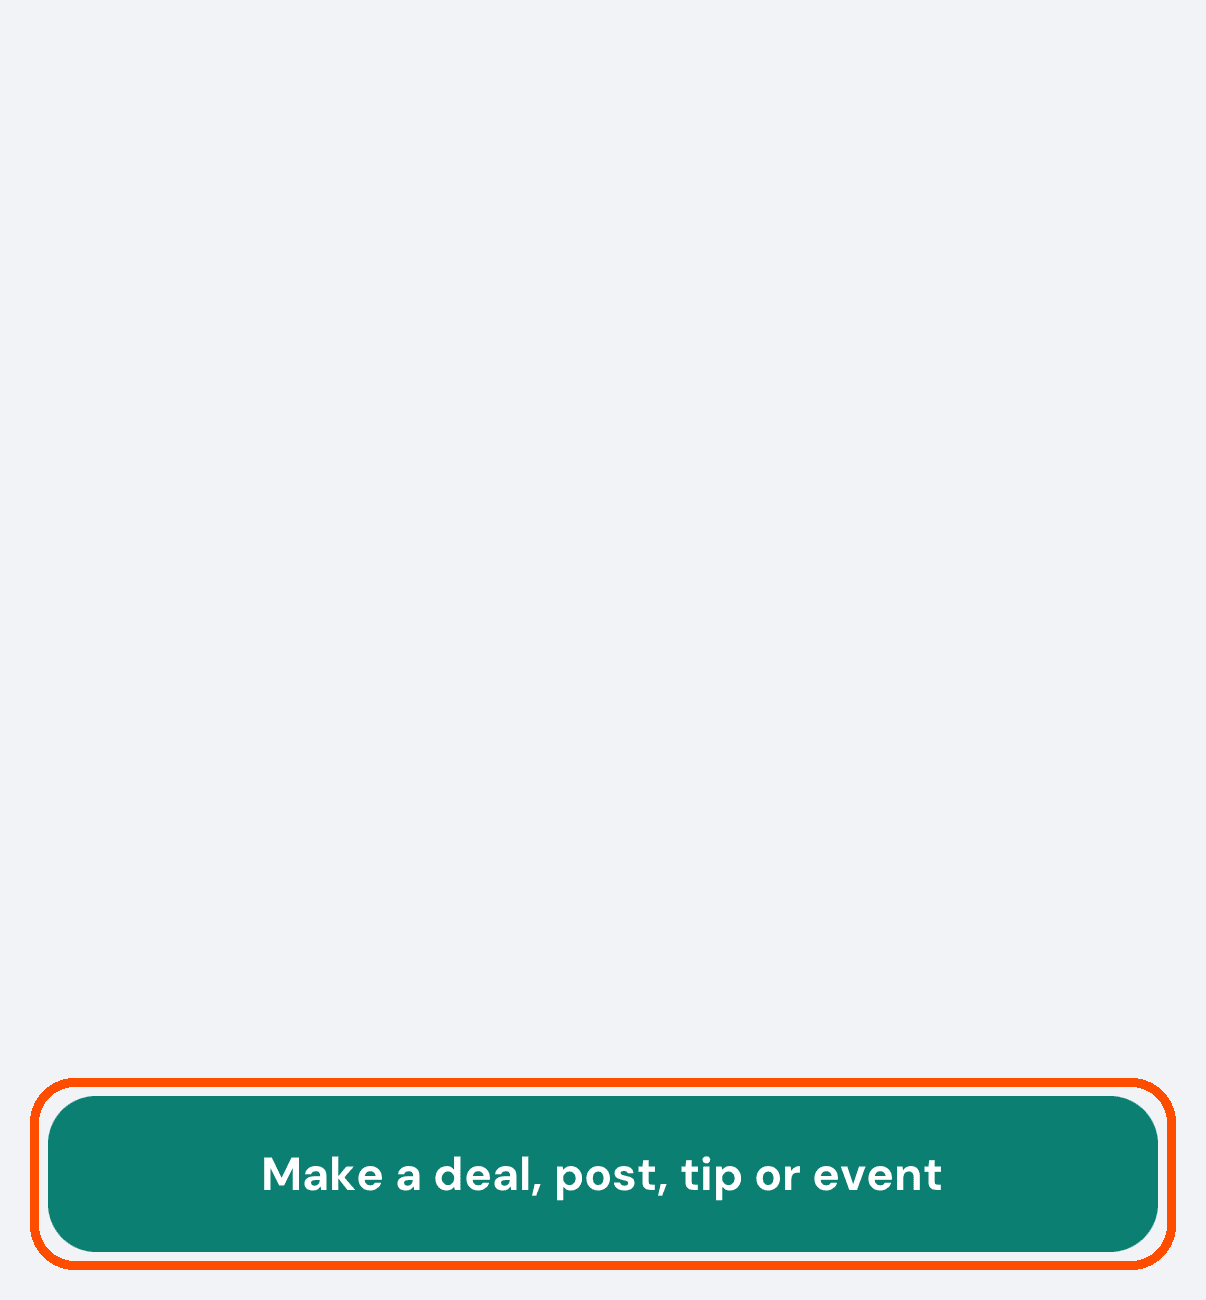
On Pro Offers, tap Make a deal, post, tip or event below the list.
-
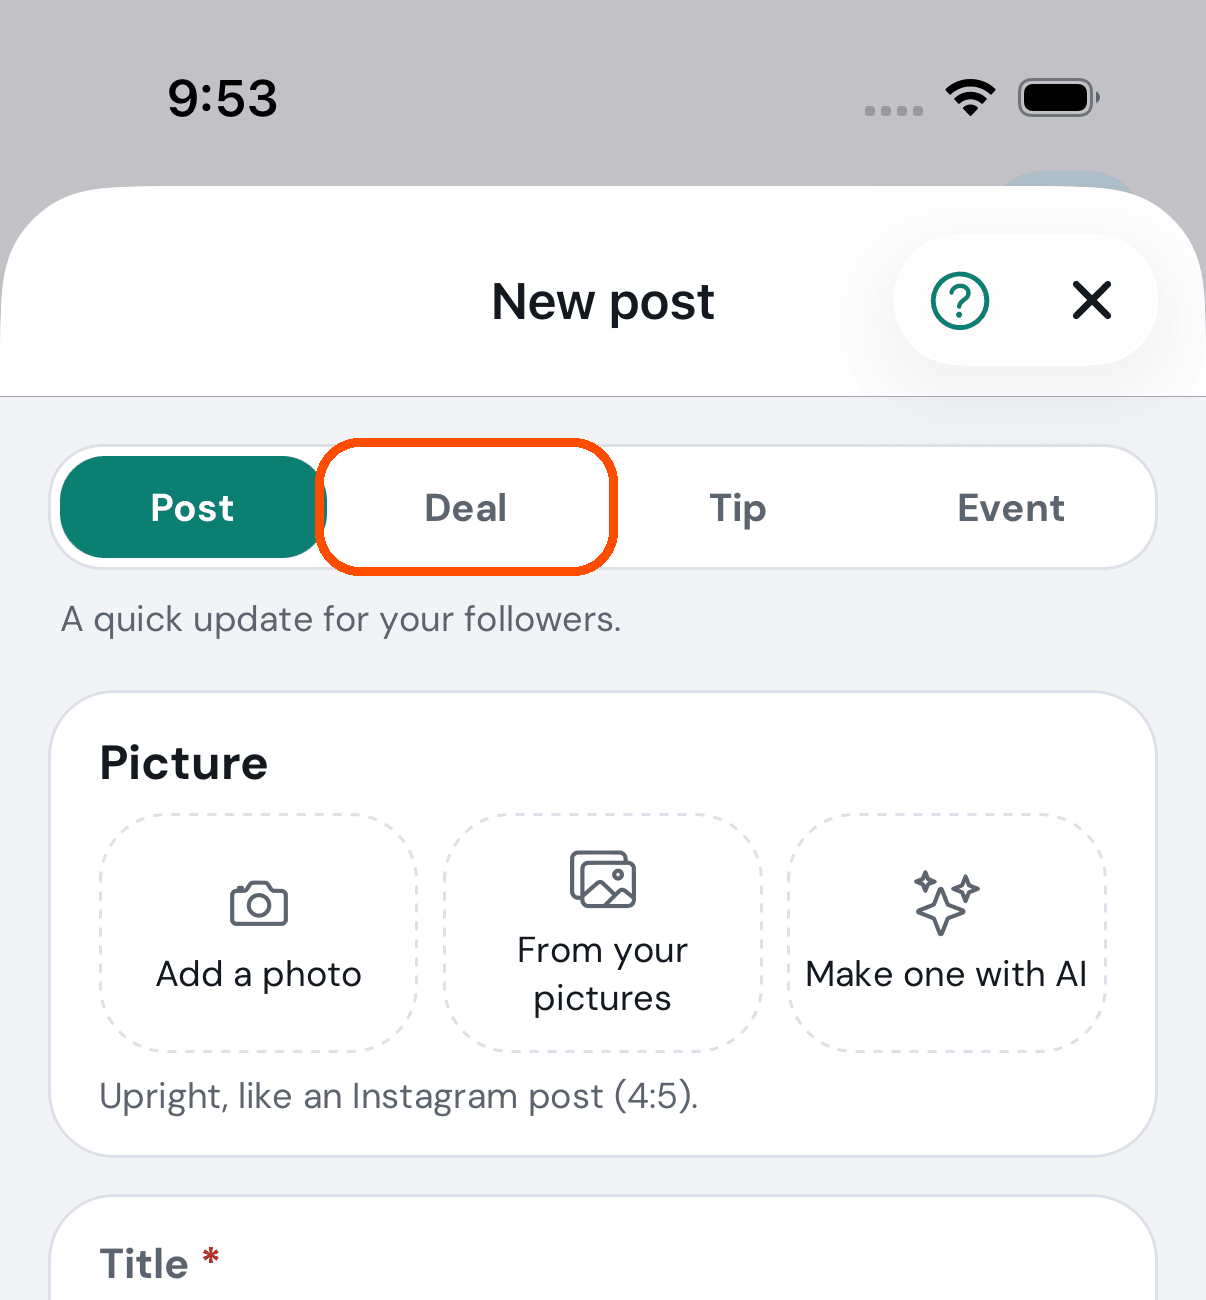
At the top of New post, tap Deal. (The others are Post, a quick update; Tip; and Event.)
-
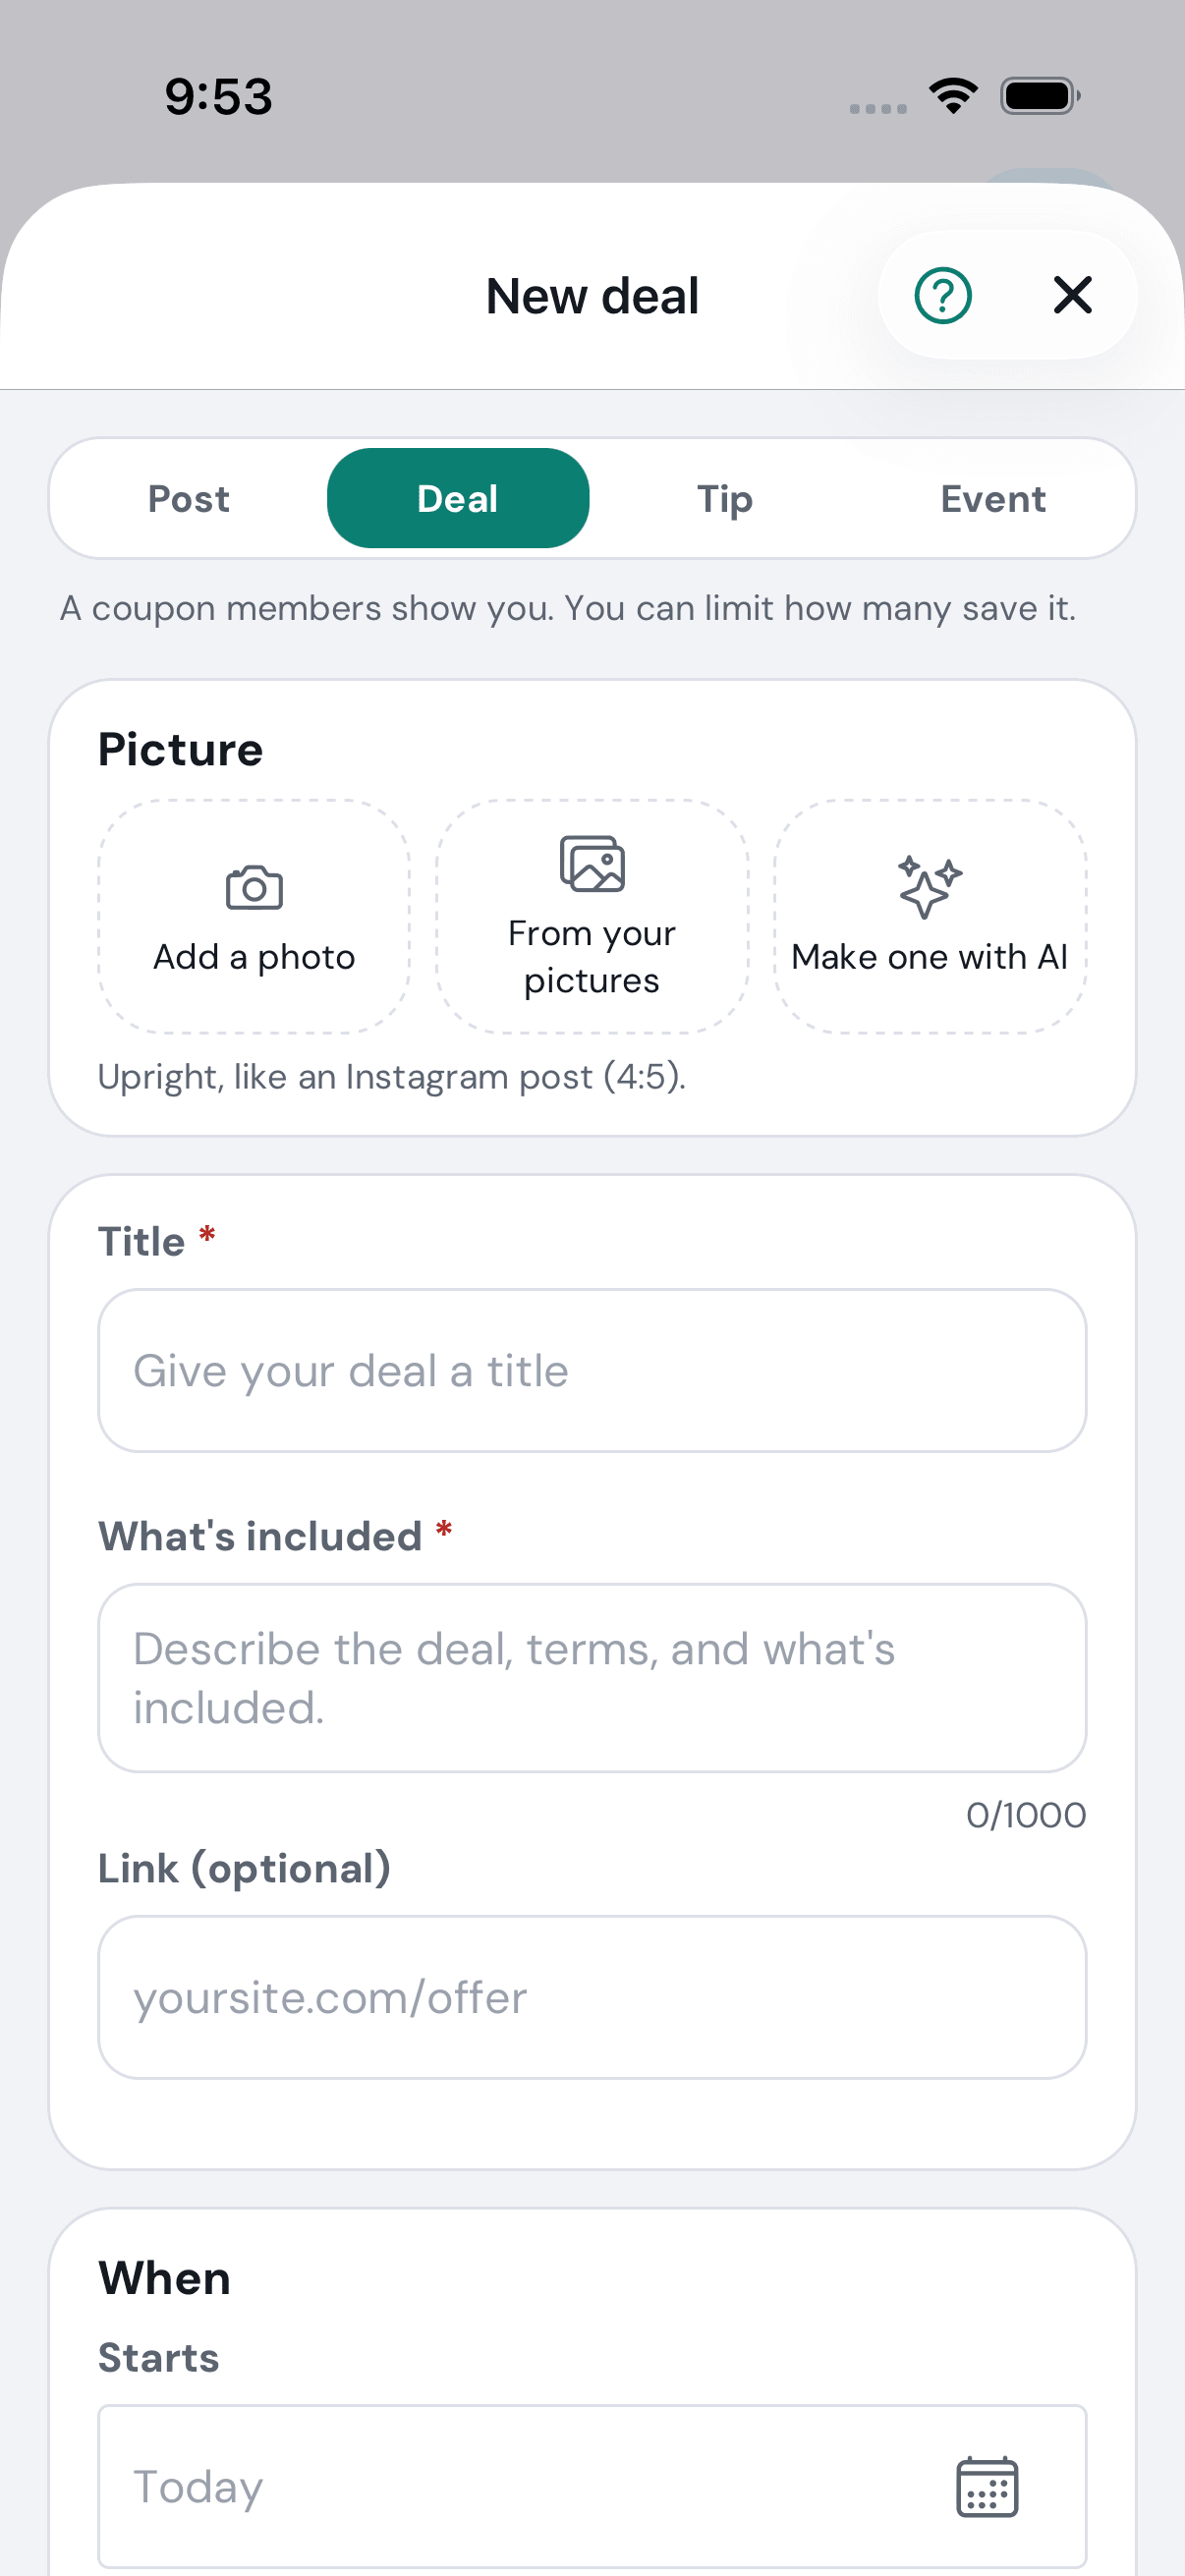
Add a picture if you want one (Add a photo, From your pictures or Make one with AI), then fill in the Title and What’s included: the deal, its terms and anything in the small print.
-
Under When, set when it Starts and Ends. Under Saving and using it, tap How many can save it if only so many people may (it starts on No limit), and A saved deal is held for to choose 7, 14 or 30 days, or until the deal ends. Turn on Scan to confirm each use if you want every use scanned or typed in by your team; off, customers just show the deal and it counts at once. Who is this for? starts on Everyone; tap it to choose. Then tap Post deal at the end of the form.
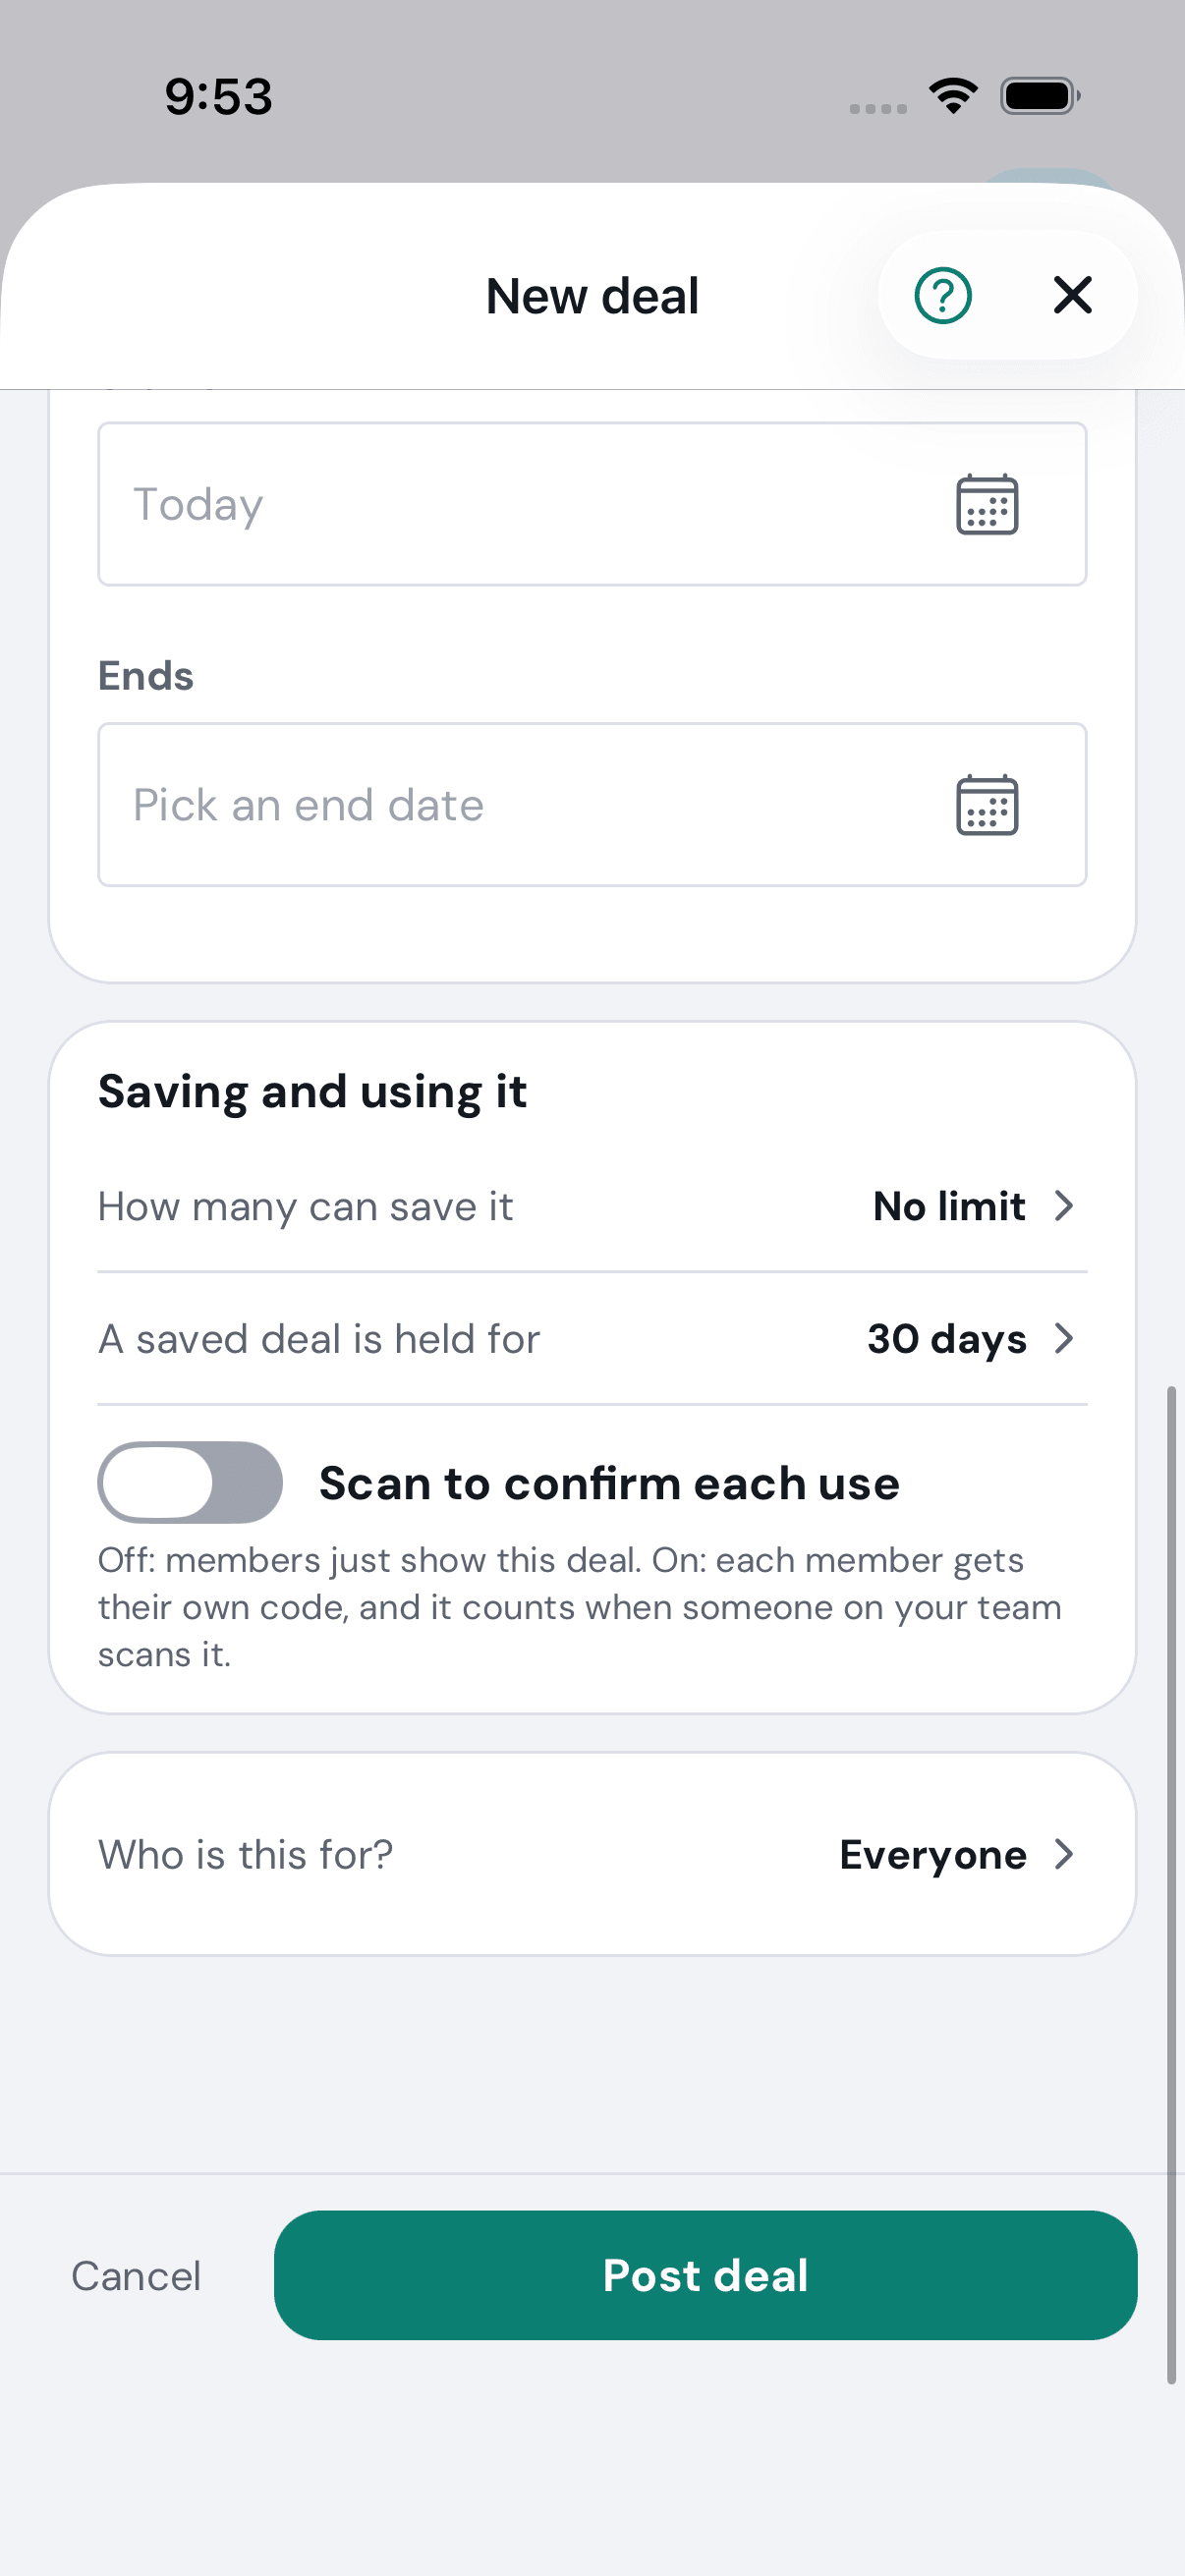
Afterwards the deal is under Showing now on Pro Offers — or under Starts later if you gave it a start date still to come, and then customers do not see it until that day. Tap it to see how it is doing, or to edit, pause or delete it.
A day begins the evening before, US time. A start or end day is kept as midnight UTC, so “the 20th” begins at 8 PM Eastern on the 19th, and a deal “ending the 5th” stops showing that same evening of the 4th.
A deal has no separate price. If you want customers to see one, say it in the title or the description.
No picture of a finished deal being posted: the automated walk photographs the blank form and shuts it, so that it never posts anything.
How do I post an update, a tip or an event?
When: you have news, a piece of advice, or something happening on a day — not a deal to save and use.
Who can: the same people as for a deal.
- On Pro Offers, tap Make a deal, post, tip or event below the list.
- At the top of New post, tap Post (a quick update), Tip or Event.
- Add a picture if you want one, then a Title, a Description and, if you like, a Link.
- For an Event, say When it happens and Where (a town, or “Virtual”).
- It shows as soon as you post it. To show it later, tap Schedule this for later and pick when it Starts and, if it should stop, when it Ends. Post now instead takes that back.
- Who is this for? starts on Everyone; tap it to choose. Then tap Publish post (or Post tip, Post event).
Unlike a deal, nobody saves or uses an update, a tip or an event, so there is no limit, hold time or scanning.
How do I change, pause or delete a deal?
Who can: the same people as for posting one. The same buttons work for a post, a tip or an event.
- On Pro Offers, tap the deal.
- At the foot of the deal:
- Edit opens it in the same form you made it with; Save changes keeps what you change.
- Pause hides it from customers until you tap Resume. It keeps its numbers.
- Publish now, on one set to start later, shows it at once.
- Delete this deal (in red) removes it for good. It cannot be undone; pause it instead if you might want it back.
To end a deal on a set day, Edit it and change when it Ends.
How do I confirm a deal a customer shows me?
When: a member shows you one of your deals on their phone and wants it confirmed.
Who can: the owner, or anyone given Confirm deals. For everyone else there is no Confirm a Deal in the menu.
-
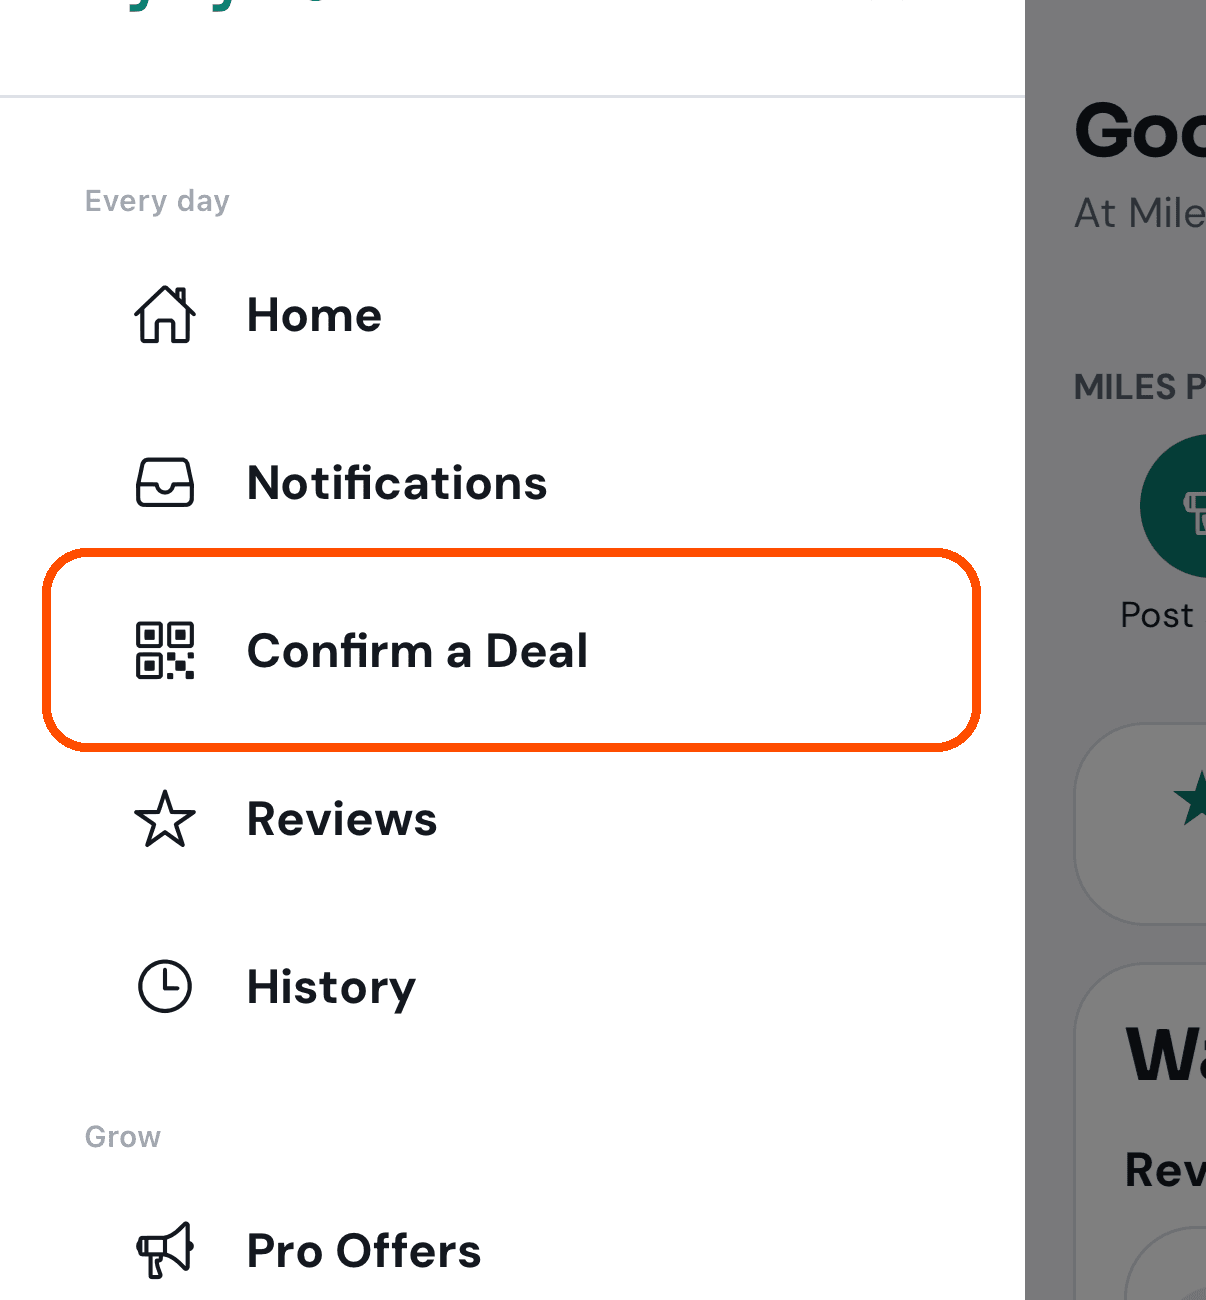
Open the menu (top left), scroll down and tap Confirm a Deal.
-
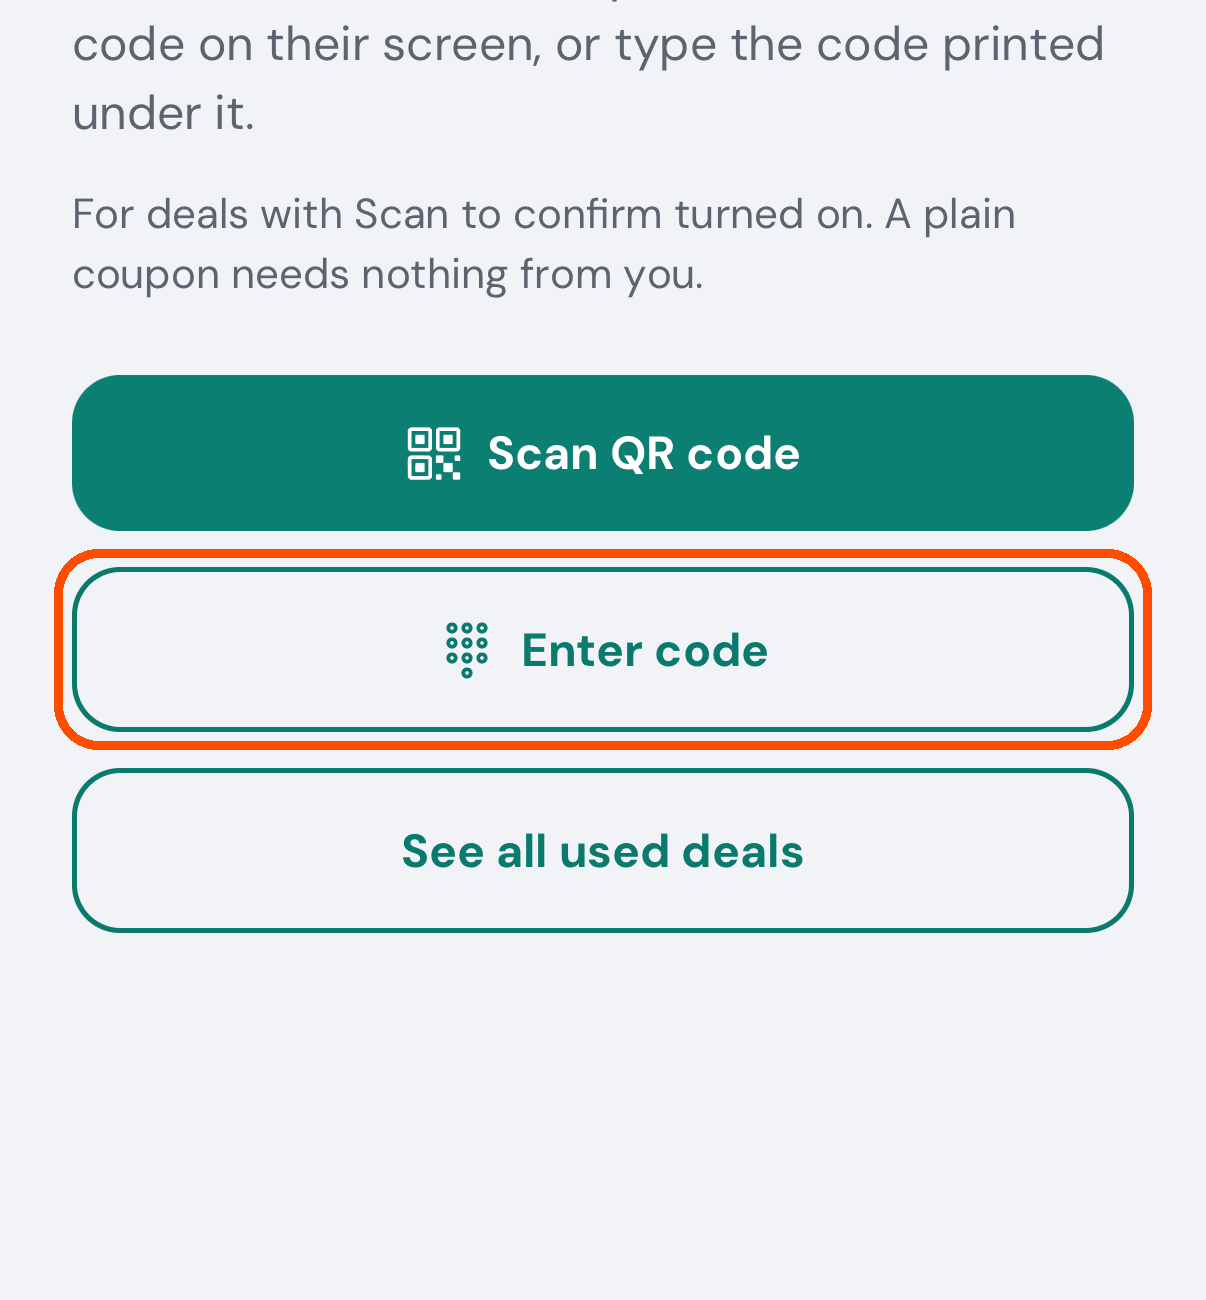
Tap Scan QR code and point your phone at the code on theirs — or, if the camera will not read it, tap Enter code.
-
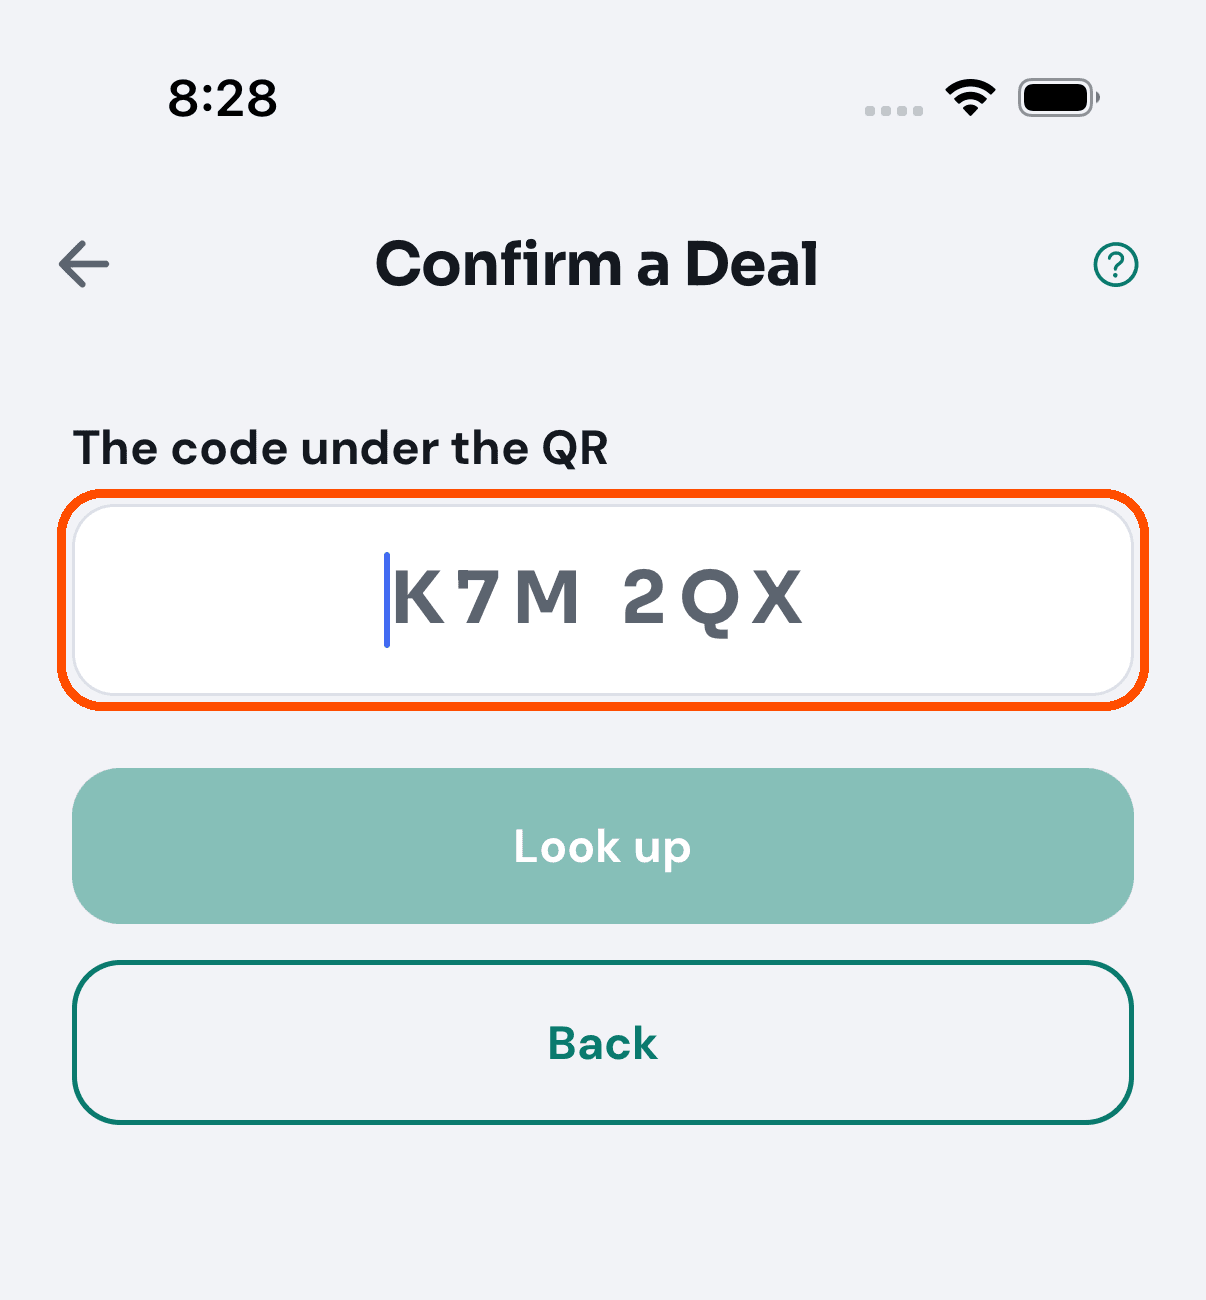
If you chose Enter code: type the letters and numbers printed under their QR code, then tap Look up.
-
Check it is the right deal and the right customer (the customer shows as a first name and last initial, like Dana O.; you never see their email or number), then tap Confirm.
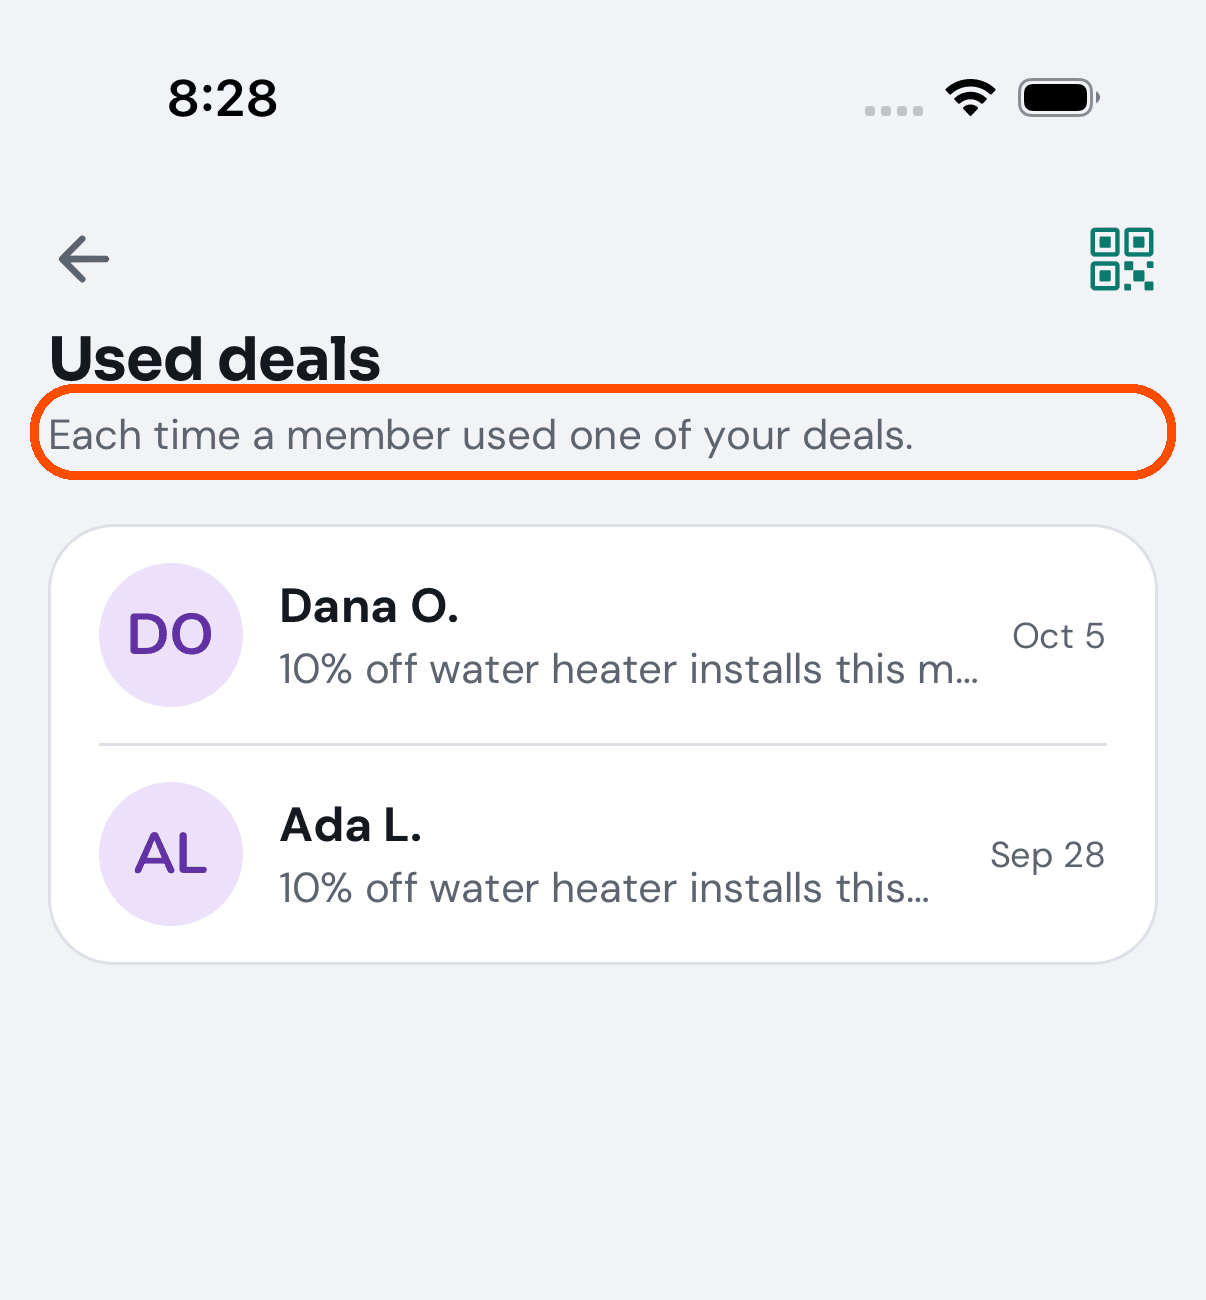
Afterwards the deal is in Used deals, newest first.
A customer can show a deal before you have seen them. Those wait under Waiting to confirm at the top of Used deals — See all used deals on the Confirm a Deal screen, or the 1 deal waiting to confirm row in Waiting on you on Home — until you confirm them or they expire.
The picture for step 4 is Used deals rather than the result of a scan or a look-up: the sample data has no code to type and no deal waiting, and the automated walk never taps Confirm.
Pro Offers is showing me nothing, and I know I have some
The kind you last picked (Deals, Tips…) is remembered between visits. If it hides everything you have, the screen names it — “Nothing matches this filter — you have 1 deal, but none in Tips” — with a Show everything button; while a kind is picked, a Show everything button also sits under the list.
Your network, and groups
How do I add another business to my network?
When: you trust another business and want it in Miles Plumbing’s network.
Who can: the owner, or anyone given Manage the business’s network. For everyone else there is no Network in the menu.
-
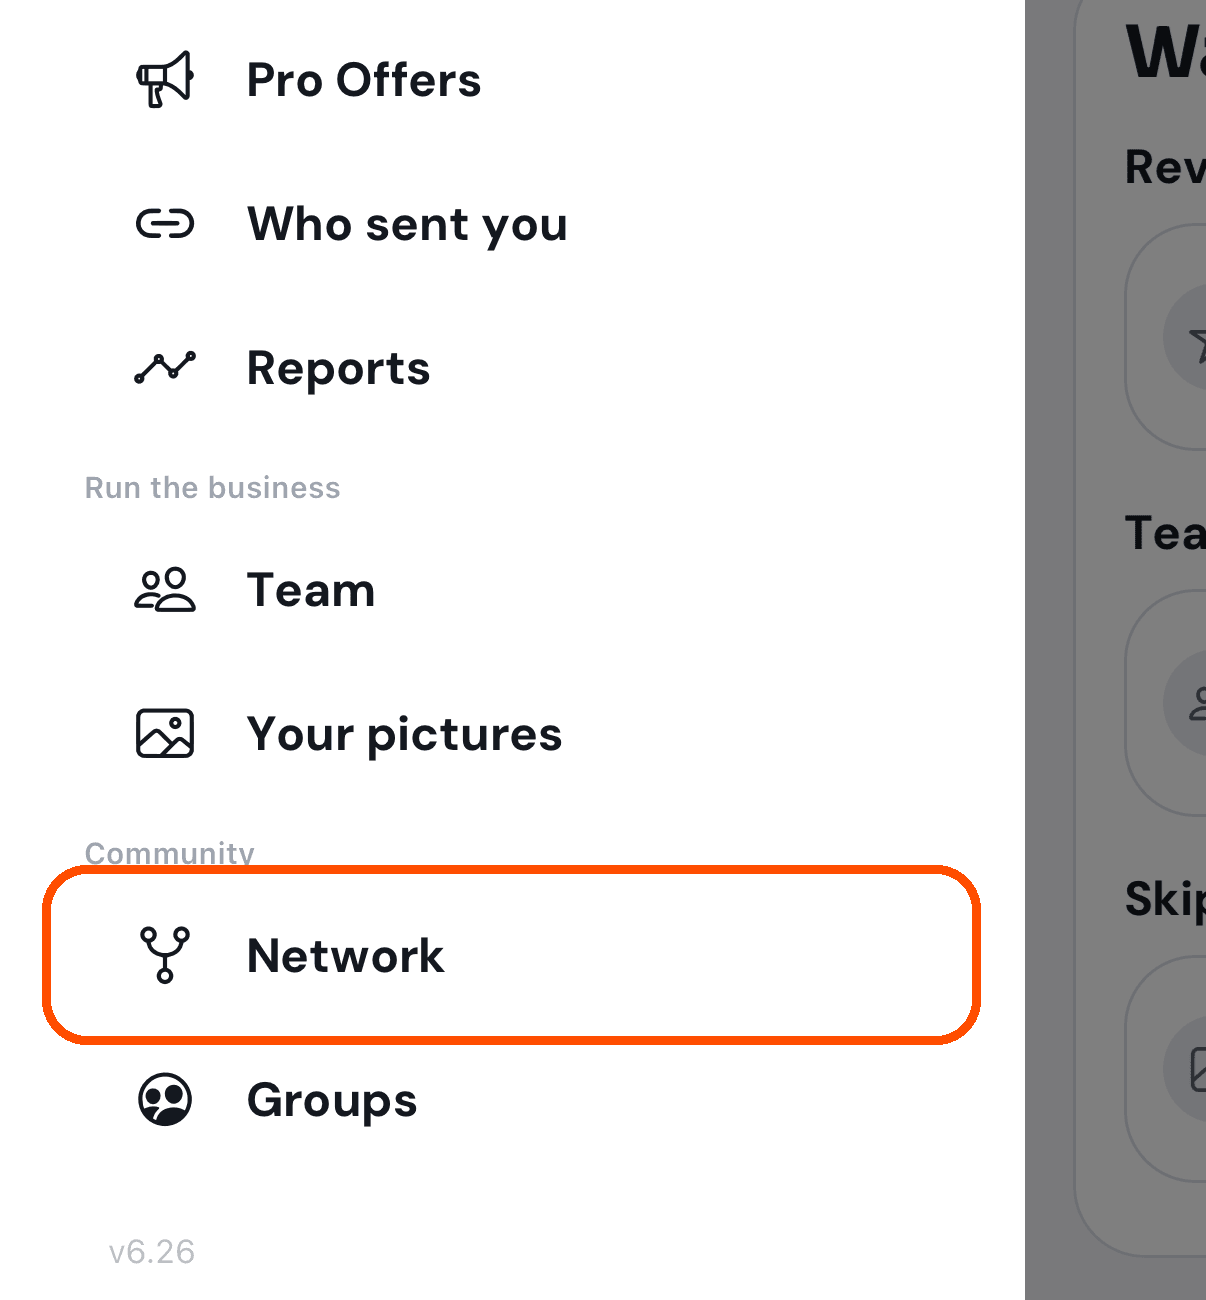
Open the menu (top left), scroll down and tap Network.
-
Tap Add a provider at the bottom.
-
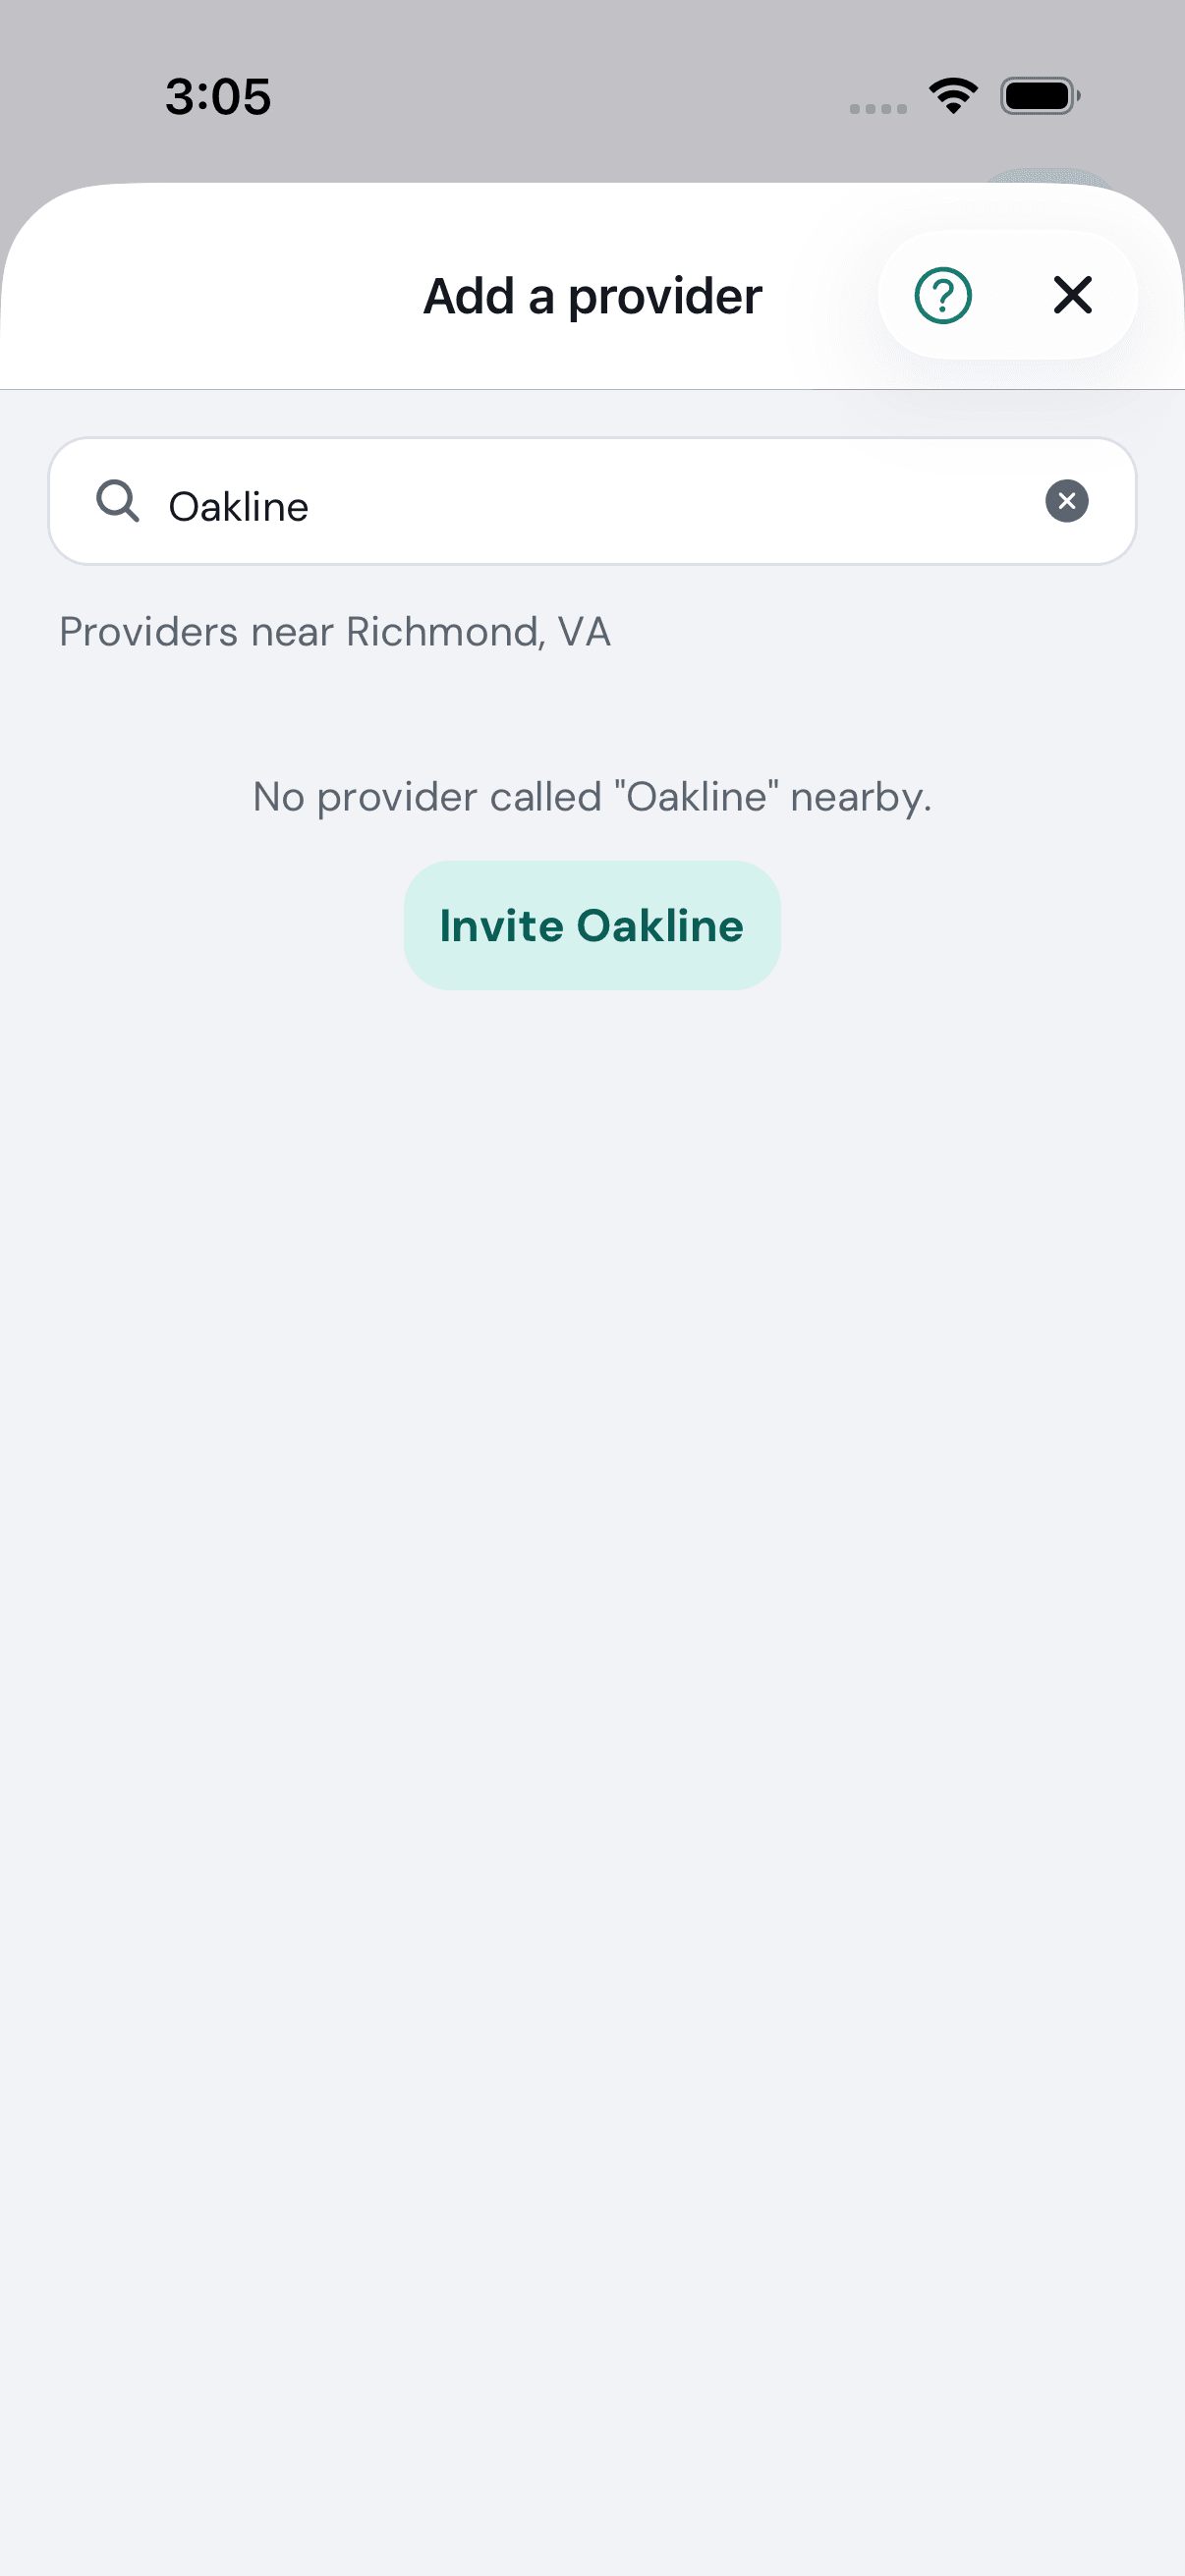
Type the provider’s name. Providers near yours are listed; tap Add beside the one you mean.
-
To endorse them, tap the gold heart on their row. It fills and reads Endorsed. Customers who endorse Miles Plumbing now see them as trusted. Tap Endorsed to take it back; it asks first. The heart shows only for the owner and anyone given Endorse Providers for the business.
A business’s network holds other businesses and the groups it is in, never people (owner, 2026-10-28, L710). Your own people are your My Network in the customer app. A group goes on the Groups tab when the business joins it.
Not on TryMyPro yet? When the search finds nothing, tap Invite and the name you typed. Add the town and their phone or email, then Send from my phone.
How do I remove a business from my network?
When: you no longer want another business in your network.
- On Network › Providers, tap the bin at the right end of its row.
- Tap Remove. (Keep leaves it.)
How do I start a group?
When: you run a chamber of commerce or a business networking circle and want its members together in one place.
-
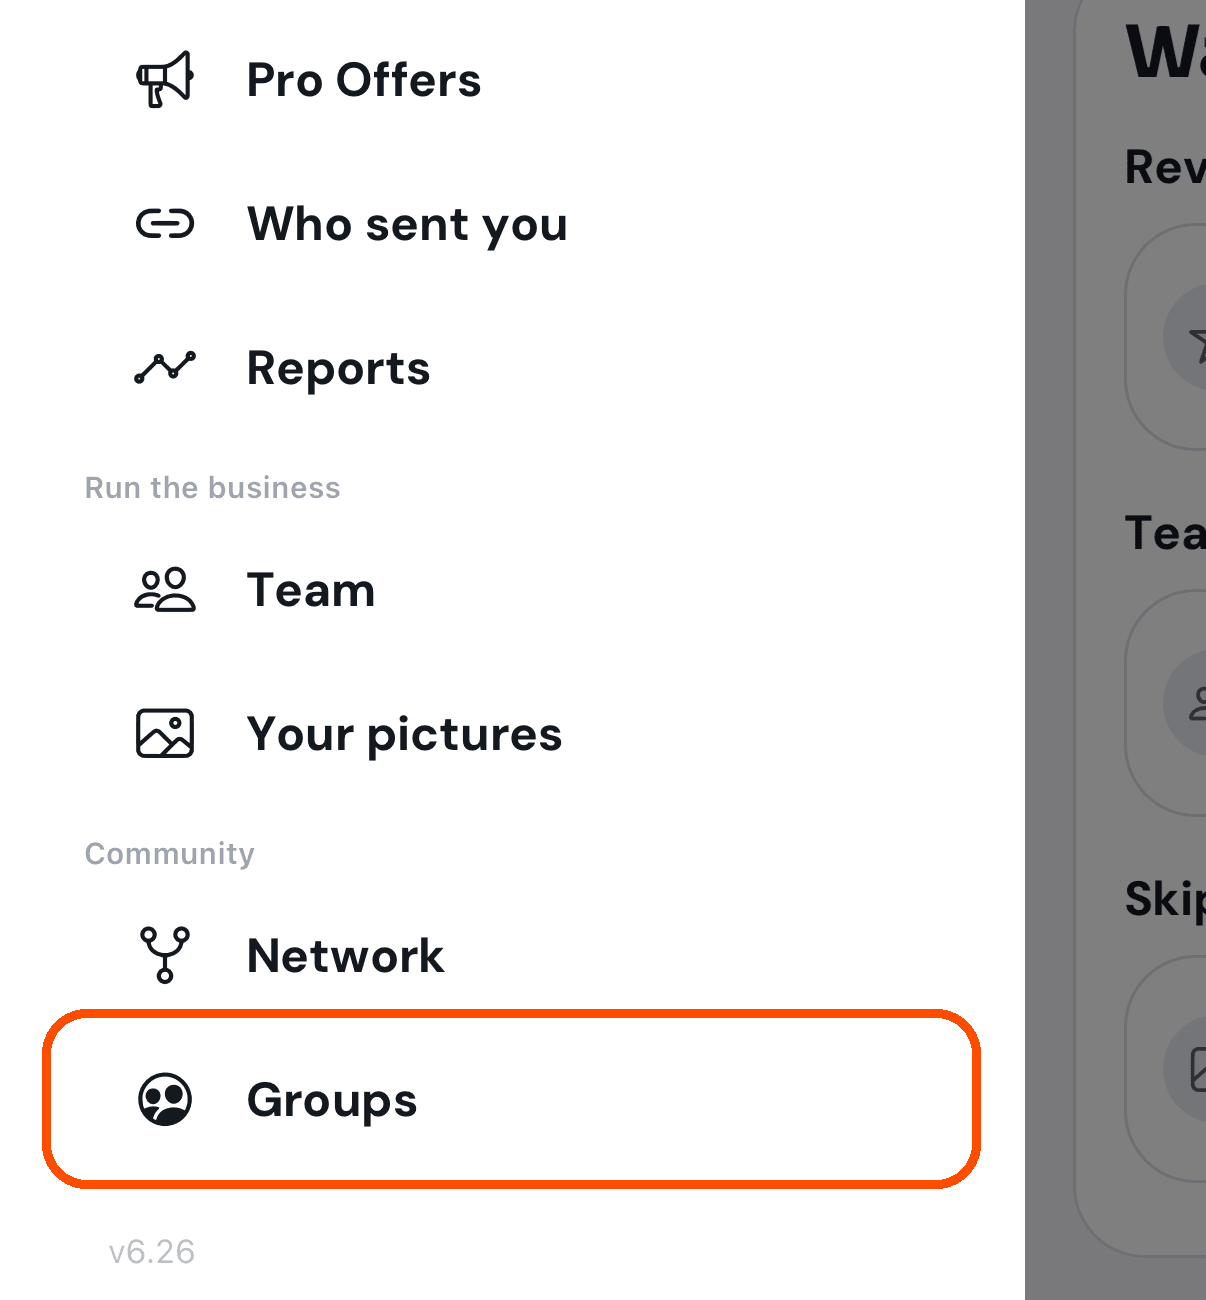
Open the menu (top left), scroll down and tap Groups.
-
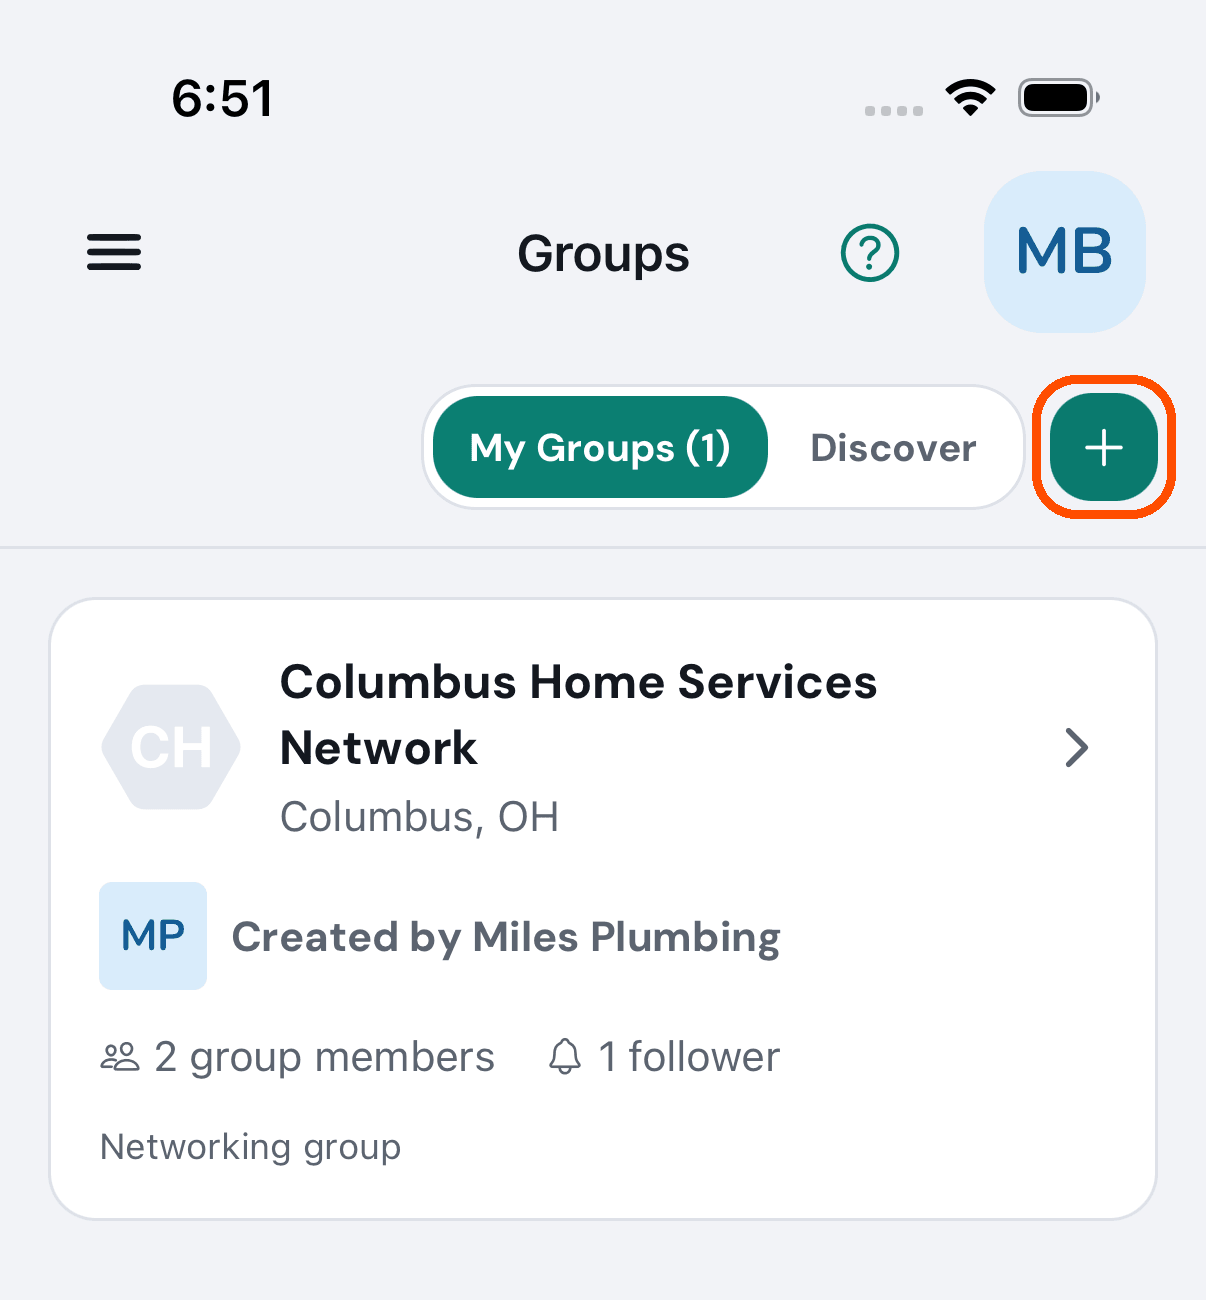
Tap Ask for a review, the wide button at the bottom.
-
Type a Group name — at least two characters — choose Chamber of Commerce or Business Networking (the line under Group type says Required — pick one), then tap Start group at the bottom (it is grey and says Type a name first or Pick a type first until the form is complete; X at the top right closes the form).
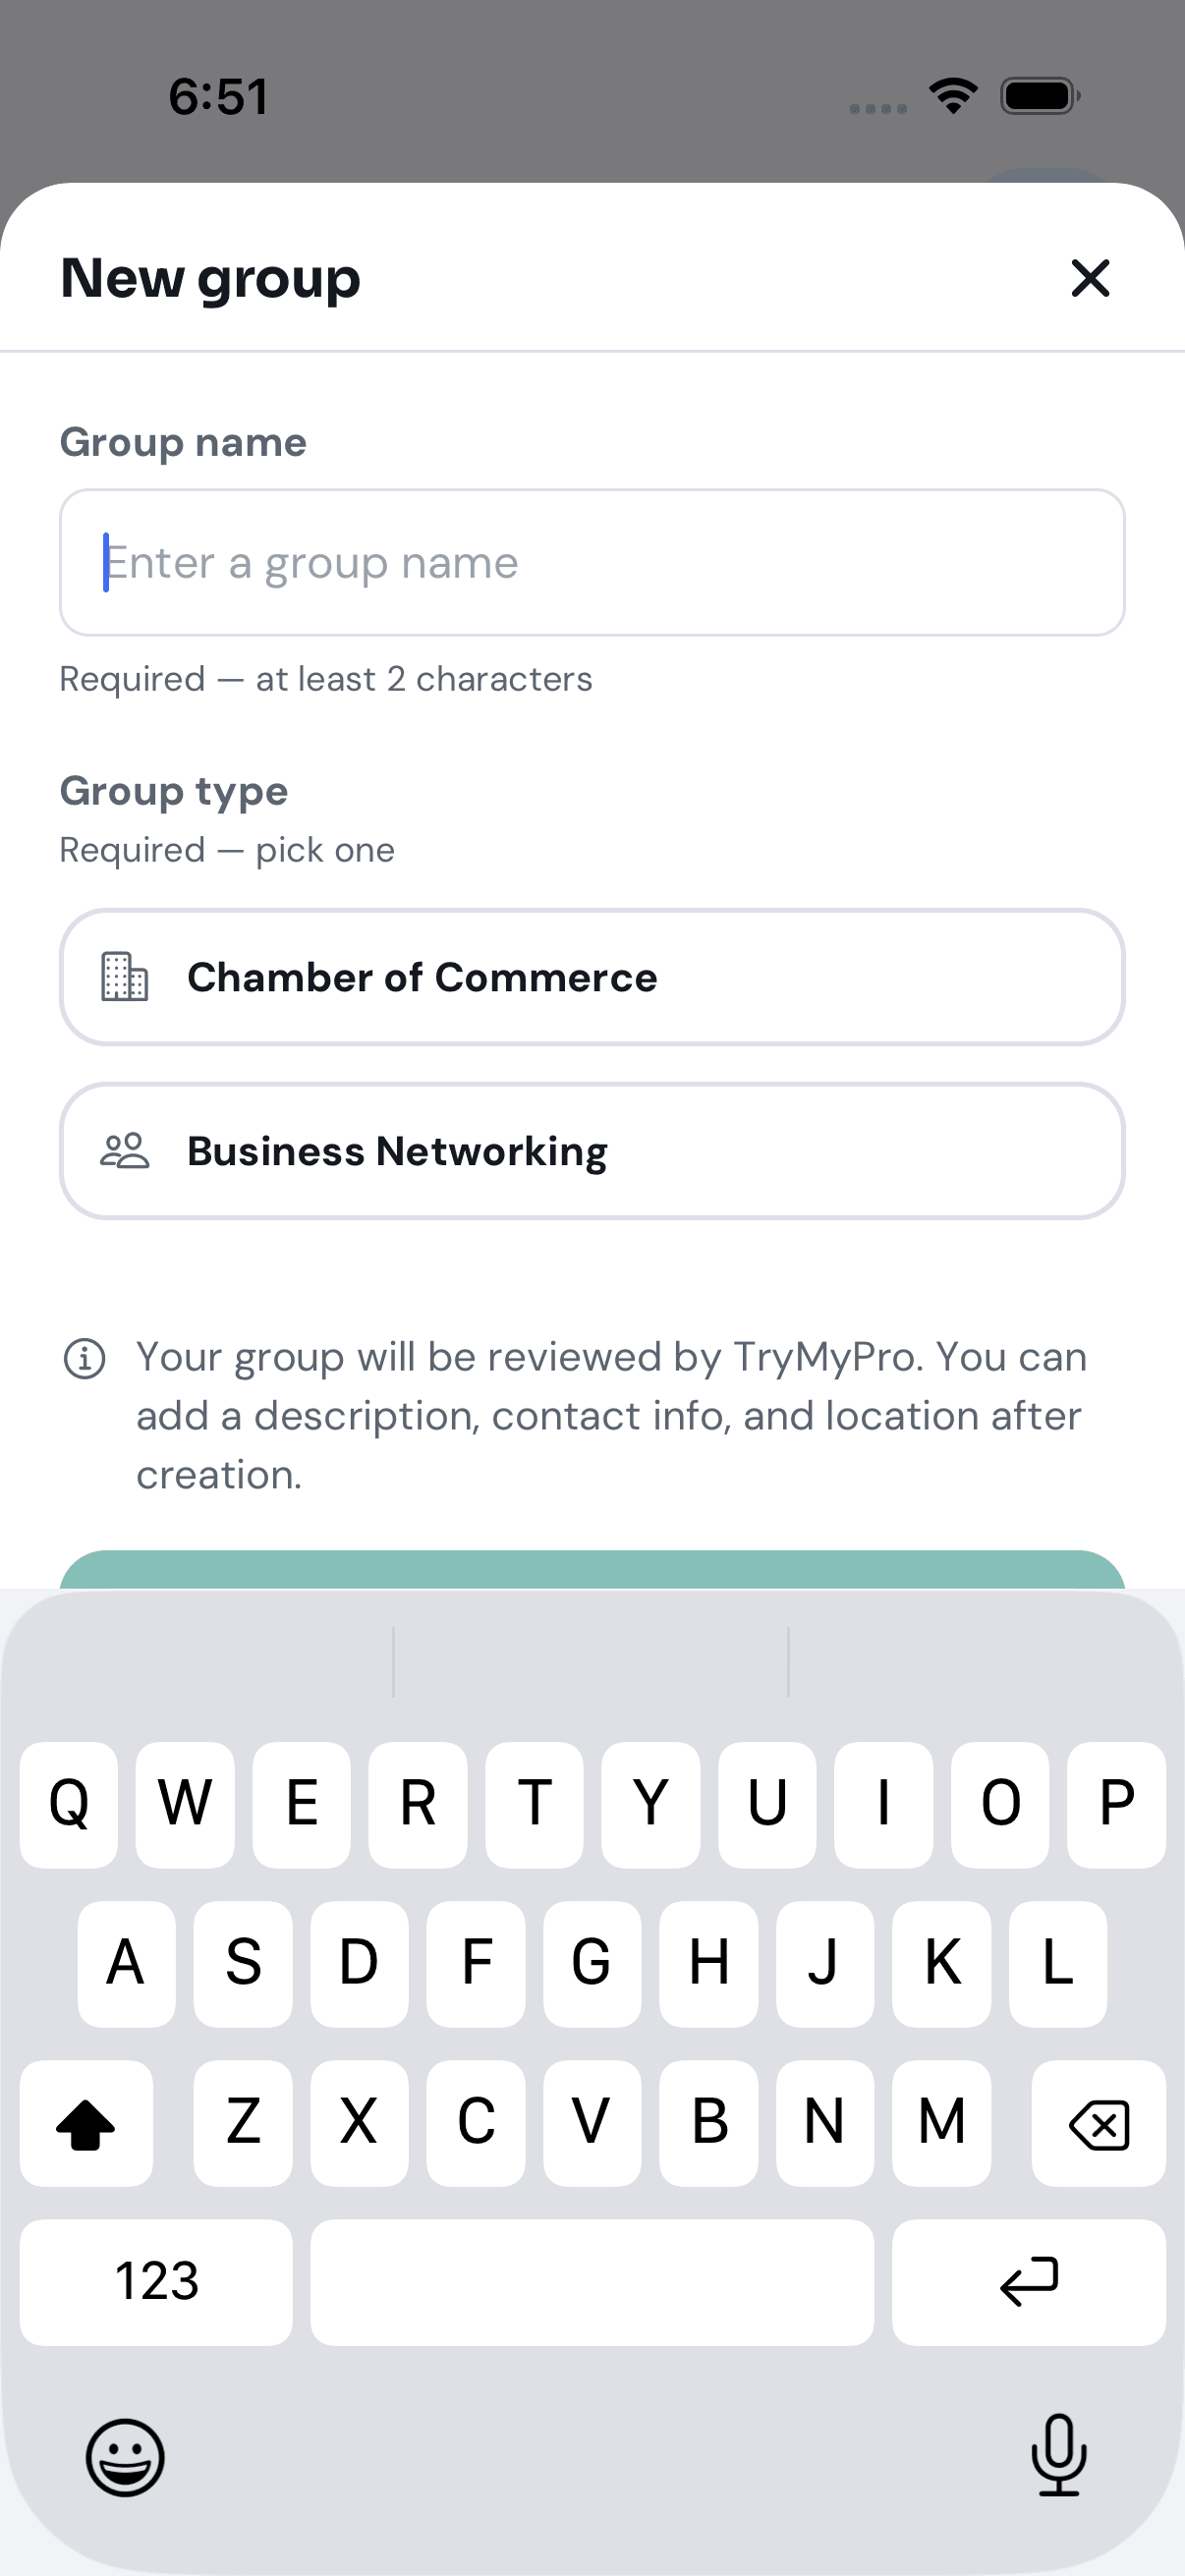
Afterwards TryMyPro reviews the group before it appears to anyone else. You add its description, contact details and location from the gear on the group’s own page.
No picture of a group being created: the automated walk photographs the blank form and cancels it.
Where does the location on my group’s page come from?
From the city and state in Group Settings (the gear on the group’s page, then Edit at the top, then the Location box: start typing an address and pick it from the list). The page and the Groups list show them as “Columbus, OH”, and the group profile checklist ticks Set your location once either is filled in. Only a group with neither says “Location not specified”.
Money
How do I see what I am paying?
When: you want to know what the business pays TryMyPro and what is due.
-
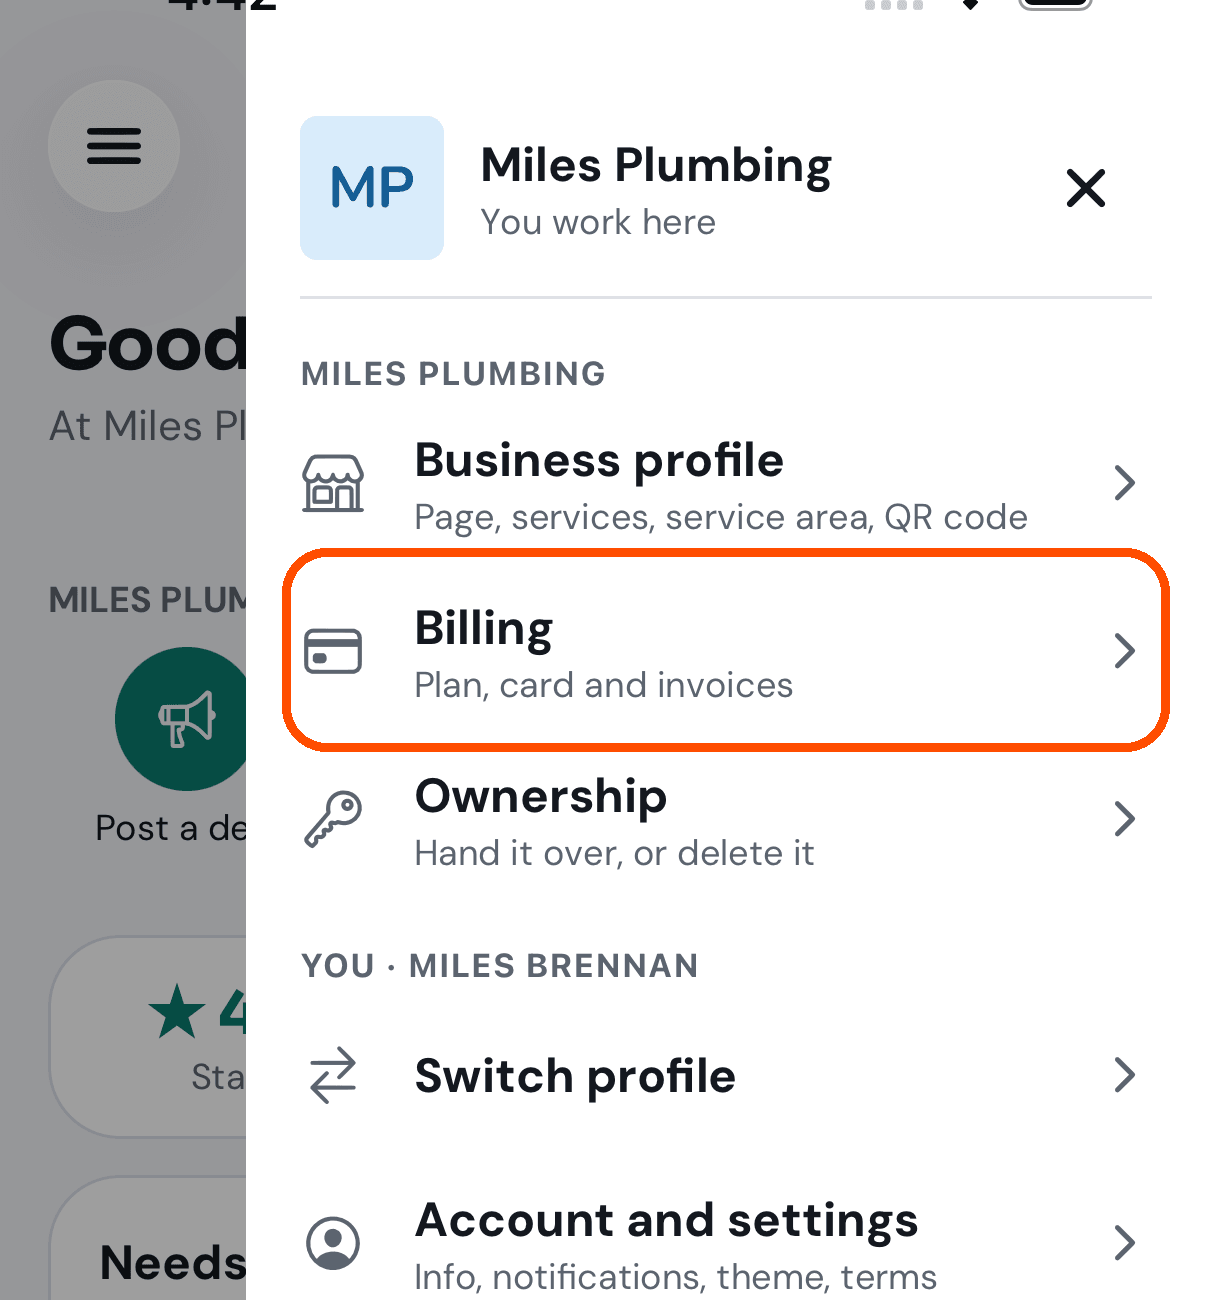
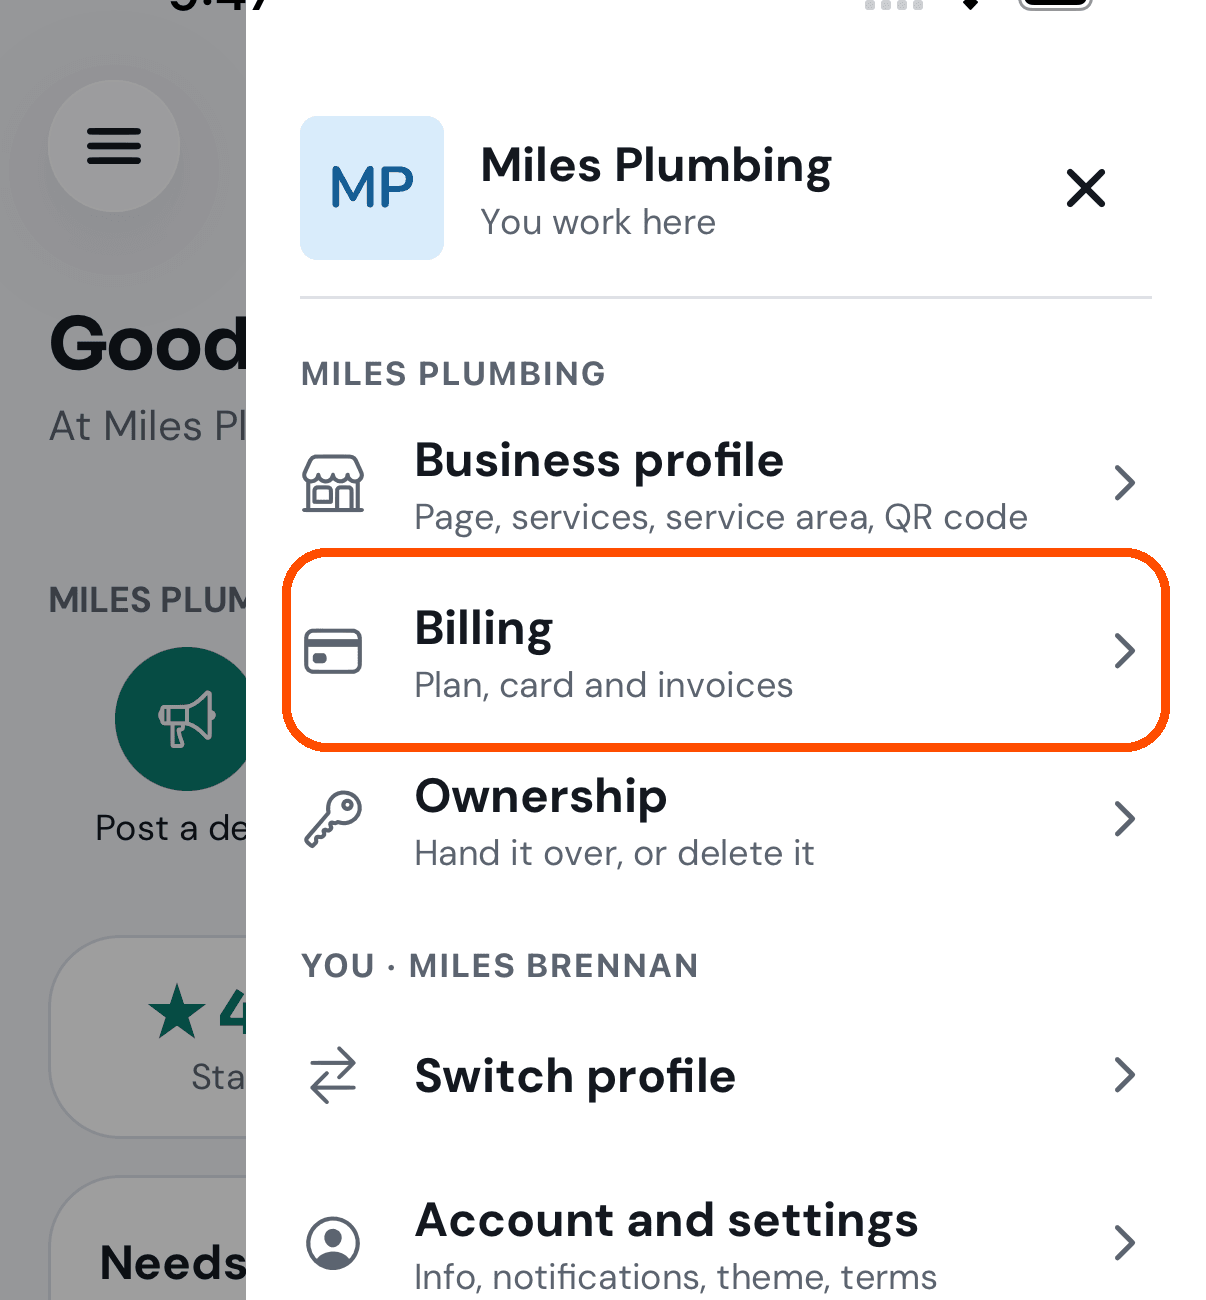
Tap your picture (top right), then Billing.
-
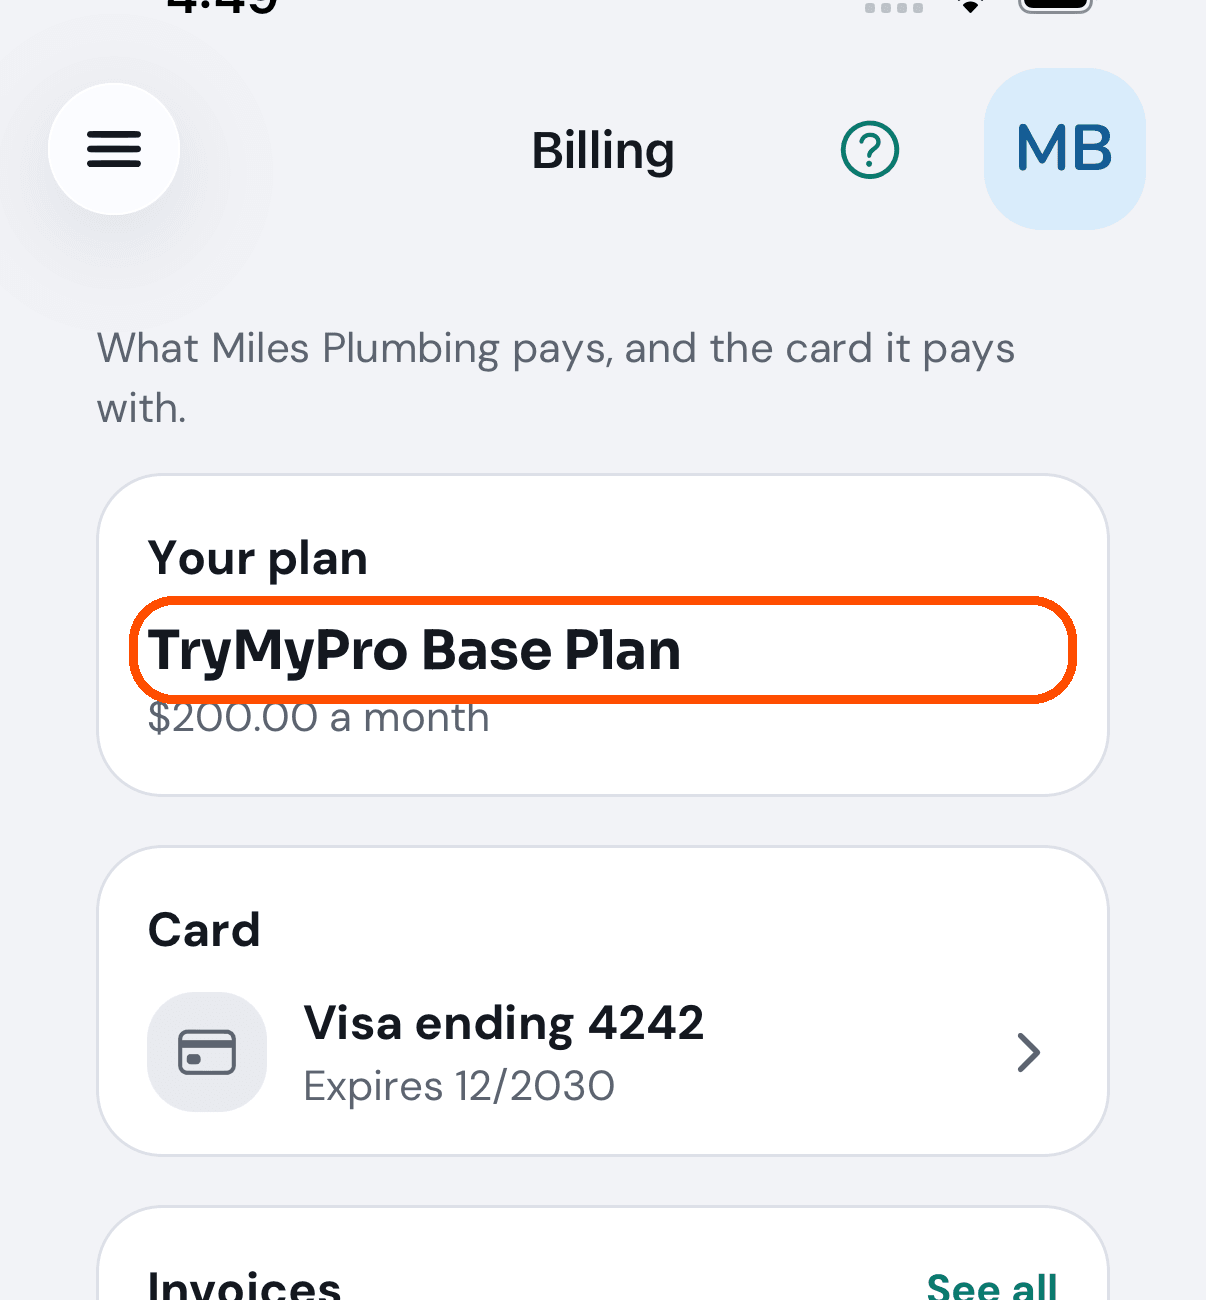
Under Your plan read the plan (for example TryMyPro Base Plan, $200.00 a month) and Next payment: the next charge and its date, as Stripe will make it. If you joined with the Launch Campaign, a note names the $100 you paid, and Next payment is $200.00 on the day your six months end.
-
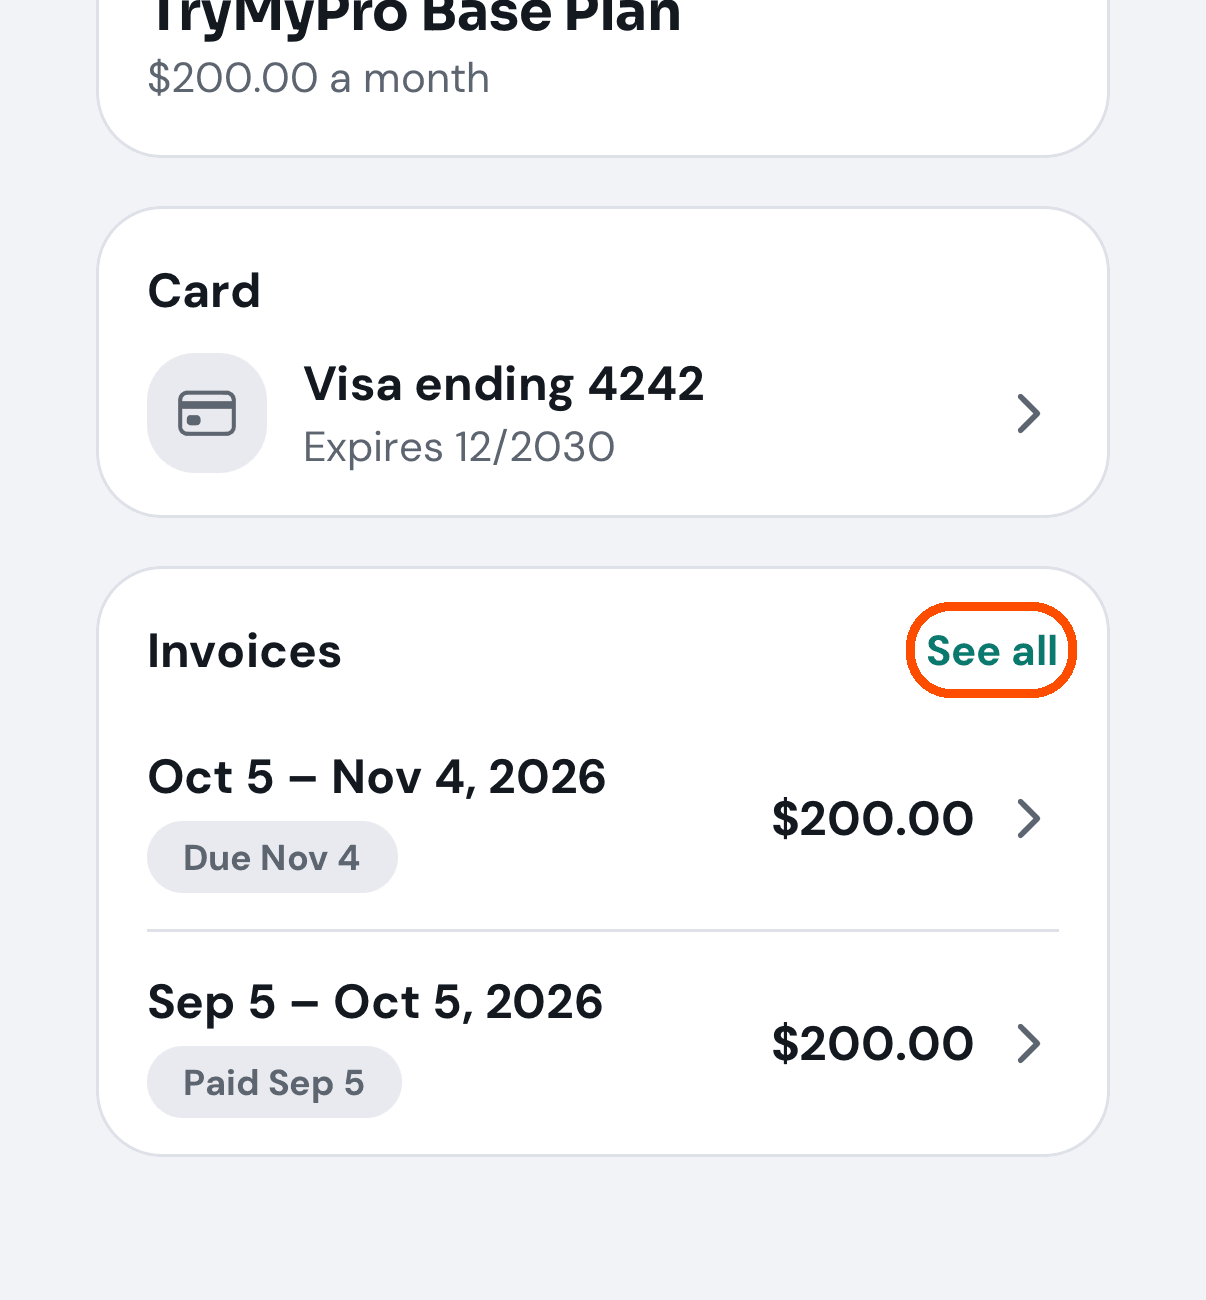
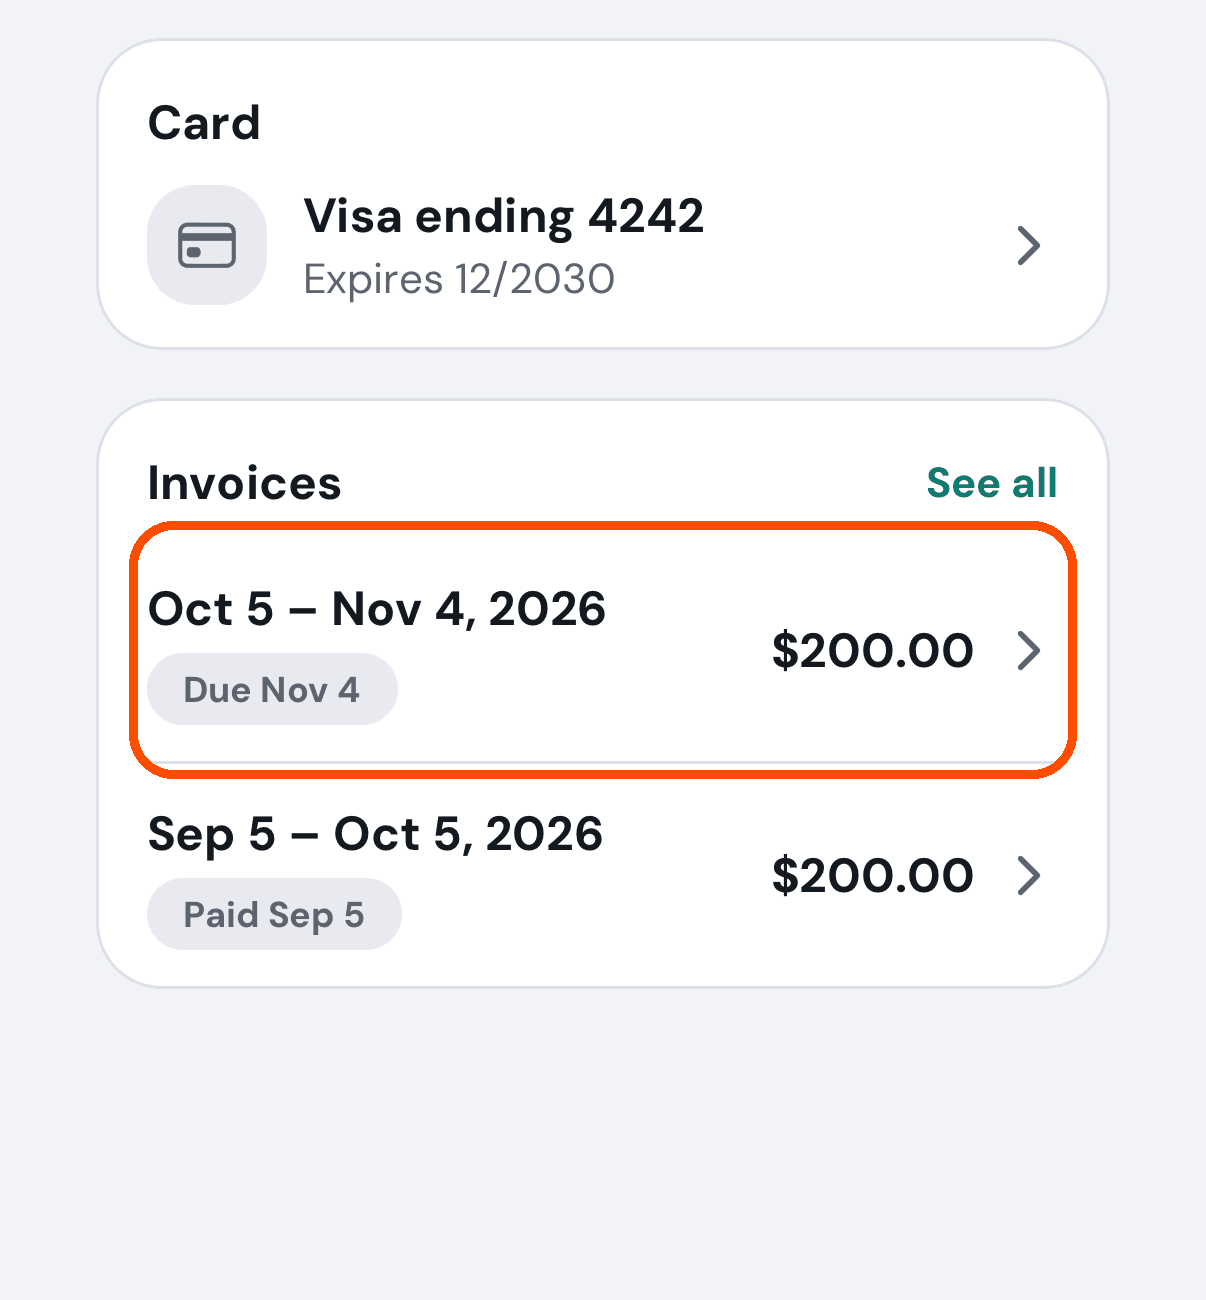
Under Card you see the card on file. Under Invoices the latest ones show with their state (Due Nov 4, Paid Sep 5); tap See all for every bill.
Afterwards you know your plan, the next charge, the card and which invoices are paid.
How do I cancel the plan?
When: the business is stopping its TryMyPro plan.
- Tap your picture (top right), then Billing.
- Under Your plan, tap Cancel plan.
- Read Cancel your plan?: the plan stays on until the end of the month you have paid for (or, if you joined with the Launch Campaign, the end of your six months), and nothing more is charged or refunded. Tap Cancel plan to end it, or Not now.
Afterwards Billing shows Plan ends and the date. Only the owner, or someone the owner lets manage billing, sees the button.
Changed your mind before that date? Under Plan ends tap Keep my plan, then Keep my plan again to confirm: the plan carries on as before and nothing is charged now.
How do I add a card?
When: you are setting up billing, or the card on file has expired or changed.
-
Tap your picture (top right), then Billing.
-
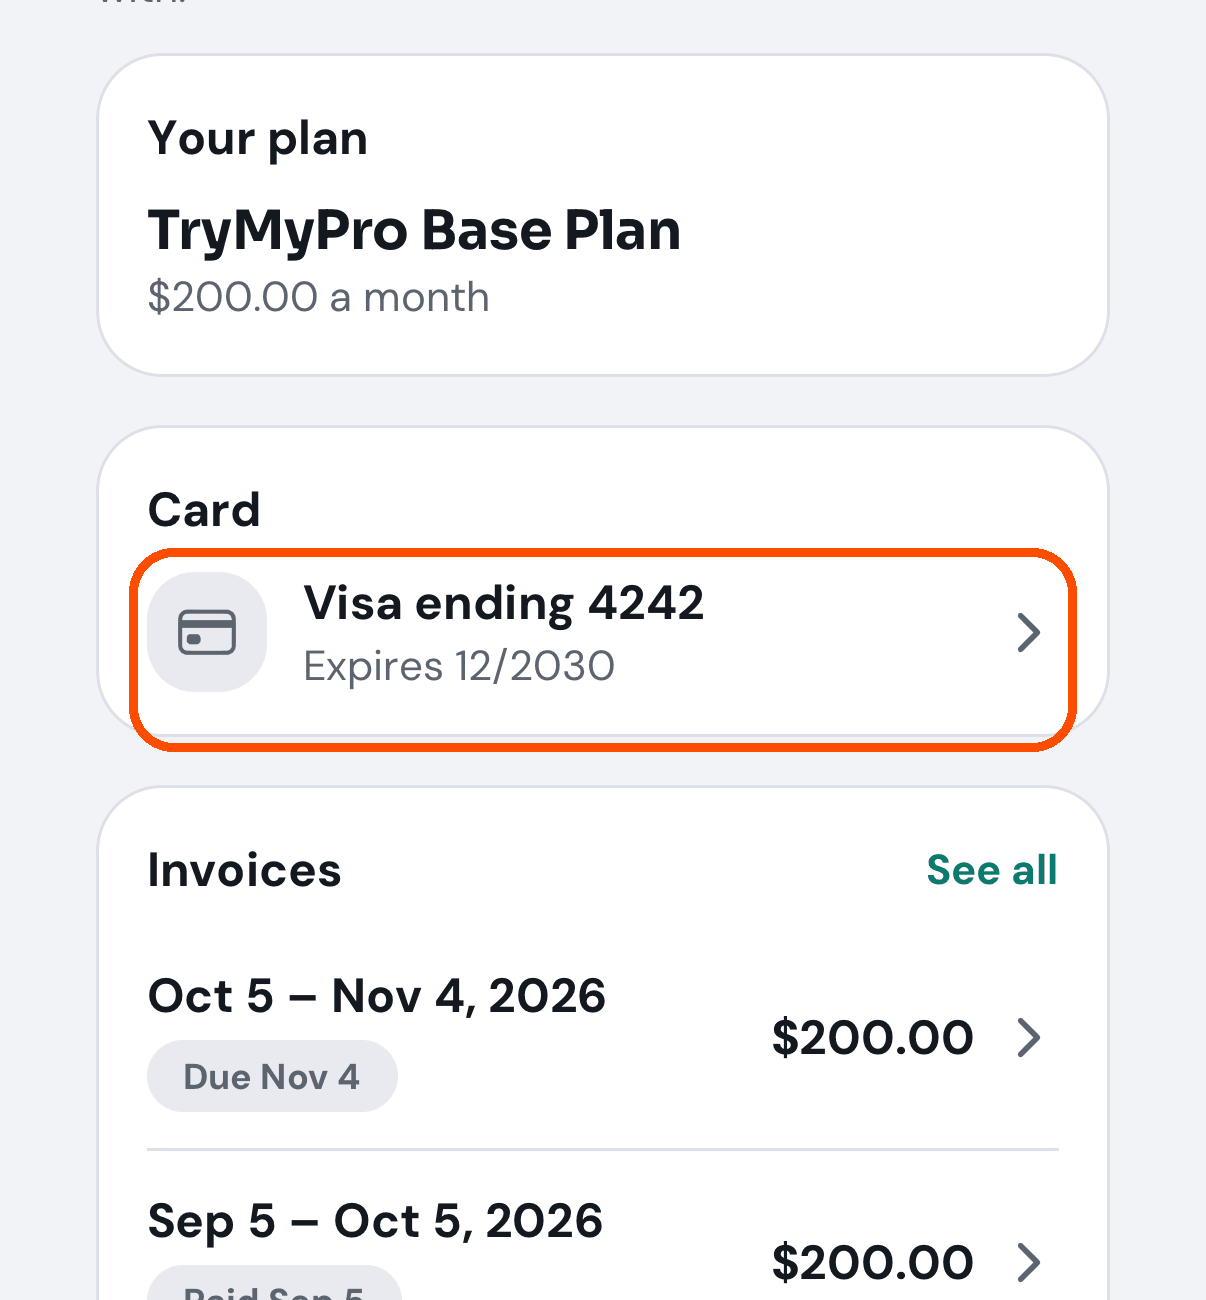
Under Card, tap the card on file (for example Visa ending 4242). With no card yet, tap Add a card there instead and go on from step 4.
-
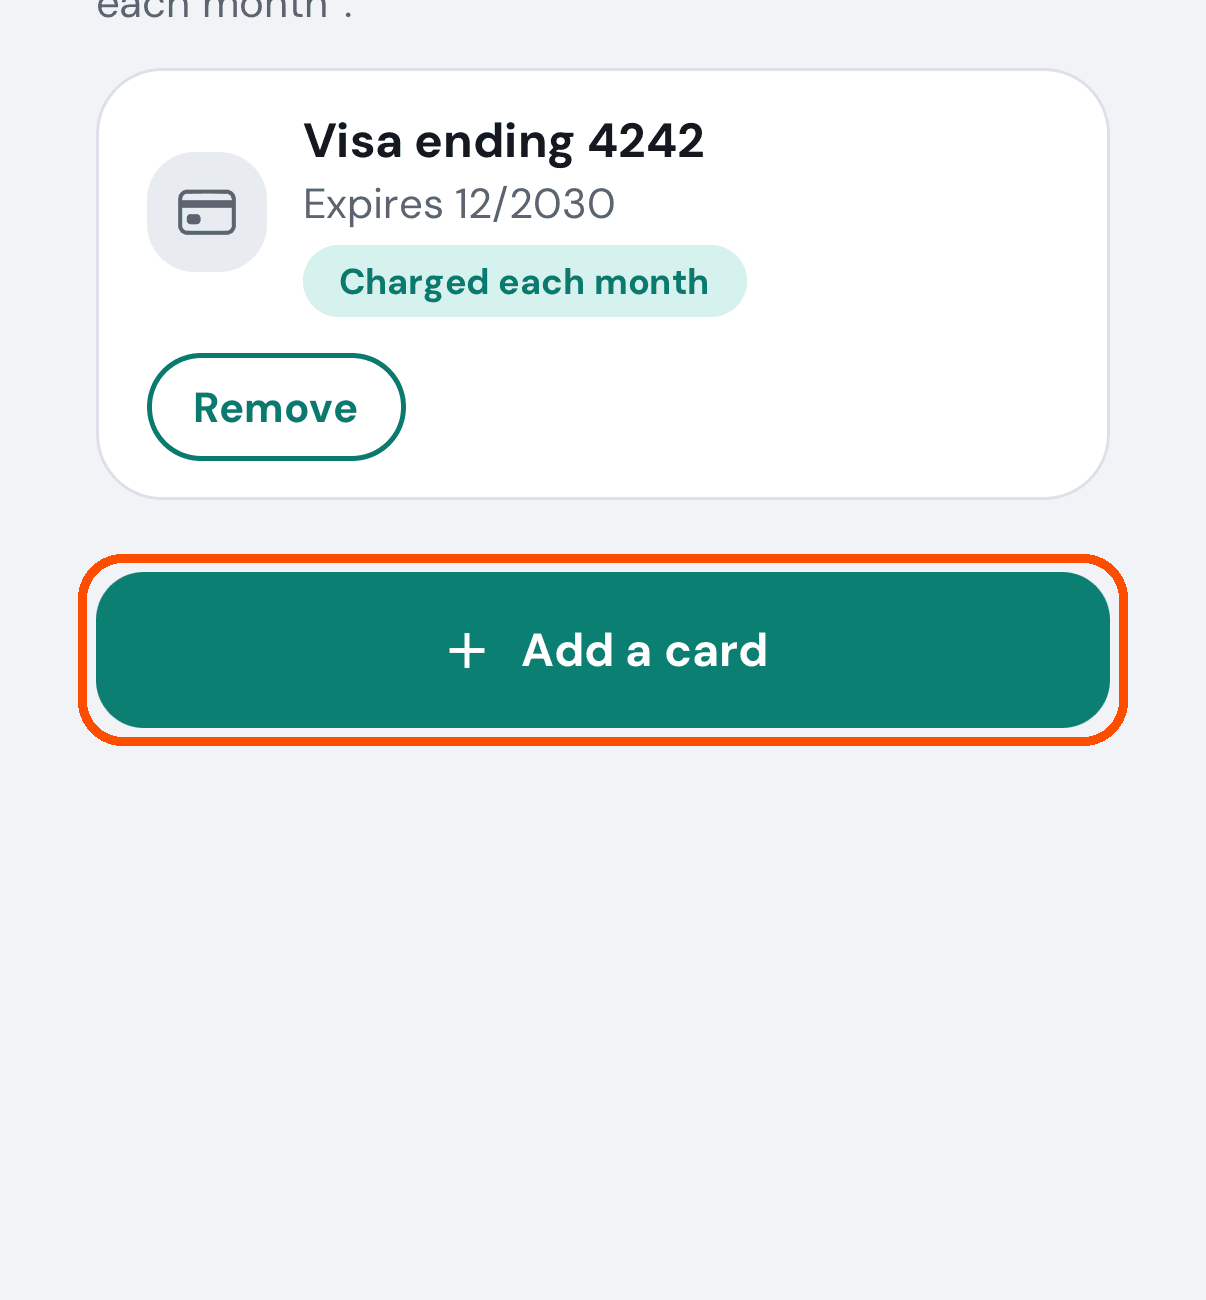
On Cards, tap Add a card. The cards already on file are listed above it; Remove takes one off, and Charge this one chooses which card pays each month.
-
Tap Add a card again. This hands you to Stripe’s own form, where you type the card number, its expiry date and its security code.
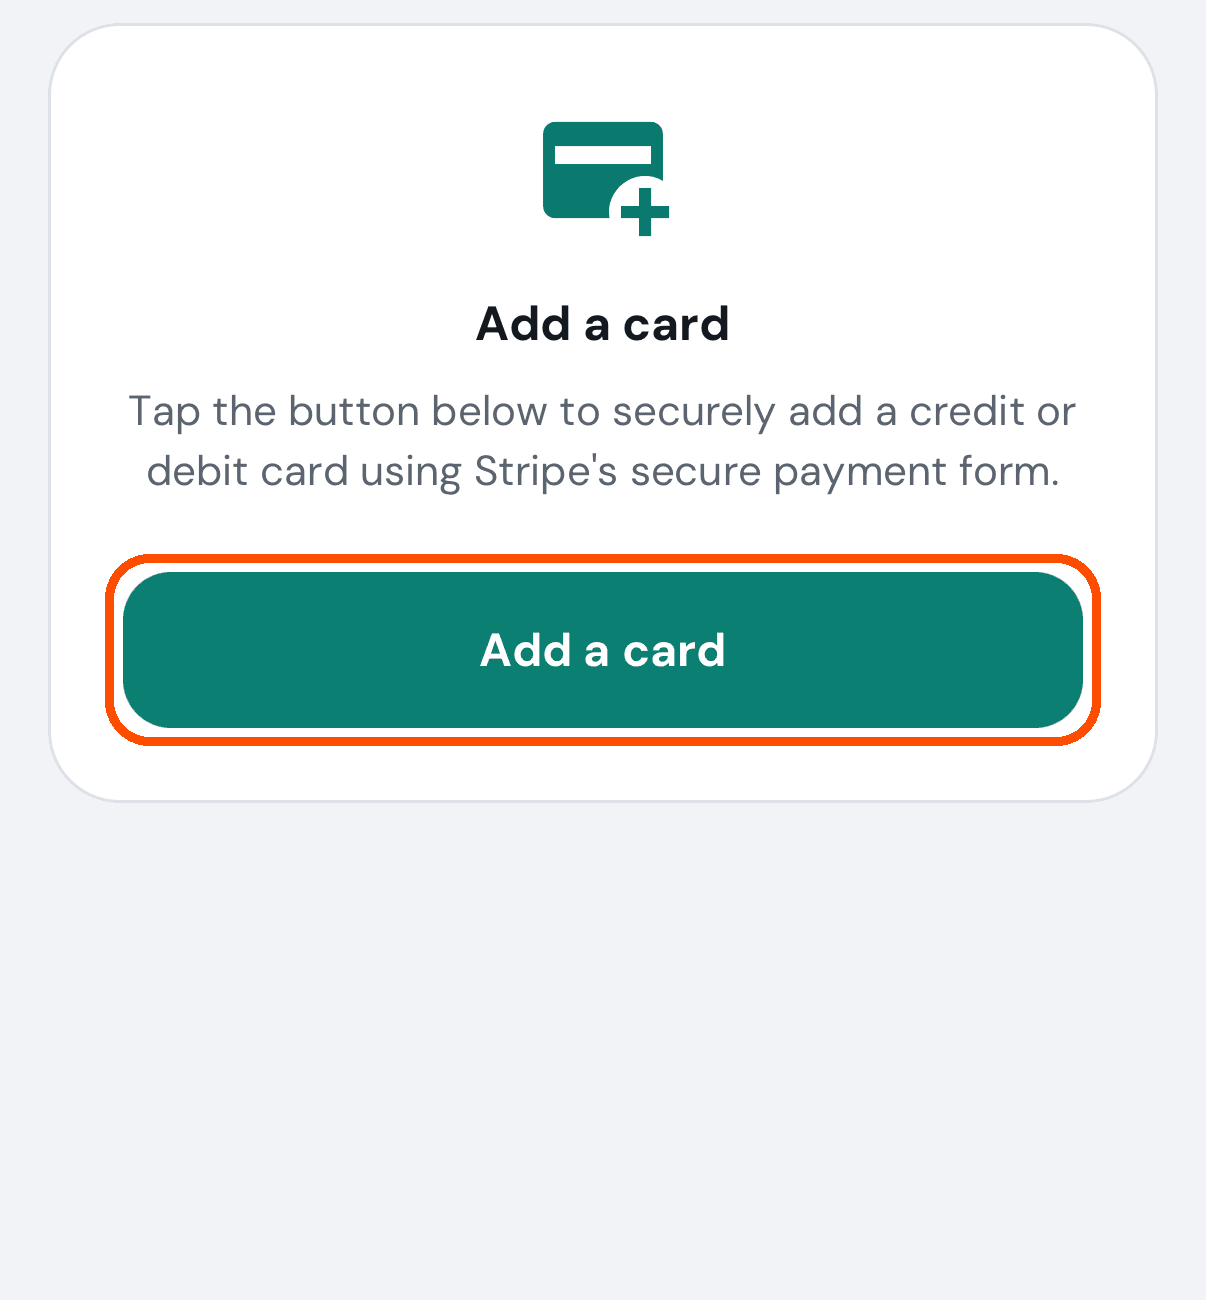
Afterwards the card is listed on Cards. The one marked Charged each month pays the plan.
A card is the only way to pay. Stripe’s form takes a credit or debit card. Apple Pay and Google Pay are not offered yet.
No picture of Stripe’s form: the automated walk never opens it and never types a card number.
How do I pay an invoice?
When: a bill says Due (or Overdue) rather than Paid.
-
Tap your picture (top right), then Billing.
-
Under Invoices, tap the one that says Due. (See all lists every bill, with a Pay button on each unpaid one.)
-
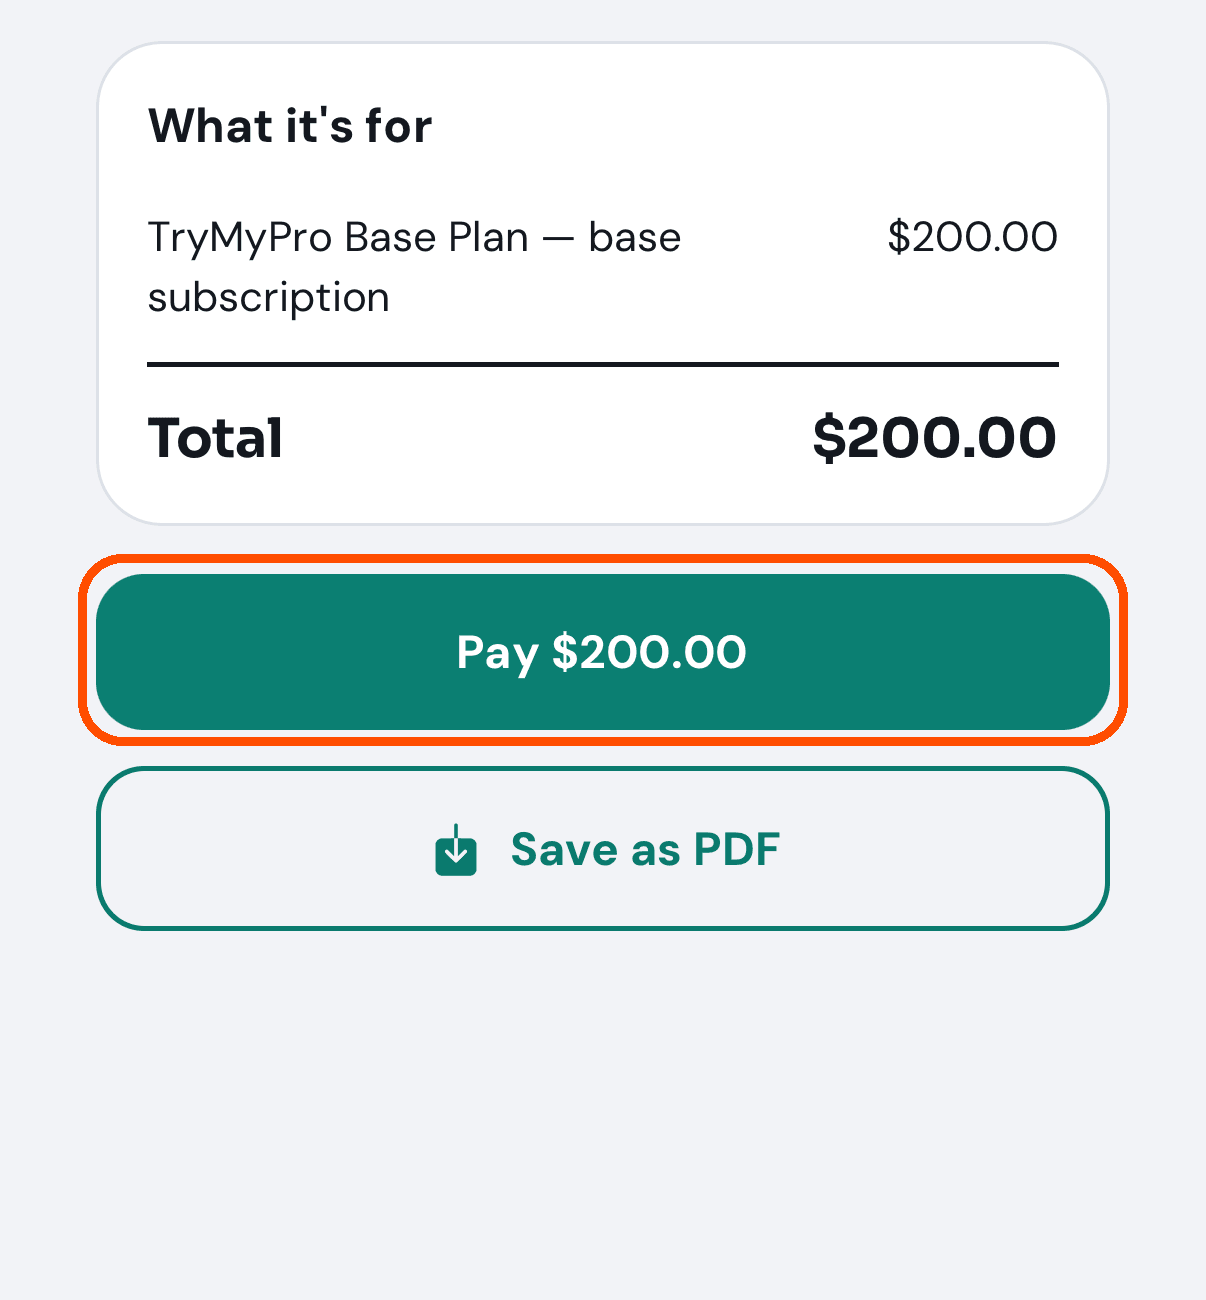
On the invoice, tap Pay $200.00 (the button shows the amount).
-
Check the amount and the card, then tap Pay. To pay with another card, tap it; to pay with one that is not listed, tap Use a different card (Add a card when none is on file) and enter it in Stripe’s card form — it comes back selected.
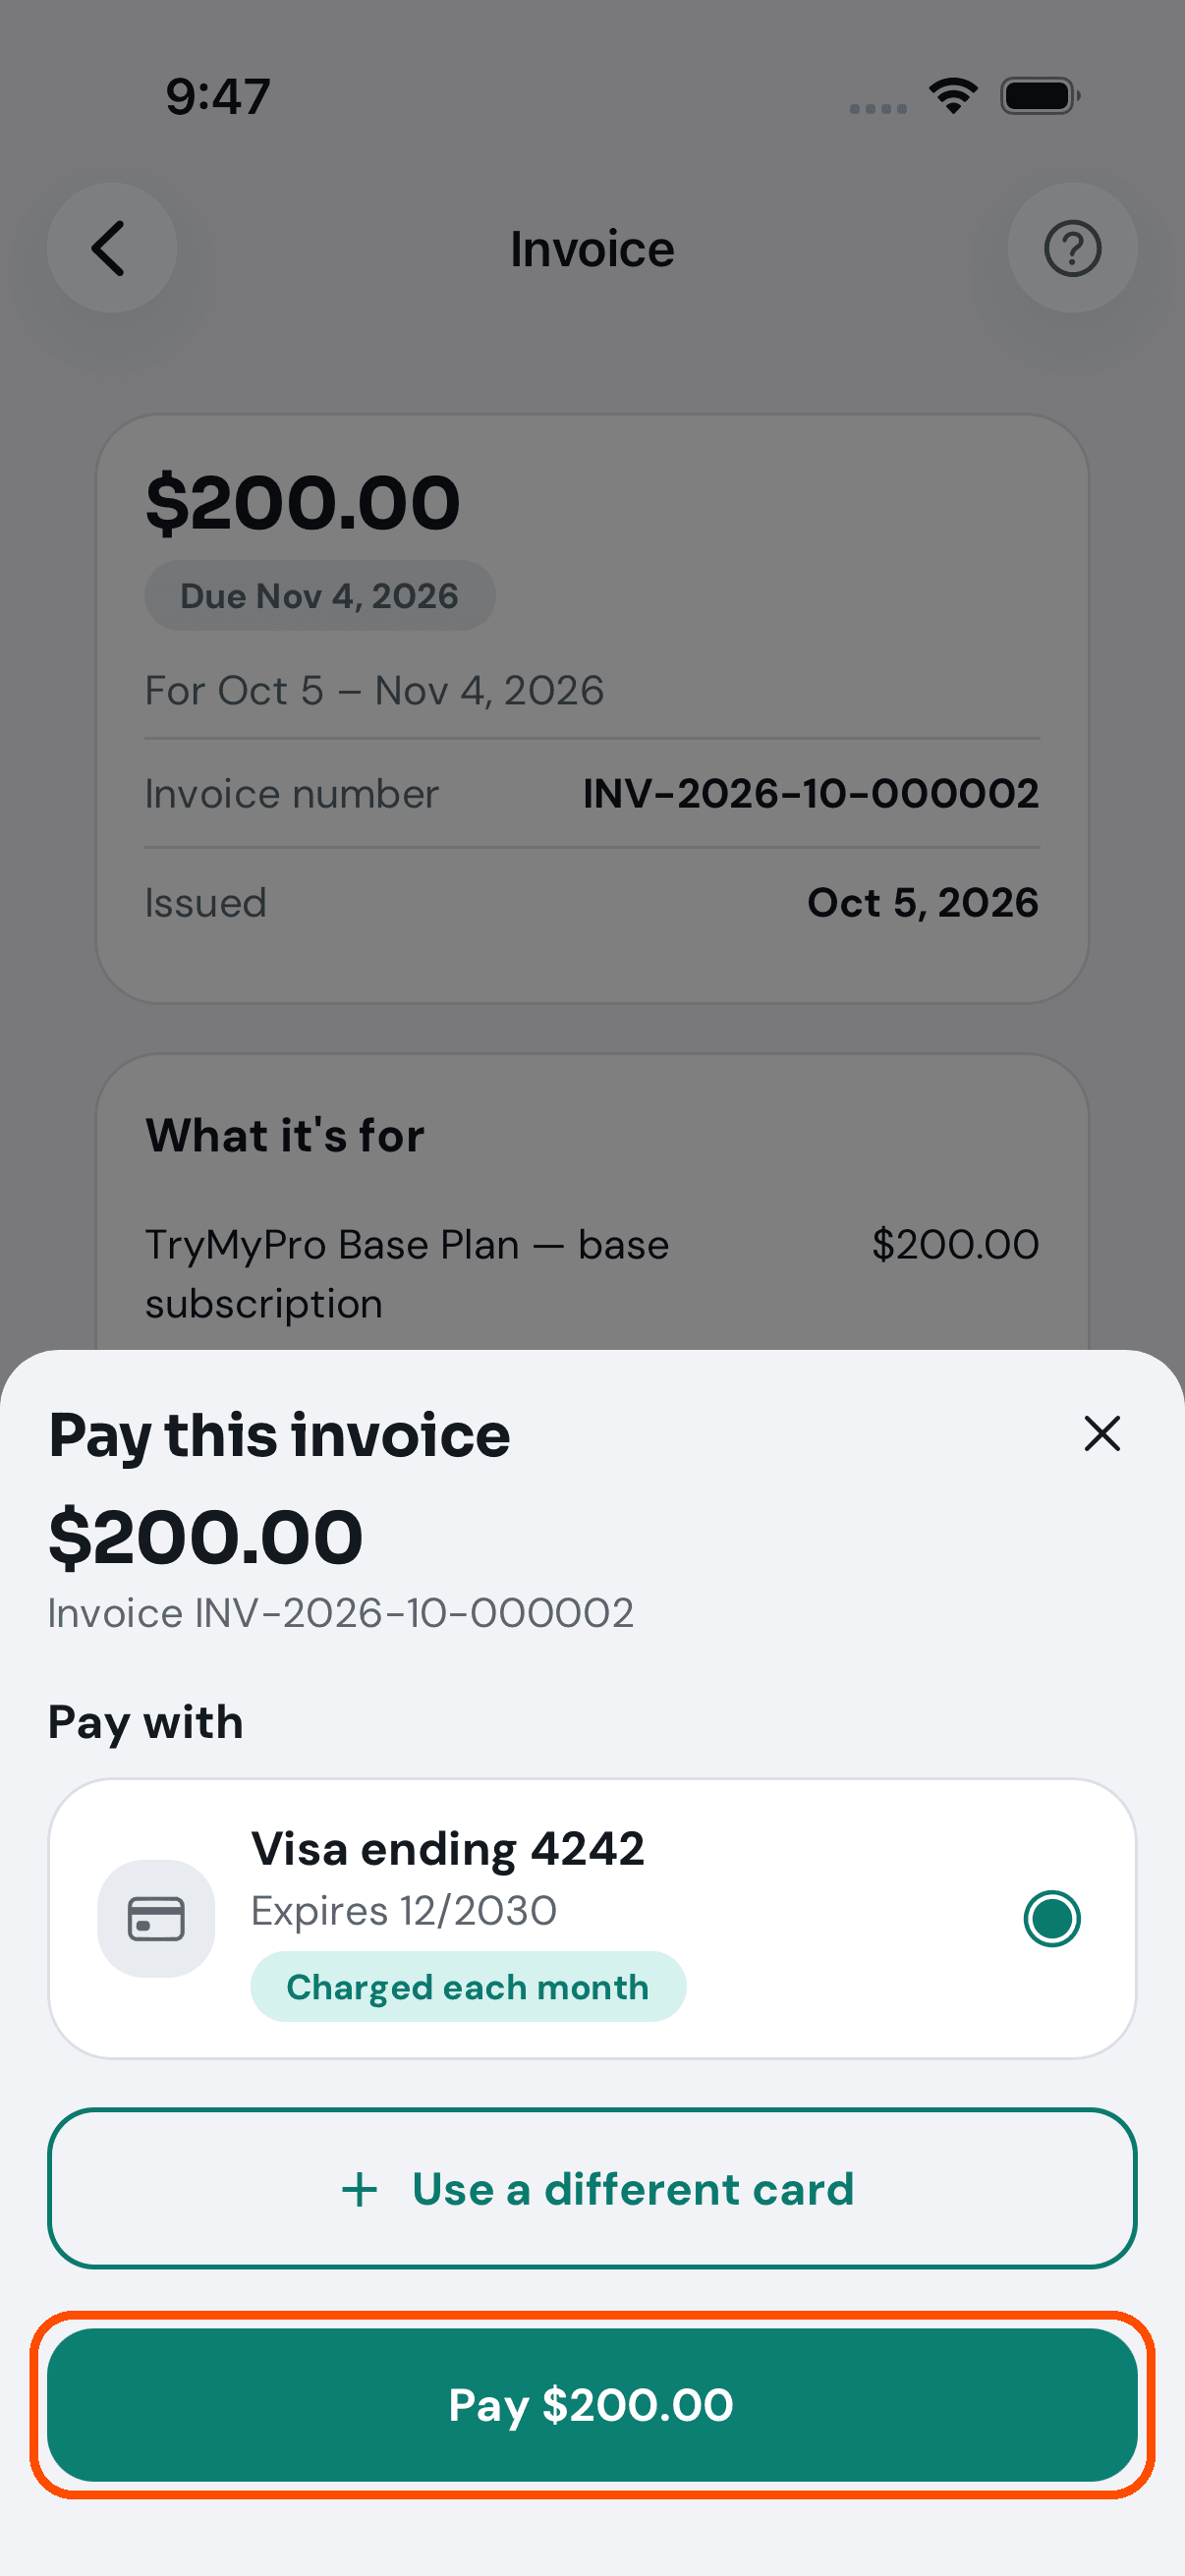
Afterwards the invoice reads Paid. If your bank asks you to approve the payment, it reads “Waiting for you to confirm this payment. Check your email from Stripe.” until you have.
No picture of a payment going through: the automated walk rings the Pay button and never taps it.
How do I change my plan?
You cannot, from inside the app. Billing shows which plan you are on and what you owe, and there is no screen for choosing a different one. This is the one to raise with support rather than work around.
I have professionals on my team. Am I paying for them?
No. Professionals are free: your whole team is included in the plan, and your invoice has one line, for the plan.
Working at a business, rather than running one
Where are Team, Billing and Pro Offers?
They show only for someone allowed to use them at the business. With no permission, your menu has Home, Reviews and Network, and your Home has a YOU section of your own; when the owner gives you a role, its lines and buttons appear beside yours. Your account is behind your picture (top right).
How do I ask a customer to review my own work?
When: you have finished a job and would like the customer to review your work.
-
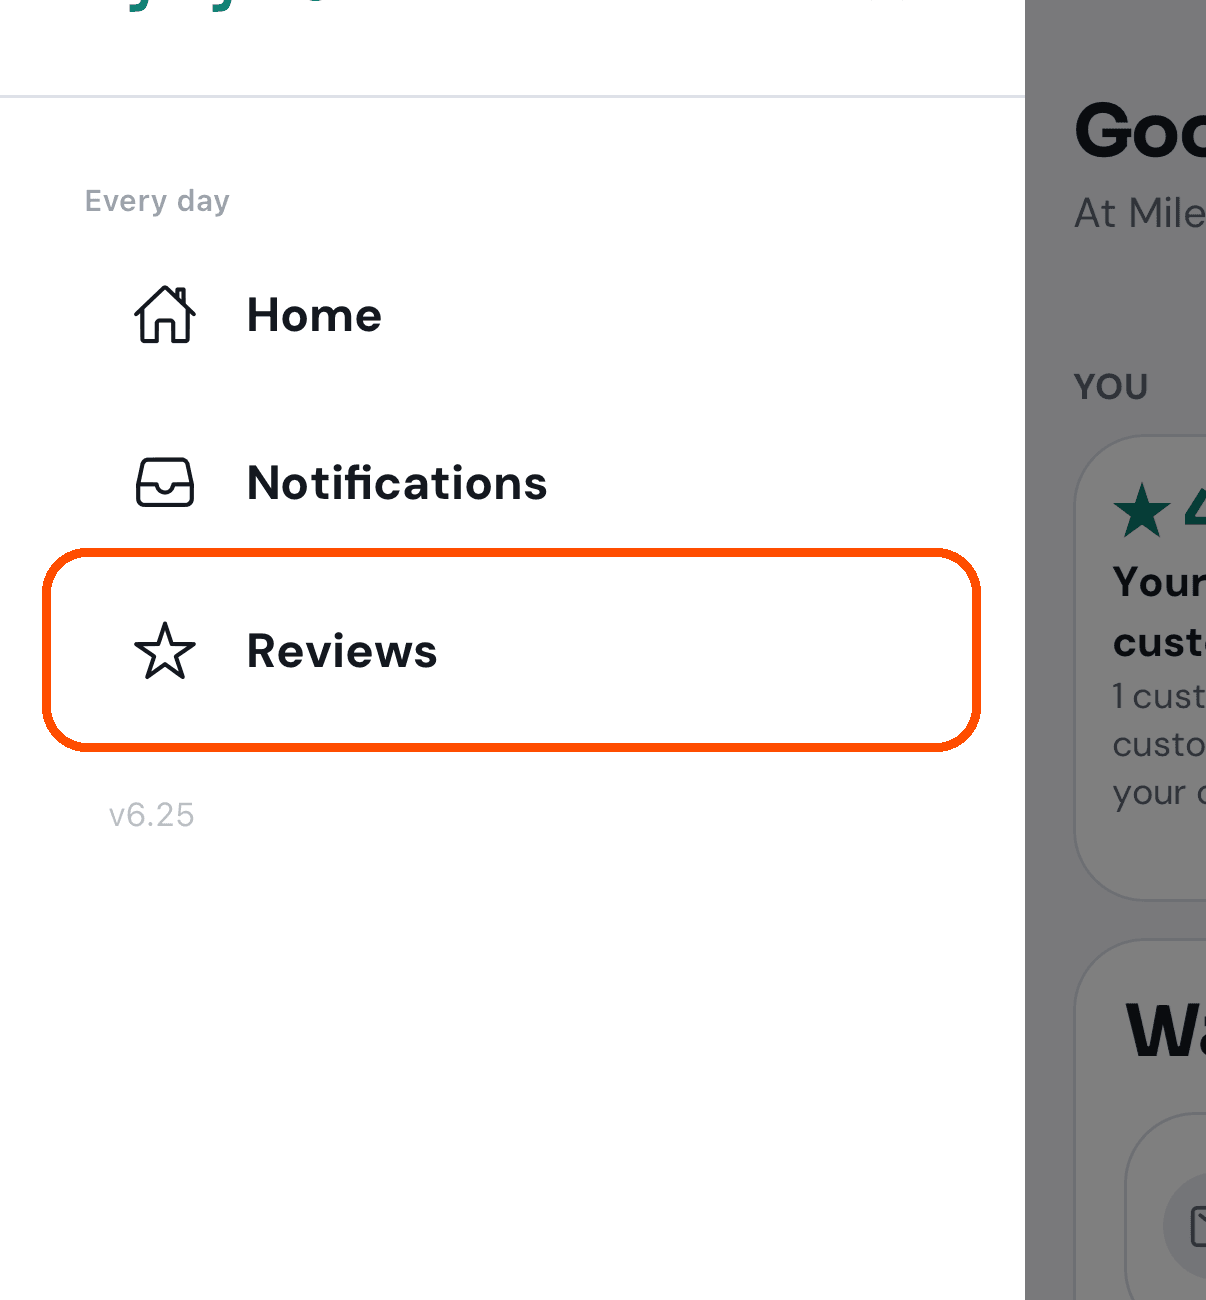
Open the menu (top left) and tap Reviews.
-
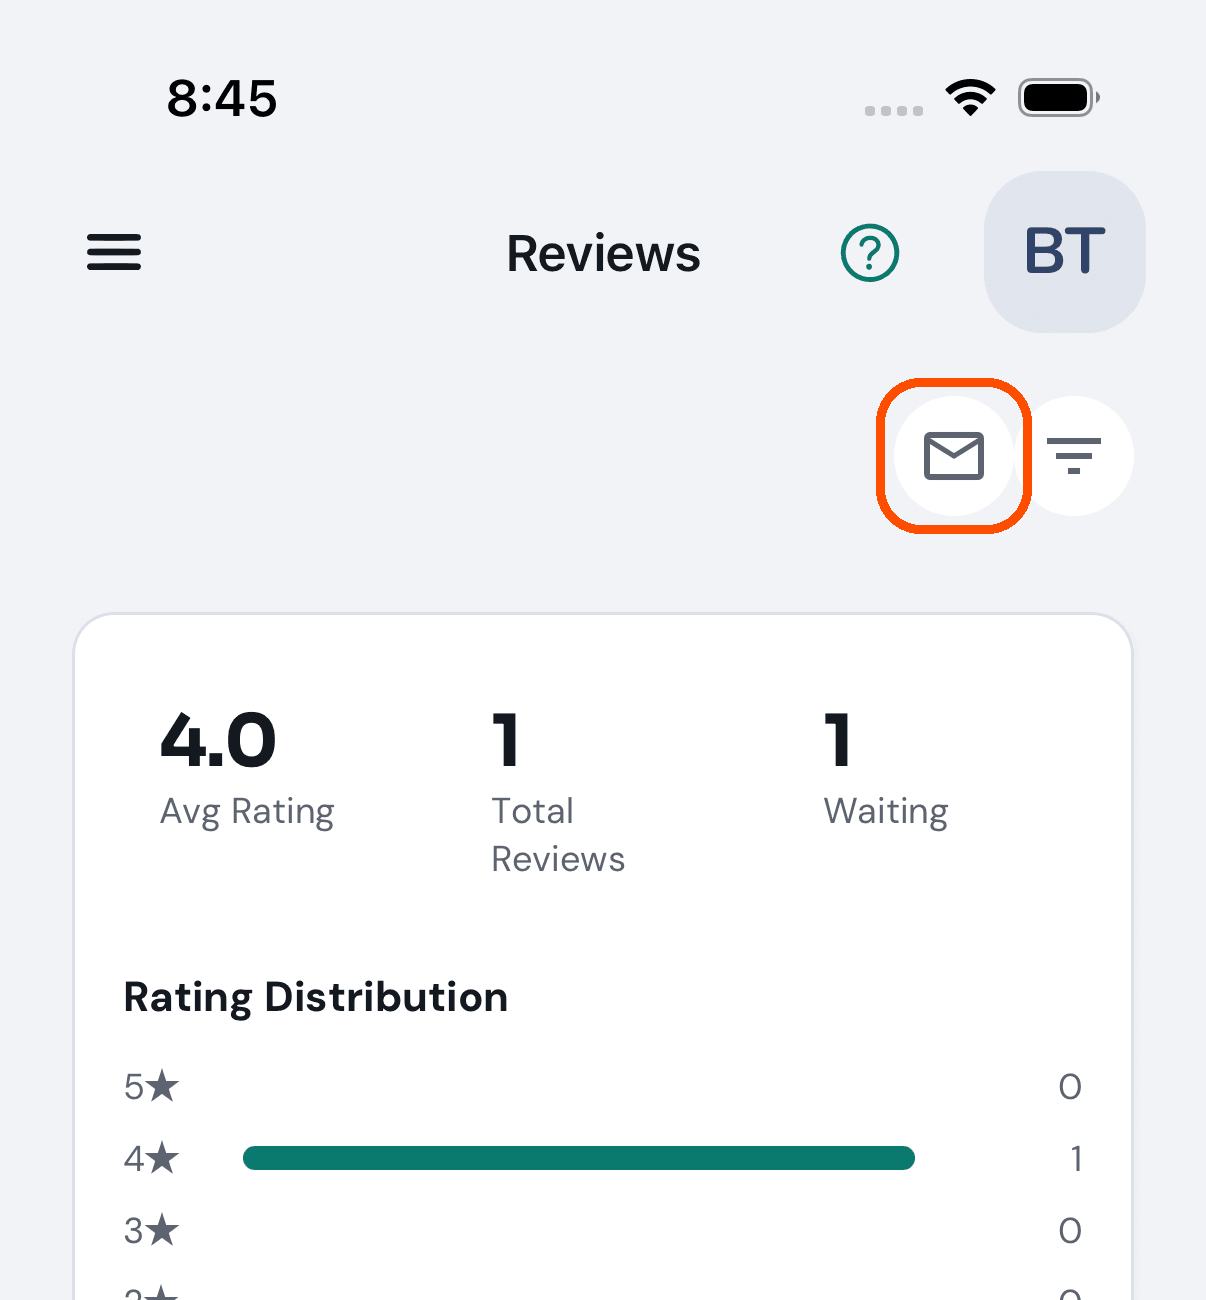
Tap Review requests, the first of the two round buttons at the top right. (If you also see Mine and All at the top, stay on Mine.)
-
On Your review requests, tap Ask for a review, the wide button at the bottom.
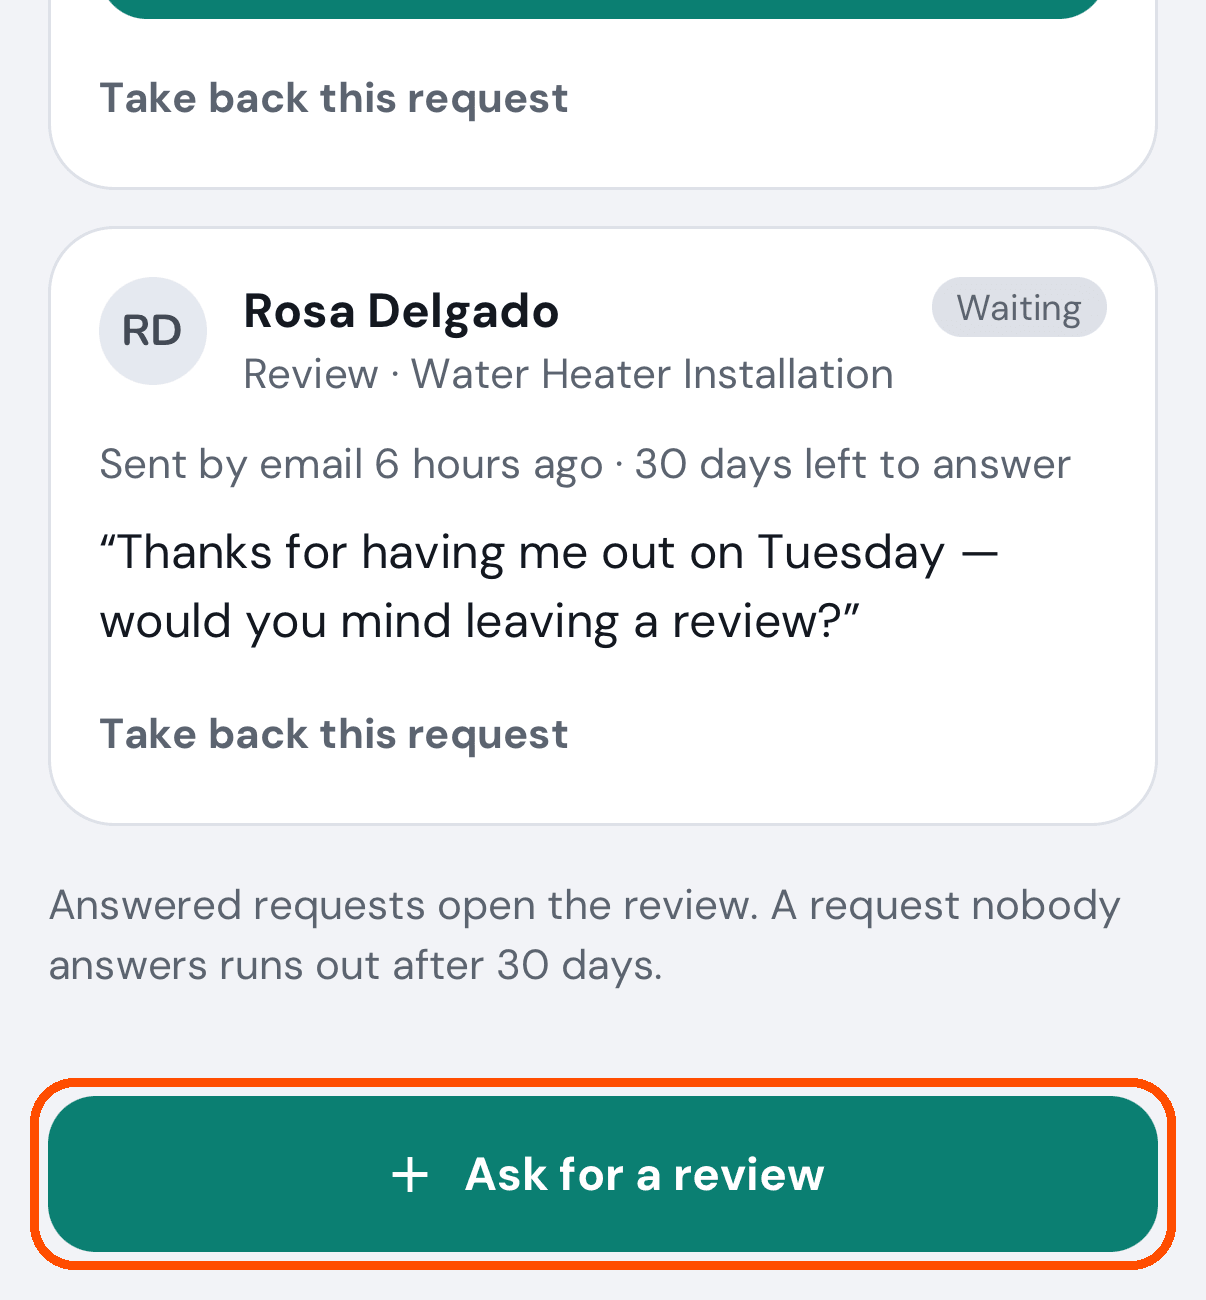
-
Find the customer by name if they are already in your network, otherwise by their full email or phone number; choose the service the job covered, and send — exactly as an owner does. Those steps, with a picture of each, are
steps 3 to 6 of How do I ask a customer for a review? in the Reviews section above.
The second round button on your Reviews screen filters the reviews you are looking at.
How do I see the requests I am waiting on?
The Your review requests screen (step 3 of the answer just above). Its three tabs are Waiting, Answered and Ran out, each with its count. Each request shows who you asked, what for, when it was sent and how long is left (or when they answered), and what you wrote. An answered request opens the review. A waiting one has Take back this request, and Send again when the customer is on TryMyPro.
How do I share my profile so customers can find me?
When: you want a customer to leave you a review on the spot.
-
Tap your picture (top right), then Business profile.
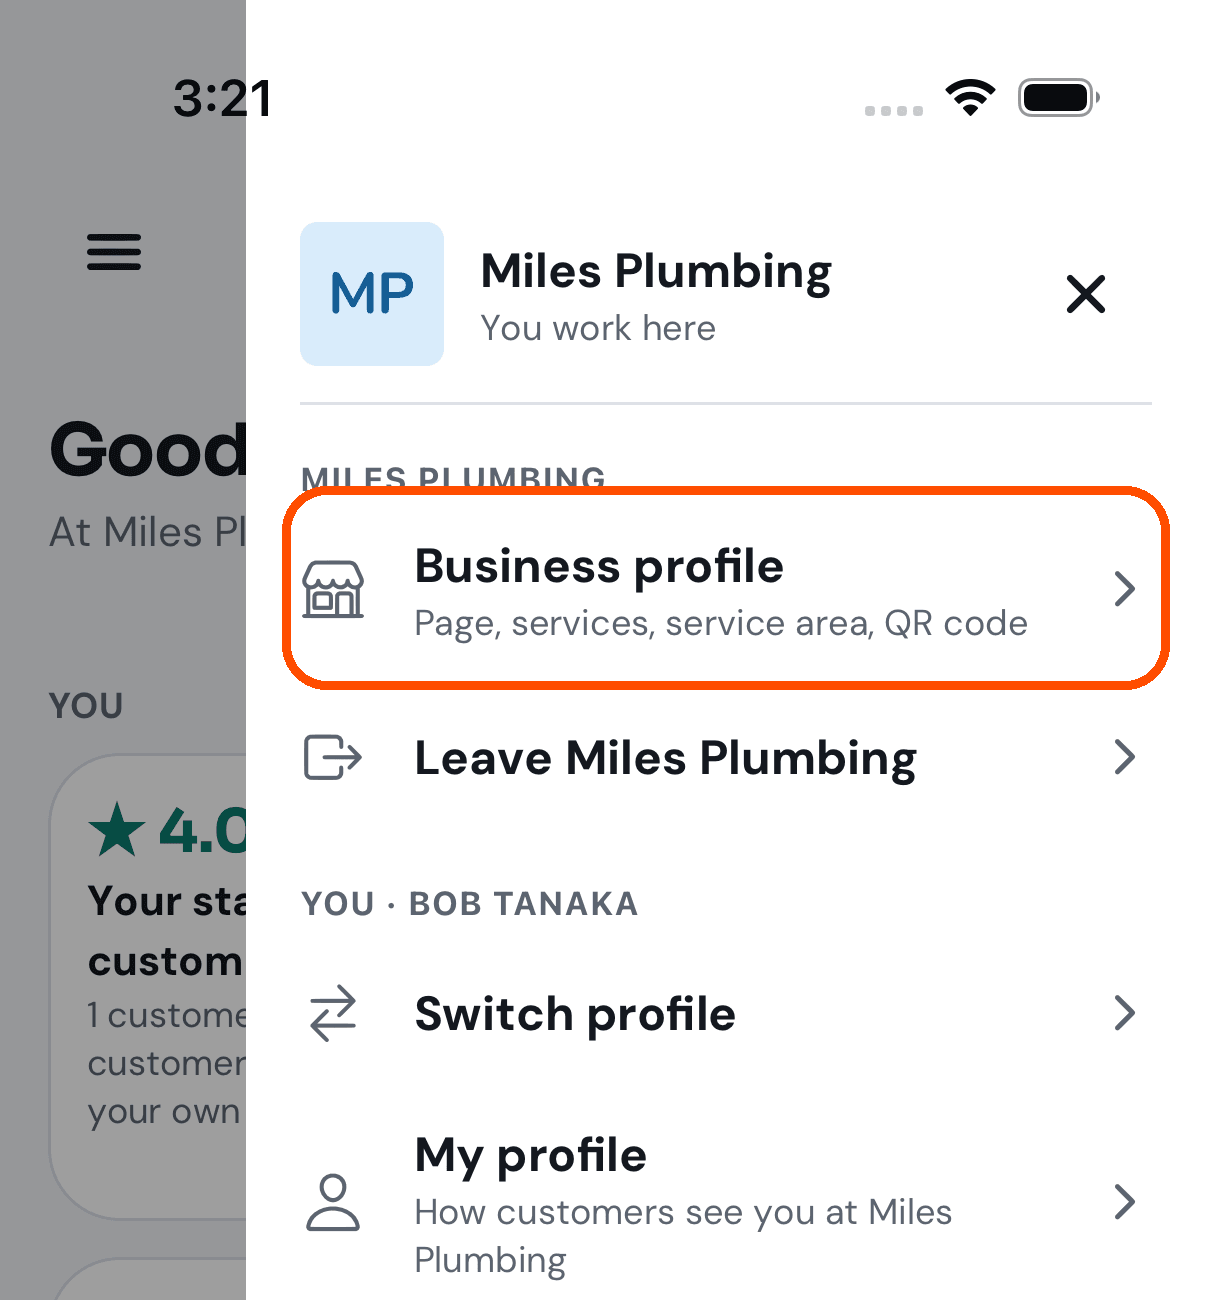
-
Tap Your review code.
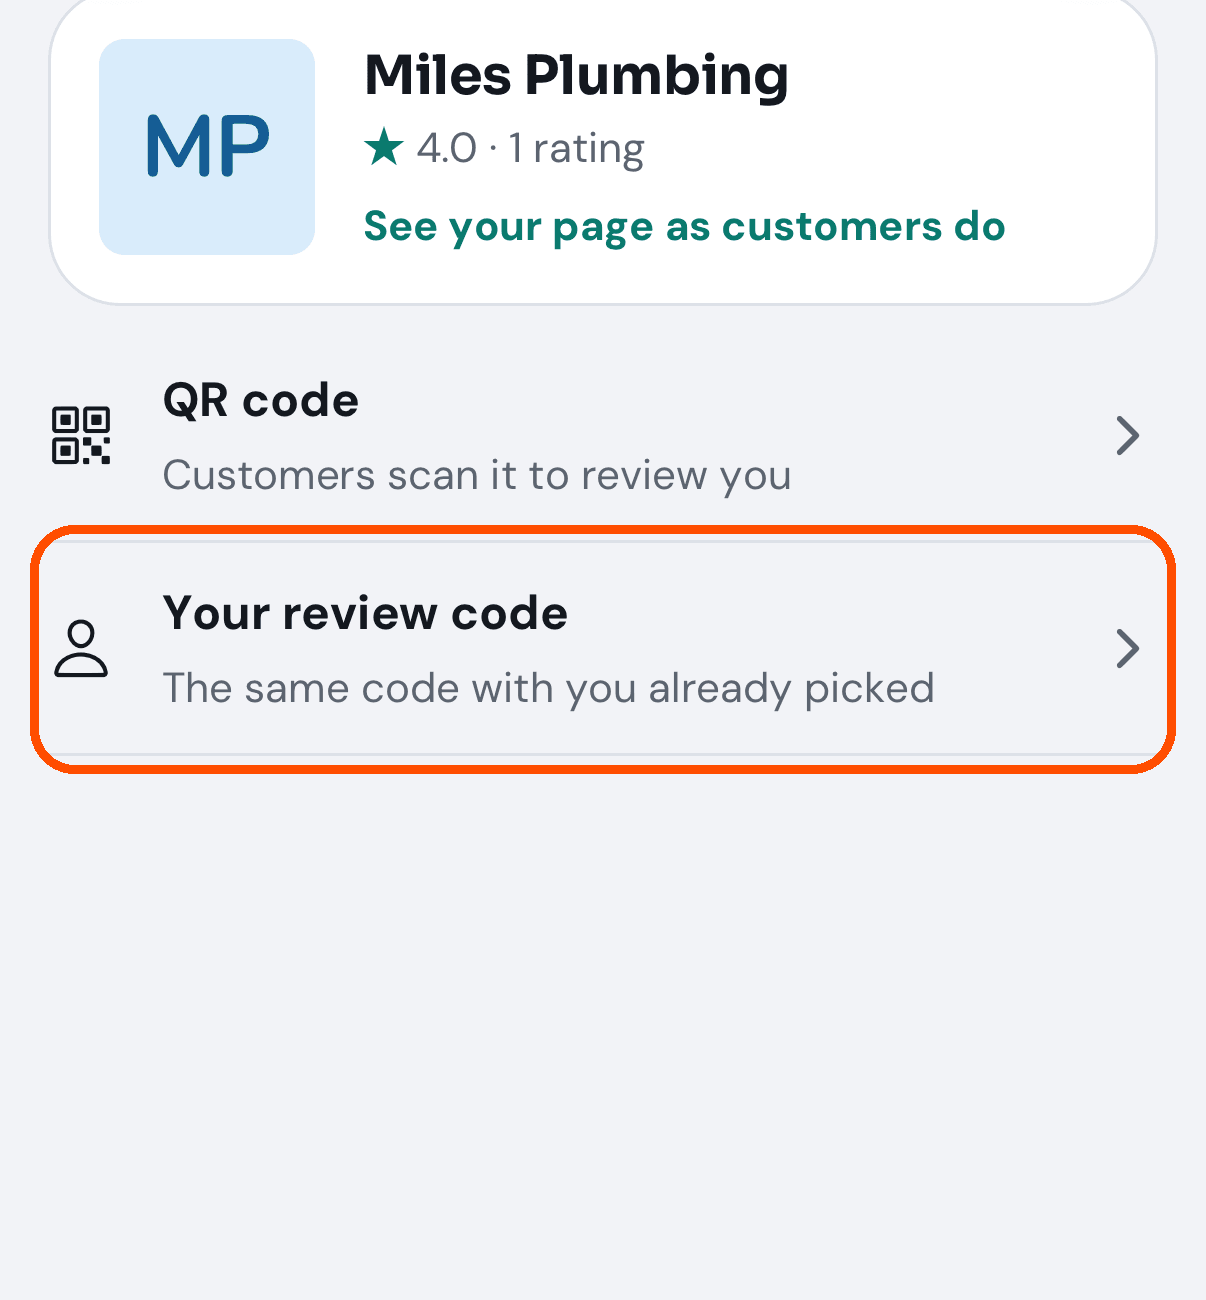
-
Let the customer scan the code with their phone’s camera, or tap Share to send it. It is your business’s review form with you already picked.
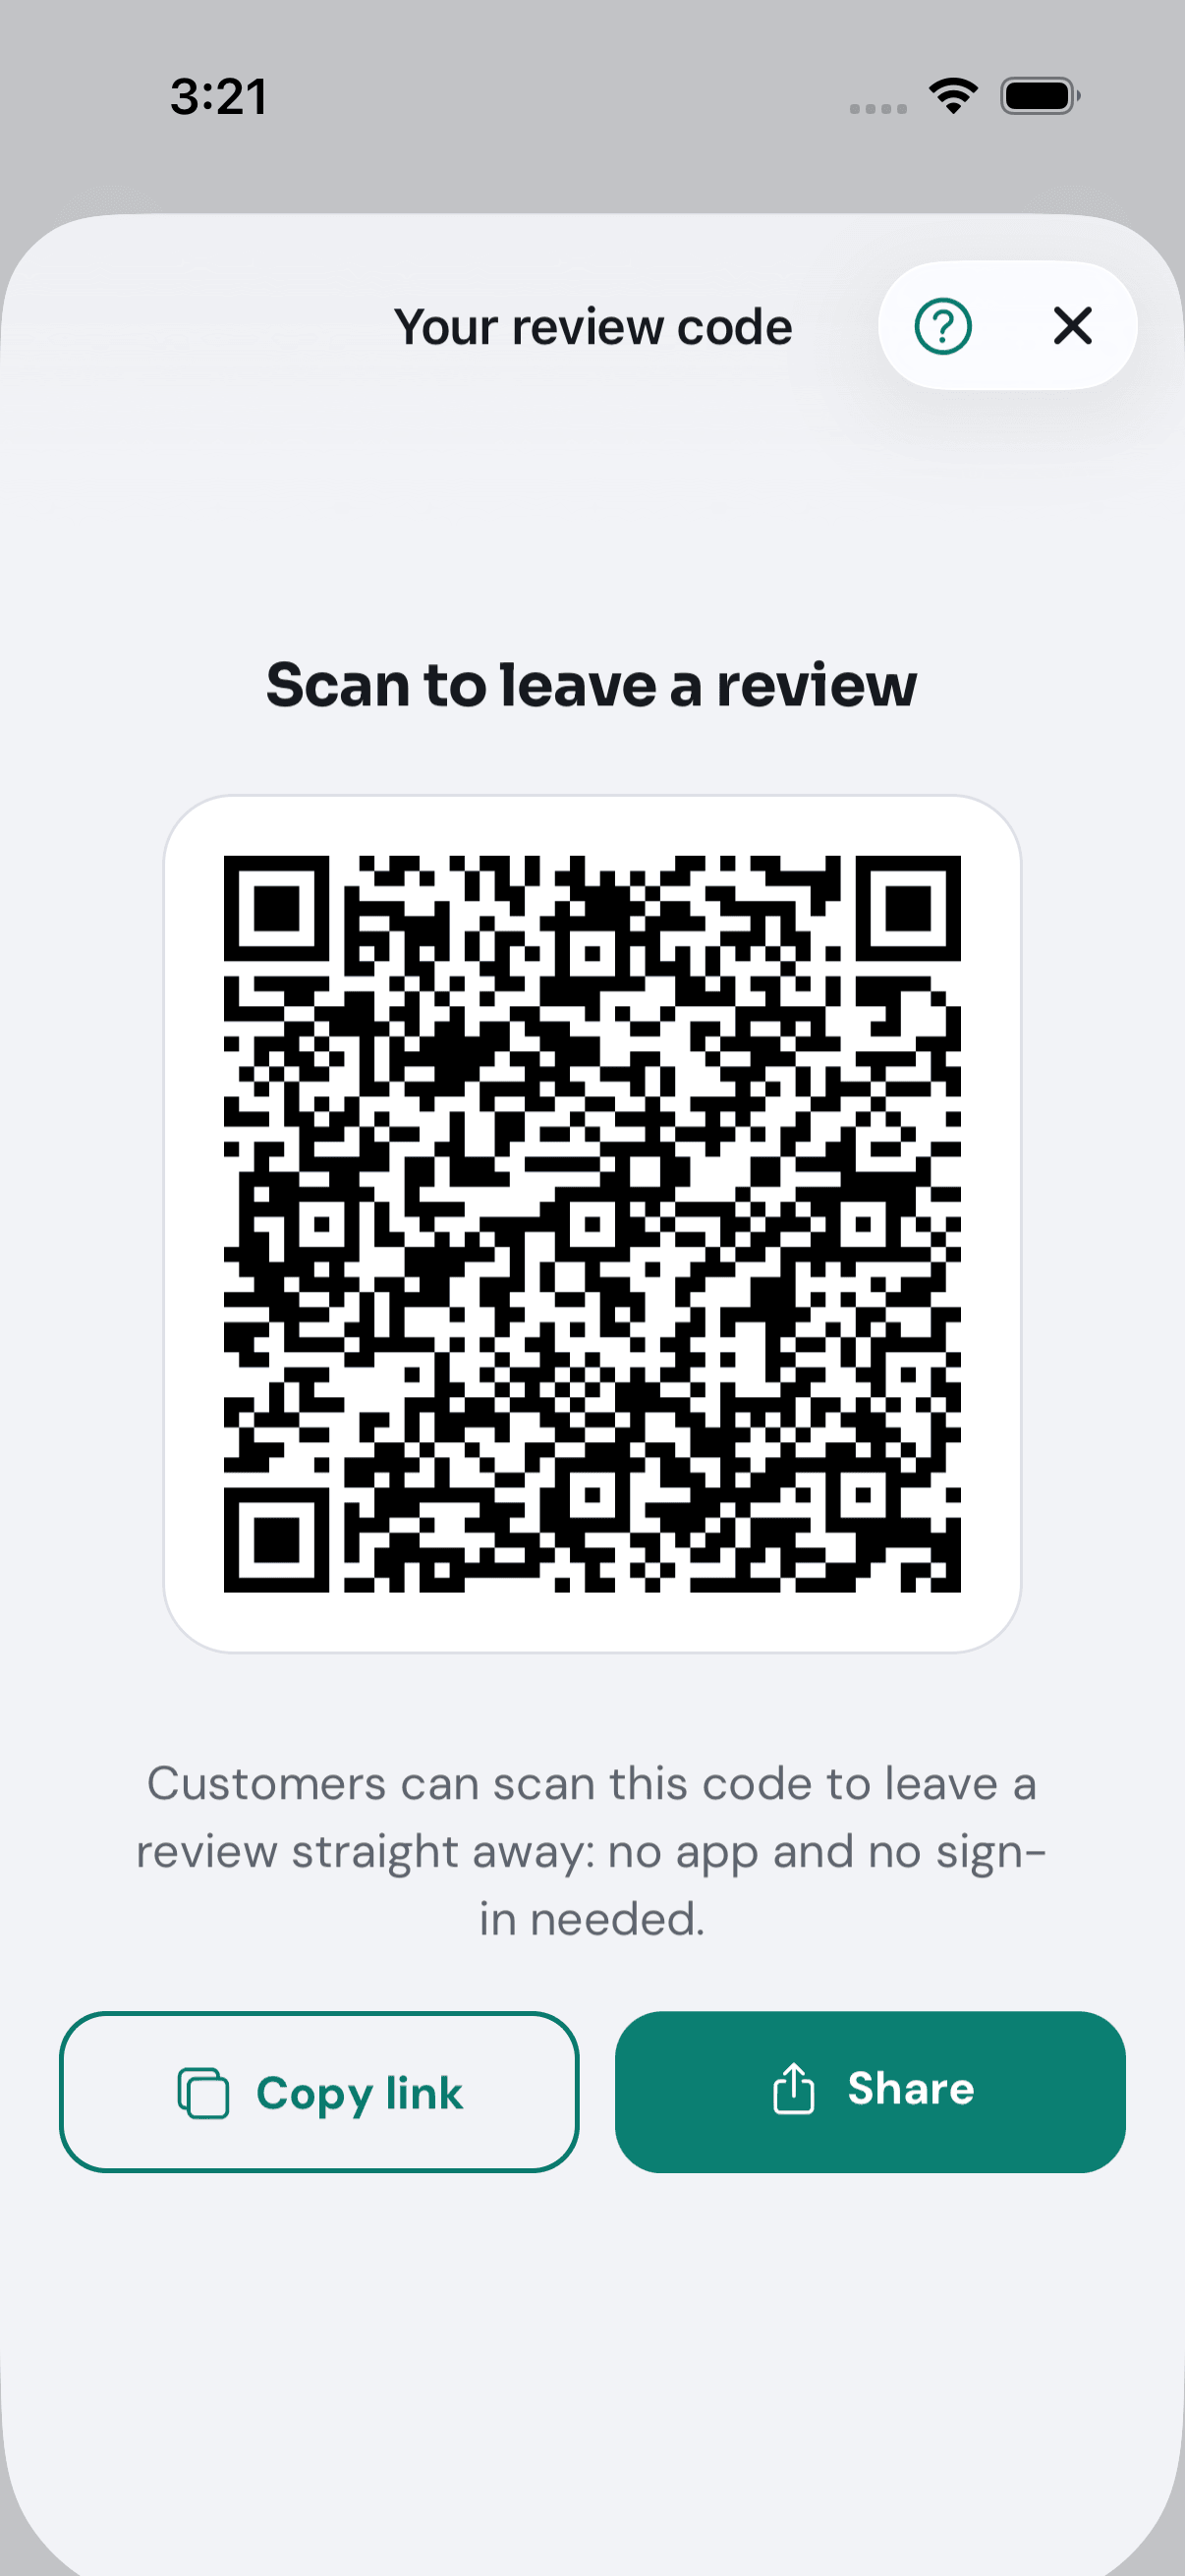
The web address under the code in that picture is this test machine’s; yours is on trymy.pro.
How do I switch to my member profile?
Tap the picture with your initials at the top right, then Switch profile. It lists each business, each group you run and you as a customer; tap your member profile. A customer’s screens live in the customer app, TryMyPro, so that is where it takes you, and if that app is not installed it offers the download.